 Installation guide
 Owner’s manual




How much does a handyman charge to install a microwave?
For a GE over-the-range microwave/hood combo like model JVM1540SM4SS, handyman installation commonly runs about $300 to $850 total (labor plus typical mounting hardware). Your final price depends on venting setup, cabinet modifications, and whether any electrical work is needed; use the installation guide to understand the exact steps and requirements for this model.
A microwave/hood combo install is more than “hang and plug in”. Costs rise when the installer has to change venting, reinforce mounting, or modify cabinets.
Common cost factors:
- Venting type: recirculating (charcoal filter) vs outside top exhaust vs outside back exhaust
- Cabinet work: drilling, enlarging the cord hole, trimming cabinet bottom, adding filler blocks
- Wall structure: locating studs and securely fastening the mounting plate
- Electrical: verifying a properly grounded 3-prong receptacle and correcting deficiencies
- Two-person lift: these units are heavy and are typically installed by two people
From the installation instructions for the JVM1540 series:
- The mounting surface must support the unit’s weight (the microwave is listed at about 63 to 85 lb, plus potential additional loads).
- The microwave must be mounted to both a top cabinet and a wall (not an island or peninsula setup).
- The power cord must be routed through the cabinet opening and not pinched during mounting.
| Scenario | What’s included | Typical total cost |
|---|---|---|
| Straight swap | Replace an existing over-the-range microwave with same venting | $300 to $500 |
| Moderate complexity | Minor cabinet drilling, vent alignment, new mounting plate alignment | $450 to $700 |
| Complex install | Vent conversion, significant cabinet modifications, electrical corrections | $650 to $850+ |
A correct install prevents door alignment issues, vibration, poor ventilation, and electrical hazards. It also ensures the microwave is properly supported by the wall and top cabinet, which is critical for a microwave/hood combo.
Last updated: February 2026
Is GE JVM1540SM4SS considered high end?
GE JVM1540SM4SS is a standard GE Spacemaker over-the-range microwave/hood combo, so it is typically considered mid-range, not “high-end.” It’s built for dependable everyday cooking and ventilation; premium positioning is more common in GE Profile or other upscale lines.
“High-end” usually means a combination of stronger feature sets, more premium materials/finishes, and higher price tiers. For a microwave/hood combo like the JVM1540SM4SS, that often shows up as:
- Sensor cooking and more advanced presets
- Higher-end control interface and lighting features
- Quieter, higher-performance venting systems
- More premium trim and design details
- More included accessories or specialty modes
A reliable mid-range model can still be a great fit if you want solid performance without paying for premium extras.
| What you’re comparing | Mid-range OTR microwave (typical) | High-end OTR microwave (typical) |
|---|---|---|
| Core heating performance | Strong everyday performance | Strong plus more automation/sensors |
| Venting | Good for normal cooking | Quieter, higher airflow options |
| Controls/features | Straightforward | More advanced, more presets |
| Styling | Practical | More premium look and feel |
The fastest way to confirm what your unit includes is to match features and installation requirements in the documentation:
- Verify the exact model number on the label inside the oven
- Review the feature list and operating instructions in the owner's manual
- Confirm venting setup options and electrical requirements in the installation guide
Knowing whether your JVM1540SM4SS is mid-range or premium helps set expectations for vent noise, feature depth, and what repairs are worth doing. For example, replacing common wear parts like a microwave door interlock switch WB24X10180 can be a cost-effective way to keep a dependable unit running.
Last updated: February 2026
What are common problems with GE JVM1540SM4SS microwaves?
Common problems we see with the GE JVM1540SM4SS microwave/hood combo include not heating, not starting due to a door-latch or interlock issue, unusual noises from the turntable area, vent fan concerns, and interior light problems. Many symptoms trace back to door switches, airflow/filters, or high-voltage components; use the owner's manual for model-specific operating and safety guidance.
- Runs but does not heat: high-voltage system issue (often the magnetron, capacitor, or diode)
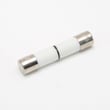
- Dead display or won’t start: power supply issue, blown fuse, or door interlock problem
- Starts then stops when the door moves: worn door latch or failing interlock/monitor switch
- Loud humming, grinding, or rattling: turntable support/tray problems or a loose internal cover
- Sparking or arcing: food debris, damaged cavity surface, or a problem near the waveguide area
- Vent fan behavior seems odd: on some conditions the vent fan can run while cooking and may not shut off until cooking stops
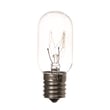
- Light out over the cooktop: failed bulb or bulb mounting hardware
- Confirm the door closes firmly and the latch engages consistently.
- Unplug the microwave (or switch off the breaker) for 1 minute, then restore power.
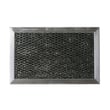
- Clean the cavity and door sealing surfaces; remove any grease buildup around the vent area.
- Verify the turntable tray sits flat and the support ring is seated correctly.
- If you notice moisture on the door or walls during cooking, wipe it off after use; it is a normal byproduct of steam.
If the unit will not run, runs only with the door held a certain way, or blows a fuse when starting, these door-safety parts are frequent culprits:
| Symptom | Common suspect | Example part for this model |
|---|---|---|
| Won’t start, intermittent start | Door interlock switch | Microwave door interlock switch WB24X10180 |
| Blows fuse or acts “dead” after closing door | Monitor switch | Microwave/hood monitor switch WB24X10181 |
| Door won’t latch smoothly | Latch hook | Microwave door latch hook WB02X11096 |
Microwaves use door interlocks to prevent operation with the door open. If a switch or latch is worn, the oven can act completely dead, run intermittently, or stop mid-cycle. Heating failures are different; they typically involve high-voltage components and require extra care.
For installation-related venting and mounting details (common sources of vibration and airflow complaints), follow the installation guide.
Last updated: February 2026
What is the average lifespan of a GE microwave?
Most GE microwaves, including over-the-range models like the GE JVM1540SM4SS microwave/hood combo, typically last 7 to 10 years with normal household use. Heavy daily cooking, poor ventilation, and skipped cleaning shorten life; good airflow and basic care help the magnetron and controls last longer.
A microwave’s lifespan is driven more by usage and heat/grease exposure than by brand name alone.
- Light use (reheating, 1 to 3 cycles/day): often closer to 10 years
- Heavy use (multiple long cook cycles/day): often closer to 7 years
- Over-the-range installs: can wear faster if grease and heat are not managed
- Keeping vents and filters clean: reduces heat stress on internal components
- Avoiding misuse: prevents early failures (arcing, door damage, blown fuses)
For model-specific care and operating guidance, follow the owner's manual.
If your JVM1540SM4SS starts acting up, these checkpoints help decide whether a repair makes sense.
| Symptom | Common cause | Typical next step |
|---|---|---|
| Runs but does not heat | High-voltage system issue | Service-level diagnosis (high voltage) |
| Dead display, no power | Fuse, door switch, noise filter | Check door switches and power path |
| Starts then stops when door moves | Door latch or interlock switch | Inspect latch and interlock alignment |
| Loud buzzing or burning smell | Electrical or high-voltage fault | Stop using; service-level repair |
If the door is not closing or latching correctly, a worn latch or switch is a common wear item; see the microwave door interlock switch WB24X10180 and microwave door latch hook WB02X11096.
Microwaves contain high-voltage components; when a unit is near end-of-life, small issues (like a weak door switch or poor ventilation) can turn into repeated shutdowns, no-heat complaints, or nuisance fuse trips. Staying on top of cleaning and airflow helps prevent heat-related failures.
- Run the hood fan when cooking on the range to reduce heat buildup
- Keep the vent grille and intake areas free of grease and dust
- Never run the microwave empty
- Use microwave-safe containers only (no metal, no foil contact)
- Clean splatters promptly to prevent arcing and odor buildup
For safe mounting and ventilation setup, follow the installation guide.
Last updated: February 2026


