Installation guide
 Owner’s manual
 Error Codes



How do you put the bottom grill on a GE refrigerator?
On the GE CFCP1NIZCSS bottom-mount refrigerator, you reinstall the bottom grill (base grille) by aligning it at the bottom front of the cabinet, seating it flush, then reinstalling the Phillips-head screws that secure it. The exact screw count can vary by configuration, so we recommend reusing the screws you removed.
Steps to reinstall the base grille on model CFCP1NIZCSS
- Make sure the refrigerator is stable and the freezer drawer is fully closed.
- Align the base grille with the bottom-front opening so it sits even across the front.
- Push the grille straight into position until it sits flush.
- Reinstall the Phillips-head screws in the same locations they came out.
- Tighten screws snug only; do not overtighten because the grille can crack.
For the model-specific procedure, see the CFCP1NIZCSS installation guide.
How many screws should there be?
On CFCP1NIZCSS, the installation instructions describe reinstalling Phillips-head screws on the sides of the base grille, but the wording can be interpreted differently depending on how the grille was removed (for example, during door or drawer removal). The most reliable approach is to reinstall the same number of screws you removed.
| What you removed | What to reinstall |
|---|---|
| 1 screw per side | Reinstall 1 per side (2 total) |
| 2 screws per side | Reinstall 2 per side (4 total) |
If the grille will not sit flush
- Confirm the freezer drawer front is not interfering and is fully closed.
- Check that the grille is not upside down and the screw holes line up.
- Start all screws by hand a few turns before tightening any of them.
- Remove any tape, foam, or debris caught behind the grille.
- If holes are stripped, inspect the mounting points for damage.
Why it matters
A properly installed base grille helps protect lower components, supports normal airflow at the bottom front, and reduces rattles or vibration noise during compressor and fan operation.
Last updated: January 2026
What is the most common problem with a GE refrigerator?
For the GE CFCP1NIZCSS bottom-mount refrigerator, the most common service issue we see across similar GE models is a cooling problem (refrigerator or freezer not cold enough). In many cases, the root cause is restricted airflow from dirty condenser coils or a failing fan, not the sealed system.
Quick checks we recommend first (no parts needed)
- Confirm the controls are set near 37°F for fresh food and 0°F for the freezer (allow 24 hours after changes).
- Make sure air vents inside the compartments are not blocked by food packages.
- Clean dust and pet hair from the condenser area; restricted airflow can cause warm temps and long run times.
- Verify doors close and seal fully; a poor seal can mimic a cooling failure.
- If you have an icemaker or dispenser, check water flow; a clogged filter can reduce flow and affect ice production.
For model-specific operating details (controls, filter location, icemaker basics), use the CFCP1NIZCSS owner’s manual.
Common “most likely” causes (and what they affect)
| Symptom | Most common cause | What you’ll notice |
|---|---|---|
| Fridge warm, freezer OK | Airflow issue between sections | Weak airflow at vents, temps uneven |
| Freezer warm, fridge warm | Condenser airflow or compressor start issue | Unit runs a lot, little cooling |
| Ice maker slow or no ice | Water supply or filter restriction | Small cubes, hollow cubes, no fill |
| Temps swing up and down | Sensor/control issue | Random warming, inconsistent cycling |
Parts that often come up in cooling or ice complaints
If basic cleaning and settings do not help, these model-compatible parts are commonly involved:
- GE profile refrigerator condenser coil WR84X10022 (dirty or restricted coils can drive poor cooling)
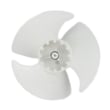
- Condenser motor WR60X10209 (failed condenser fan can cause warm temps)
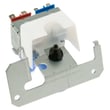
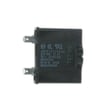
- Refrigerator compressor start relay WR07X10084 (hard starting or clicking, poor cooling)
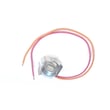
- Temperature sensor WR55X10025 (temperature sensing problems can cause erratic cooling)
- GE refrigerator water filter MWFP (low water flow, slow ice production)
Why it matters
Cooling problems can lead to food spoilage and can also make the refrigerator run longer than normal. Addressing airflow and maintenance early often prevents unnecessary part replacement.
Last updated: January 2026
How do I find the model number on my CFCP1NIZCSS?
On the GE CFCP1NIZCSS bottom-mount refrigerator, the model number is printed on the rating label inside the fresh food (refrigerator) compartment. Look on the right side wall near the top of the compartment for the label that lists both the model and serial numbers.
Where to look (fast checklist)
- Open the refrigerator (upper) door
- Look inside the refrigerator compartment (not the freezer drawer)
- Check the right interior side wall
- Focus near the top area, close to the front frame
- Find the label that shows Model # and Serial #
What the label looks like
The label is a small manufacturer tag that typically includes:
- Model number (for example, CFCP1NIZCSS)
- Serial number
- Electrical information (voltage/amps)
- Compliance and certification markings
Why it matters
Using the exact model number ensures you get the correct GE refrigerator parts and diagrams for your specific configuration (door style, dispenser features, and internal components). It also helps match items like a water filter, temperature sensor, or door gasket to the right fit.
Model vs. serial number (quick reference)
| Item | What it identifies | When you need it |
|---|---|---|
| Model number | The exact refrigerator design and parts fit | Ordering parts, looking up diagrams, manuals |
| Serial number | The specific unit and production run | Service history, warranty paperwork |
If the label is hard to read
- Wipe the label gently with a damp cloth and dry it
- Use a flashlight or take a close-up photo and zoom in
- Copy the model number exactly as printed (letters and numbers)
For diagrams and additional location details, use the owner's manual.
Last updated: March 2026