Owner’s manual




What is the average lifespan of an LG dryer?
An LG dryer typically lasts 10 to 15 years. For your LG DLGX7188WM, consistent airflow maintenance (lint filter and venting) and avoiding overheating are the biggest factors that help you reach the high end of that range; see the care guidance in the DLGX7188WM owner's manual.
What affects dryer lifespan the most
- Vent restriction (long ducts, crushed flex vent, clogged exterior hood) raises heat and wear
- Lint buildup inside the cabinet or blower housing can cause overheating and longer dry times
- Overloading strains the drum support system (belt, rollers, idler)
- High heat use on every load accelerates wear on thermostats and sensors
- Skipping routine cleaning leads to repeated thermal cycling and component stress
Maintenance checklist (best ROI)
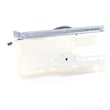
- Clean the lint screen after every load; replace a damaged screen such as the LG dryer lint screen 5231EL1003B if it will not seat or seal correctly.
- Check airflow at the outside vent hood; strong, steady airflow matters more than cycle settings.
- Vacuum lint around the lint filter housing and front duct area periodically.
- Keep the dryer level; vibration shortens the life of rollers and the belt.
- Use Sensor Dry when possible; it reduces unnecessary run time and heat exposure.
Common wear parts and what they usually sound like
| Symptom | Most common wear area | Typical result if ignored |
|---|---|---|
| Thumping or rumbling | Drum support rollers | Noisy operation, uneven drum support |
| Squealing | Idler pulley or belt path | Belt wear, intermittent noise |
| Drum not turning | Belt or motor drive | No tumble, clothes stay wet |
| Long dry times | Airflow or moisture sensing | Overheating risk, higher energy use |
Why it matters
A dryer that runs hot or runs long to finish loads wears out faster and can damage key components like thermostats, the thermistor, and the blower system. Good airflow and basic cleaning keep drying times normal and extend the service life.
Last updated: January 2026
What is the most common problem with LG dryers?
For LG dryers like model DLGX7188WM, the most common customer-reported issue is no heat or poor heating, which shows up as long dry times or clothes staying damp. The fastest wins are airflow checks (lint and venting) and then testing the heating and safety temperature parts.
What we see most often (and what to check first)
Start with the items that cause the highest number of “no heat” complaints and are easiest to verify.
- Clean the lint filter every load; the manual notes never run the dryer without the lint filter installed (see the DLGX7188WM owner’s manual).
- Confirm strong airflow at the outside vent hood; weak airflow points to a crushed hose, long run, or lint blockage.
- If the dryer runs but does not heat, check heat-related components (thermostats, thermistor, igniter on gas models).
- If the dryer will not start, check power supply and door switch operation.
- If an error code appears, use the LG dryer error codes guide to match the code to the likely circuit.
Common symptoms and likely causes
| Symptom | Most likely category | Examples of parts involved on this model |
|---|---|---|
| Runs but no heat | Heating or gas ignition | LG dryer burner igniter 5318EL3001A, thermostats, thermistor |
| Takes too long to dry | Airflow restriction | Lint screen, vent duct, blower wheel |
| Stops mid-cycle or shows temp-related error | Temperature sensing | Dryer thermistor AGM30045804, high-limit thermostat |
| Loud thumping/squealing | Drum support/drive | Dryer drum belt 4400EL2001F, rollers, idler pulley |
Why it matters
Heating complaints are often caused by restricted airflow; that same restriction can also overheat the dryer and shorten the life of temperature sensors and thermostats. Keeping the lint filter and vent path clear protects drying performance and key components.
Where to find model-specific troubleshooting steps
Use the troubleshooting section and maintenance instructions in the DLGX7188WM owner’s manual for checks like power supply, gas shutoff position (gas models), lint filter cleaning, and “before calling for service” diagnostics.
Last updated: January 2026
How do I do a hard reset on my LG dryer?
To hard reset your LG DLGX7188WM dryer, turn the dryer off, unplug it (or switch the breaker off) for about 1 minute, then restore power and press POWER. This clears many temporary control glitches and cancels any stuck cycle.
Hard reset steps (DLGX7188WM)
- Press POWER to turn the dryer off (this cancels the current cycle).
- Unplug the dryer from the outlet, or turn the circuit breaker off.
- Wait 60 seconds.
- Plug the dryer back in, or turn the breaker back on.
- Press POWER, select a cycle, then press START/PAUSE.
For control-panel button locations and normal start-up behavior, use the DLGX7188WM owner's manual.
If the dryer still will not start after a reset
A reset will not fix a power supply problem or a safety switch issue. Check these common causes:
- Make sure the plug is fully seated in the correct outlet.
- Reset the house breaker (or replace a blown fuse) without increasing fuse size.
- Confirm the dryer door closes firmly; a failed door switch can prevent starting.
- If you have a gas model, confirm the house gas shutoff and dryer gas shutoff are fully open.
- If the display shows an error code, match it to the code list before replacing parts.
If the dryer will not start and the door feels normal but the button presses do nothing, the dryer door switch EBF61496102 is a common no-start part to test.
Quick guide: reset vs. power cycle
| Action | What it does | When to use it |
|---|---|---|
| Press POWER off/on | Cancels the current cycle and restarts the UI | Stuck cycle, wrong settings |
| Unplug or breaker off for 1 minute | Clears temporary control logic issues | Glitchy display, unresponsive buttons |
Why it matters
A proper hard reset is a fast first step that can restore normal operation without replacing parts; it also helps you confirm whether the issue is a control glitch or a real power, door-switch, or gas-supply problem.
Last updated: January 2026
Why does an LG sensor dry dryer take so long to dry?
On the LG DLGX7188WM, Sensor Dry can take a long time when airflow is restricted (lint buildup or a vent problem) or when the dryer is extending time to reach the selected dryness level. Sensor Dry uses moisture sensing to automatically adjust cycle time, so “More Dry” settings and heavy loads naturally run longer.
Quick checks that fix most long dry times
- Clean the lint screen before every load; even a thin film can reduce airflow.
- Check the exhaust vent for kinks, crushing, or lint blockage behind the dryer.
- Run a timed cycle (Manual Dry/Time Dry) and confirm the exhaust feels warm after about 3 minutes.
- Avoid overloading; tightly packed loads dry slowly and confuse moisture sensing.
- Sort by fabric weight (towels separate from lightweight items).
Sensor Dry settings that change cycle length
Sensor Dry cycles estimate time and then adjust based on moisture in the load and in the air. These choices commonly extend run time:
| What you select | What the dryer does | Result |
|---|---|---|
| Very Dry / More Dry | Adds time to reach a drier endpoint | Longer cycles |
| Less Dry / Damp Dry | Stops earlier | Shorter cycles |
| Mixed heavy fabrics | Senses moisture longer | Longer cycles |
When a part is the likely cause
If airflow is good but dry times keep increasing, a sensing or heating issue is common.
- A dirty or failing moisture sensor can misread the load; inspect and clean the sensor bars, and replace if needed using dryer moisture sensor 6500EL3001A.
- If the dryer is not heating consistently, a gas ignition problem can lengthen cycles; the igniter should light the burner shortly after start. If it does not, check/replace LG dryer burner igniter 5318EL3001A.
- If temperatures seem erratic, the temperature sensor can be involved; consider dryer thermistor AGM30045804.
Why it matters
Long dry times usually mean poor airflow or weak heating. Both waste energy and can overheat components like thermostats, the blower wheel, and the motor.
Helpful references
- Use the cycle and dryness-level guidance in the DLGX7188WM owner's manual.
- If you see an error code, match it using LG dryer error codes.
Last updated: January 2026