Owner’s manual
 View engine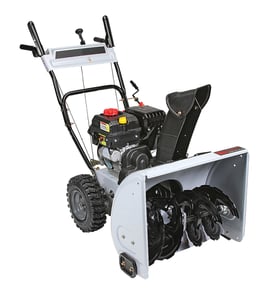


Should I spray my snowblower with WD-40?
Yes, you can spray a light coat on key metal areas of your Craftsman 247888540 snow thrower to help prevent rust and reduce snow sticking, but keep any spray lubricant off the friction wheel and drive plate and away from hot engine and muffler surfaces.
Use a light, even coat and wipe off excess so it does not attract dirt.
- Inside the discharge chute and chute opening (helps reduce clogging)
- Auger housing and impeller area (helps reduce snow buildup)
- Exposed metal surfaces for off-season rust protection
- Chains, springs, bearings, and cables during storage prep
For model-specific maintenance and storage guidance, follow the owner's manual.
Spraying the wrong area can cause slipping, belt contamination, or a safety hazard.
- Friction wheel and drive plate: keep all grease and oil off these parts
- Belts and pulleys: lubricant can cause belt slip and poor drive/auger engagement
- Hot engine or muffler: burn and fire risk; let the engine cool first
- Controls and hand grips: overspray can make them slippery
| Goal | Best approach | Notes |
|---|---|---|
| Stop chute clogging | Light spray lubricant on chute surfaces | Apply before use; wipe excess |
| Prevent rust in storage | Light oil or silicone on metal parts | Focus on chains, springs, bearings, cables |
| Fix drive slipping | Do not lubricate drive components | Check belt condition and adjustments instead |
Your manual calls out two key points: avoid contact with hot engine/muffler surfaces during operation, and keep grease and oil off the friction wheel and drive plate. Spraying only the right areas helps performance without creating traction-drive problems.
Last updated: February 2026
How can I tell how old my Craftsman snowblower is?
To estimate the age of your Craftsman snow thrower model 247888540, start by finding the model plate and any engine ID information; the model plate confirms the unit model, and the engine model tag helps narrow the engine’s production era. For decoding details and label locations, use the owner's manual.
On this Craftsman unit, the manual shows a center model plate location aligned with the top of the frame cover, and it also lists an engine model reference.
- Check the center model plate area on the frame cover for model and serial information
- Look for the engine identification tag on the engine shroud or valve cover area
- Record the full model number and serial number exactly as printed
- Note the engine model shown in the manual (example listing: 143.999005) and compare to your engine tag
- If labels are missing or damaged, plan to replace them so the unit remains safe to operate
Once you have the serial number and engine ID, you can determine age using these common approaches.
| What you found | What it tells you | Best use |
|---|---|---|
| Snow thrower serial number | Build date coding for the machine (varies by manufacturer) | Most accurate for the unit itself |
| Engine model and code | Engine manufacture date format (engine-maker specific) | Confirms engine age and helps validate the unit’s timeframe |
| Purchase date/receipt | In-service date | Useful for warranty and maintenance history |
Knowing the approximate age helps us match the right maintenance parts and wear items (for example, skid shoes, shave plate, belts, and cables) and it also helps you plan service intervals like oil changes, lubrication, and tune-ups.
- Clean the model plate area gently; avoid spraying water directly at bearings, pulleys, or the engine
- If the unit has been repainted, check under the frame cover edges for the original label
- Write the numbers down before ordering parts to avoid mismatches
- If you are doing seasonal service, follow the lubrication and storage sections in the manual
Last updated: February 2026
Where can I find the Craftsman snowblower model number?
Your Craftsman snow thrower model number is on the model plate (product identification label) mounted on the frame; for model 247888540, the manual shows the plate centered on the unit and aligned with the top of the frame cover. Use that exact model number when ordering parts or looking up diagrams in the owner's manual.
Look for a sticker or metal tag in these spots (wipe off snow, salt, and grime first):
- Rear of the frame between the wheels
- On the frame near the engine
- Near the auger housing (side panel area)
- Under or near the top frame cover (where the manual indicates the model plate sits)
- On a crossmember or handle support bracket
If the label is faded or dirty, these steps usually make it readable without damaging it:
- Brush off loose debris, then wipe with a damp rag
- Use mild soap and water only; dry immediately
- Avoid pressure washers or a garden hose; water can shorten component life
- Take a close-up photo and zoom in to read the characters
- Write down both the model and serial number before ordering parts
On many snowblowers, the engine has its own model information that is different from the snow thrower model.
| What you are identifying | Where it’s found | What it’s used for |
|---|---|---|
| Snow thrower model number (example: 247888540) | Model plate on the frame | Correct parts diagrams and chassis parts |
| Engine model number (example shown in manual: 143.999005) | Engine shroud/label | Engine-specific parts and tune-up items |
The model number locks in the exact build of your Craftsman snow thrower (auger housing, chute parts, belts, skid shoes, and hardware). Using the correct model number helps ensure you get the right replacement parts the first time.
Last updated: February 2026