Owner’s manual
 Error Codes

Does anyone make a 30 inch side-by-side refrigerator?
Yes. Several brands make 30-inch-wide side-by-side refrigerators, but they are less common than 33-inch and 36-inch models. For fit planning, your Maytag PSD265LGES-PPSD265GS0 is designed for a 69-inch-tall opening and needs rear clearance for airflow; use the owner's manual to confirm your exact opening requirements.
- Confirm the cabinet width (30 inches) and the door swing clearance for your kitchen layout.
- Check overall height and whether your opening is close to 69 inches tall.
- Allow rear clearance for ventilation (many refrigerators need about 1/2 inch behind the cabinet).
- Verify water/ice hookup location if you want an ice maker or dispenser.
- Compare capacity; 30-inch side-by-sides are typically smaller than 33-inch or 36-inch units.
| Refrigerator style | Common widths | Notes |
|---|---|---|
| Side-by-side | 30, 33, 36 inches | 30-inch models exist but are limited in selection |
| French door | 30, 33, 36 inches | More 30-inch options than side-by-side |
| Top freezer | 28 to 33 inches | Often the easiest way to stay near 30 inches |
A refrigerator that is even slightly too wide, too tall, or too tight to ventilate can run hotter, waste energy, and be harder to level and align. Our Maytag PSD265LGES-PPSD265GS0 guidance specifically calls out a 69-inch-tall opening and the need for airflow clearance, so measuring your opening first saves time and prevents fit issues.
If your goal is to improve water or ice performance instead of replacing the refrigerator, these model-compatible parts are common fixes:
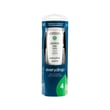
- Replace the water filter: whirlpool everydrop 4 refrigerator water filter EDR4RXD1
- Address ice production issues: refrigerator ice maker D7824706Q
- Diagnose water supply problems: refrigerator valve WP12544002
Last updated: February 2026
How do you force defrost a Maytag side-by-side?
To force defrost on your Maytag PSD265LGES-PPSD265GS0 side-by-side refrigerator, you typically enter Forced Defrost Mode using the door light switch and a specific temperature-button sequence; this starts a defrost cycle so you can melt frost off the evaporator and restore airflow. See the exact steps in the owner's manual.
- Open the fresh food door.
- Press and hold the refrigerator door light switch closed.
- While holding the switch, press the Refrigerator Temperature DOWN (-) key 3 times in a row.
- The refrigerator should switch into a defrost routine.
- You may hear relays click or see normal changes in fan/compressor operation.
- Water may begin dripping into the drain pan as frost melts.
- Unplug the refrigerator before removing any panels or touching wiring.
- Keep towels handy; defrosting can create water runoff.
- Do not use sharp tools to chip ice; it can puncture the evaporator.
- If the unit is heavily iced, allow time for meltwater to drain.
These checks solve most “won’t enter defrost” situations:
- Make sure you are pressing the Refrigerator temp DOWN key (not freezer).
- Confirm the door light switch is fully depressed the entire time.
- Try the sequence again with steady, quick button presses.
- If the refrigerator is not cooling correctly, inspect for heavy frost buildup behind the freezer rear panel.
- If you suspect a defrost system failure, common culprits include the defrost control and heater.
| Symptom | Common defrost-related suspect | Example part on this model page |
|---|---|---|
| Heavy frost on freezer back wall | Adaptive defrost control board | Refrigerator adaptive defrost board W11227239 |
| Frost returns quickly after manual defrost | Defrost heater circuit issue | Refrigerator heater WP12049801 |
Forced defrost is a fast way to confirm whether restricted airflow from frost is causing warm temperatures, weak cooling, or poor ice production. If the refrigerator cools normally right after defrost but warms again later, the defrost system needs attention.
Last updated: February 2026
What does 265 stand for?
On the Maytag PSD265LGES-PPSD265GS0 side-by-side refrigerator, “265” is part of the model identifier used to distinguish this design series and feature set; it is not a measurement (like millimeters) and it is not a capacity rating.
Manufacturers use blocks of letters and numbers to identify a platform and configuration. In this model number:
- PSD commonly indicates a side-by-side platform family
- 265 identifies a specific series within that platform (design generation and options)
- LGES / PPSD265GS0 further narrows down finish, configuration, and production variation
For the exact decoding used for your unit, use the model and serial label details referenced in the owner's manual.
On most Maytag side-by-side refrigerators, the model and serial tag is typically located:
- Inside the fresh food compartment on a side wall
- Near the crisper area
- Around the door frame area
- Occasionally behind the toe grille area (varies by build)
Even small suffix changes can affect which parts fit (water filter housing, ice maker, door gasket, control boards).
If you are matching parts to PSD265LGES-PPSD265GS0, these are examples of items where the exact model string matters:
- Water filter and filter housing
- Ice maker and ice chute components
- Door gaskets (fresh food and freezer)
- Defrost controls and heater components
| System | Example part on this model page | What it affects |
|---|---|---|
| Water filtration | Refrigerator water filter EDR4RXD1 | Taste/odor, flow rate, dispenser performance |
| Ice production | Refrigerator ice maker D7824706Q | Ice harvest, fill, and cube output |
| Door sealing | Gasket-ff W10840101 | Warm air leaks, frost, temperature stability |
Knowing that “265” is a series identifier (not a size spec) helps you avoid ordering parts based on the wrong assumption. The full model number PSD265LGES-PPSD265GS0 is what ensures correct fit and function.
Last updated: February 2026
What is the standard size side-by-side fridge?
Most standard side-by-side refrigerators are about 30 to 36 inches wide, 67 to 70 inches tall, and 29 to 35 inches deep (depth varies most depending on handles and door clearance). For the Maytag PSD265LGES-PPSD265GS0, the manual notes it was designed to fit a 69-inch-tall opening; use the owner's manual to confirm your exact cutout and clearance needs.
These are the measurements we see most often for full-size side-by-side units:
- Width: 30 to 36 inches
- Height: 67 to 70 inches (many are near 69 inches)
- Depth (cabinet): often 28 to 32 inches
- Depth (with doors/handles): often 30 to 35 inches
- Capacity: commonly around 22 to 26 cu. ft.
Your refrigerator is designed around a 69-inch-tall opening to allow ventilation, leveling, and door adjustments. Plan for airflow clearance, especially behind the unit.
- Measure the opening height, width, and depth in multiple spots
- Account for flooring thickness (tile, rugs, new flooring can reduce the opening)
- Leave rear clearance for airflow (the manual calls out about 1/2 inch at the rear)
- Make sure doors can swing fully without hitting walls or cabinets
- Opening width at top, middle, bottom
- Opening height at left and right sides
- Opening depth to the wall, plus baseboard trim
- Door swing space and handle clearance
- Pathway clearance (doorways, hallways, turns)
| Term | What it usually refers to | Why it matters |
|---|---|---|
| Width | Cabinet width | Determines if it fits between cabinets |
| Height | Floor to top hinge cover | Determines if it fits under soffits |
| Depth | Front to back (varies by handles) | Affects how far it sticks out |
| Cutout/opening | Your cabinet space | Must include ventilation clearance |
A fridge that is even 1 inch too tall or too deep can block airflow, prevent leveling, or keep doors from sealing correctly. That can lead to warm temperatures, frost, or higher energy use.
Last updated: February 2026