Installation guide
 Owner’s manual





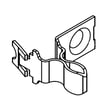
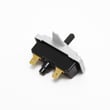

Can I replace a dryer heating element myself?
Yes. On Kenmore electric dryer model 1106012510, replacing the heating element is a common DIY repair if you’re comfortable using basic hand tools and following safety steps. Disconnect power first, then swap the element and reassemble carefully so wiring and airflow are restored correctly.
Safety first (before any disassembly)
- Unplug the dryer (or switch both dryer breakers OFF); electric dryers use 240V.
- Let the dryer cool completely.
- Never work around a moving drum.
- Keep lint and dust cleared from the heater and exhaust area.
- Only perform repairs you understand and have the skills to carry out (per the 1106012510 owner's manual).
What the job usually involves
Most Kenmore electric dryers of this design use a heater assembly mounted in a heater box at the rear.
- Remove the rear panel to access the heater housing.
- Label wires before disconnecting them.
- Remove mounting screws, slide out the old element, and install the new one.
- Inspect and reconnect terminals firmly (loose connections can overheat).
- Reassemble panels and restore power.
Common parts you may need
| Symptom | Often replaced with the element | Why it matters |
|---|---|---|
| No heat, drum still turns | Dryer heating element 279838 | The element is the heat source |
| No heat after overheating event | Dryer thermal cut-off fuse kit 279816 | A blown thermal cut-off stops heat |
| Overheating or cycling heat issues | Dryer high-limit thermostat WP3977767 or dryer operating thermostat WP3387134 | Thermostats regulate heater temperature |
Quick checks before you buy parts
These checks come straight from typical “no heat” troubleshooting for electric dryers:
- Confirm both household fuses are good or both breakers are on (the drum can run with only one side of the 240V supply).
- After running 5 minutes, open the door and feel for heat; if none, shut the dryer off and recheck power supply.
- Check airflow: a crushed vent or heavy lint buildup can overheat the heater circuit and blow the thermal cut-off.
Why it matters
A heating element failure is often caused or accelerated by restricted airflow. Fixing the element without correcting venting and lint buildup can lead to repeat no-heat problems and additional part failures.
Last updated: January 2026
How to hard reset a Kenmore dryer?
To hard reset a Kenmore dryer like model 1106012510, we unplug the dryer (or shut off the breaker) for about 1 to 5 minutes, then restore power and try a normal cycle. If it still will not run or heat, the issue is usually airflow, power supply, or a safety device that needs attention.
Hard reset steps (model 1106012510)
- Turn the dryer OFF.
- Unplug the power cord (or switch the dryer breaker OFF).
- Wait 1 to 5 minutes.
- Plug back in (or switch breaker ON).
- Select a Timed Dry cycle and press Start.
- If the control seems “stuck,” open and close the door once after power is restored.
For model-specific operating details and cycle guidance, use the 1106012510 owner's manual.
If a reset does not fix it
A reset clears a temporary control glitch, but it will not fix common “no start” or “no heat” causes.
- No heat but drum tumbles: electric dryers need a full 240V supply; a tripped breaker can leave the motor running on 120V but no heat.
- Long dry times: clean the lint screen every load and check for a restricted vent (lint buildup is a top cause).
- Overheat protection trips: restricted airflow can cause the thermal cut-off to open.
Quick symptom guide
| What you see | Most common cause | What we do next |
|---|---|---|
| Runs, no heat | Power supply issue or heater circuit problem | Check both breakers; inspect heater circuit |
| Stops, then won’t restart | Overheating from poor venting | Clean venting; check safety thermostats |
| Takes too long to dry | Lint screen or vent restriction | Clean lint screen; clear vent path |
Parts that often relate to “no heat” after troubleshooting
If airflow and power are good, these parts are common checks on this style of Kenmore electric dryer:
- Dryer heating element 279838
- Dryer thermal cut-off fuse kit 279816
- Dryer high-limit thermostat WP3977767
Why it matters
Hard resets are useful for control hiccups, but dryers are designed to shut down heating when airflow is poor or a safety limit is reached. Fixing the root cause (often lint and venting) restores safe, normal drying.
Last updated: January 2026
How to tell if a dryer heating coil is bad?
On a Kenmore electric dryer model 1106012510, a bad heating coil (heating element) usually shows up as no heat even though the drum tumbles, and it will typically fail a continuity test with a multimeter. Start by confirming the dryer is actually getting full 240V power, then test the element.
Quick checks before testing the coil
- Run a full heat cycle for about 5 minutes, then open the door and feel for heat (use the steps in the 1106012510 installation guide).
- Verify the dryer is on a heat cycle (not Air/Fluff).
- Check both household fuses or both breakers; electric dryers can run but not heat if one side trips.
- Confirm the door is fully closed and Start was pressed firmly.
- Make sure the vent is not crushed or heavily clogged (restricted airflow can overheat and damage heating components).
How we test the heating coil (continuity)
- Unplug the dryer (or switch off both breakers).
- Access the heater housing (location and panel removal steps vary; follow the 1106012510 owner’s manual).
- Remove at least one wire from the heating element terminal.
- Set a multimeter to ohms (Ω) and test across the element terminals.
What the meter results mean
| Test result | What it usually indicates | What to do next |
|---|---|---|
| No continuity (OL/infinite) | Heating coil is broken | Replace the heating element |
| Continuity present | Coil is not open | Check thermostats, thermal cut-off, power supply, airflow |
| Continuity to metal housing (short to ground) | Coil is shorted | Replace the heating element |
Parts that commonly get replaced with a bad coil
If the coil is open or shorted, we typically replace the element and inspect heat safety parts:
- Dryer heating element 279838
- Thermal cut-off and high-limit thermostat kit (overheating protection)
- Operating thermostat
Why it matters
A dryer that tumbles with no heat is often a power-supply issue (one breaker tripped) or an open heating coil. Confirming 240V supply and checking continuity prevents replacing parts that are still good.
Last updated: January 2026