Get free shipping on your order, with any water filter subscription. Find my filter

Open Hamburger Menu
Sears Parts Direct
Tips to find your model number

Kenmore Elite 11027072604 washer Parts

Here are the diagrams and repair parts for Kenmore Elite 11027072604 washer, as well as links to manuals and error code tables, if available.

Kenmore Elite 11027072604 washer
By Schematic
By Part
SELECT DIAGRAM
?

This is the number corresponding to the part on the diagram / schematic

Browse Parts for 11027072604 Washer

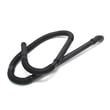
  • Appliance Cable Tie for Kenmore Elite 11027072604 - Part WPW10339879

    Pump parts, optional parts (not included) diagram

    Wire Tie

    Part #3347868

    Replaced by #WPW10339879

    Info Icon
    Manufacturer substitution
    This part replaces 3347868. Substitute parts can look different from the original.
    This item is not returnable
    In Stock
    $4.88
    17% OFF Phone Price : $5.88Info Icon
    Minus Item
    Qty
    Plus Item
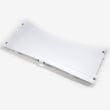
  • Washer Top Panel for Kenmore Elite 11027072604 - Part WP3957177

    Top and cabinet parts diagram

    Washer Top Panel

    Part #3957177

    Replaced by #WP3957177

    Info Icon
    Manufacturer substitution
    This part replaces 3957177. Substitute parts can look different from the original.
    In Stock
    $220.63
    5% OFF Phone Price : $232.63Info Icon
    Minus Item
    Qty
    Plus Item
  • Washer Lid Assembly for Kenmore Elite 11027072604 - Part WP8572026

    Top and cabinet parts diagram

    Washer Lid

    Part #8563945

    Replaced by #WP8572026

    Info Icon
    Manufacturer substitution
    This part replaces 8563945. Substitute parts can look different from the original.
    In Stock
    $231.34
    5% OFF Phone Price : $243.34Info Icon
    Minus Item
    Qty
    Plus Item
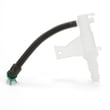
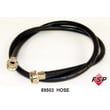
  • Washer Drain Pump Hose Connector for Kenmore Elite 11027072604 - Part WP384496

    Pump parts, optional parts (not included) diagram

    Washer Drain Hose Sleeve Connector

    Part #384496

    Replaced by #WP384496

    Info Icon
    Manufacturer substitution
    This part replaces 384496. Substitute parts can look different from the original.
    In Stock
    $98.26
    Minus Item
    Qty
    Plus Item
  • Washer Leveling Leg for Kenmore Elite 11027072604 - Part W10739673

    Top and cabinet parts diagram

    Foot Leveling Assembly

    Part #8578826

    Replaced by #W10739673

    Info Icon
    Manufacturer substitution
    This part replaces 8578826. Substitute parts can look different from the original.
    This item is not returnable
    In Stock
    $8.27
    11% OFF Phone Price : $9.27Info Icon
    Minus Item
    Qty
    Plus Item
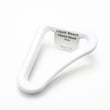
  • Washing Machine Washer for Kenmore Elite 11027072604 - Part WP8577896

    Top and cabinet parts diagram

    Washing Machine Washer

    Part #8577896

    Replaced by #WP8577896

    Info Icon
    Manufacturer substitution
    This part replaces 8577896. Substitute parts can look different from the original.
    This item is not returnable
    In Stock
    $4.39
    19% OFF Phone Price : $5.39Info Icon
    Minus Item
    Qty
    Plus Item
  • Appliance Porcelain Touch-up Paint, 1-qt (white) for Kenmore Elite 11027072604 - Part 799344

    Pump parts, optional parts (not included) diagram

    Paint (white)

    Part #799344

    Replaced by #799344

    Info Icon
    Manufacturer substitution
    This part replaces 799344. Substitute parts can look different from the original.
    In Stock
    $131.86
    8% OFF Phone Price : $143.86Info Icon
    Minus Item
    Qty
    Plus Item
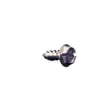
  • Appliance Screw for Kenmore Elite 11027072604 - Part WP8533928

    Motor, basket and tub parts diagram

    Screw

    Part #8533928

    Replaced by #WP8533928

    Info Icon
    Manufacturer substitution
    This part replaces 8533928. Substitute parts can look different from the original.
    This item is not returnable
    In Stock
    $4.88
    17% OFF Phone Price : $5.88Info Icon
    Minus Item
    Qty
    Plus Item
  • Appliance Silicone Sealant (red) for Kenmore Elite 11027072604 - Part WP285195

    Pump parts, optional parts (not included) diagram

    Appliance Sealant

    Part #285195

    Replaced by #WP285195

    Info Icon
    Manufacturer substitution
    This part replaces 285195. Substitute parts can look different from the original.
    In Stock
    $72.38
    8% OFF Phone Price : $78.38Info Icon
    Minus Item
    Qty
    Plus Item
  • Washer Screw for Kenmore Elite 11027072604 - Part W11700520

    Top and cabinet parts diagram

    Washer Screw

    Part #3400061

    Replaced by #W11700520

    Info Icon
    Manufacturer substitution
    This part replaces 3400061. Substitute parts can look different from the original.
    In Stock
    $41.03
    Minus Item
    Qty
    Plus Item

Kenmore Elite Washer 11027072604 FAQs

A hard reset on your Kenmore Elite washer model 11027072604 is usually as simple as removing power long enough for the control to fully shut down, then restoring power and starting a fresh cycle. If the washer is stuck mid-cycle, canceling and draining first often restores normal operation.

Hard reset steps (most effective)

  • Press STOP twice to cancel the cycle and drain the tub (if the washer is running).
  • Press POWER to turn the washer off.
  • Unplug the washer (or switch the breaker off).
  • Wait 2 minutes.
  • Restore power.
  • Press POWER, select a cycle, then press START.

For model-specific button behavior and cycle cancel details, follow the steps in the 11027072604 owner's manual.

If the washer will not unlock or seems “stuck”

Use the control actions that are built into this model’s normal operation:

  • To pause and open the lid during the “Add a garment” window: press STOP once, wait for the lid lock light to turn off, then open the lid.
  • To fully cancel: press STOP twice (this cancels and drains).
  • After canceling, press POWER, reselect the cycle, then press START.

Quick reference: what each button press does

Action What it does When to use it
STOP once Pauses the cycle Add a garment or change options
STOP twice Cancels cycle and drains Stuck cycle, wrong cycle selected
POWER Turns washer off Before restarting a new cycle

Why it matters

A true hard reset clears a “hung” control state and forces the washer to restart from the beginning of a new cycle. Canceling and draining first also prevents a locked-lid situation and helps protect the drain system.

Last updated: January 2026

On Kenmore Elite washer model 11027072604, the quickest way to force a drain is to cancel the cycle and run Drain & Spin: press STOP twice, press POWER, select DRAIN & SPIN, then press START (the lid unlocks after the spin completes). See the 11027072604 owner's manual for the exact button sequence on your console.

Fast steps to force a drain

  • Press STOP twice to cancel and start draining.
  • Press POWER.
  • Select DRAIN & SPIN.
  • Press START.
  • Wait for the cycle to finish; the lid unlocks when the spin is complete.

If it still will not drain (common causes)

A forced drain fails when water cannot leave the tub or the washer cannot run the drain pump.

  • Check the drain hose for kinks, crushing, or a clogged standpipe.
  • Make sure the drain hose is not shoved too far down the standpipe (it needs an air gap).
  • Confirm the washer is not showing a lid lock problem; a failed lid lock can stop draining/spinning.
  • Listen for the drain pump; if it hums but does not move water, the pump or an internal blockage is likely.
  • If the tub will not spin and you see heavy vibration or off-balance behavior, suspension issues can contribute to incomplete draining.

Parts that commonly relate to “won’t drain” symptoms

Symptom What it points to Example part for this model
No water movement, pump silent Drain pump or wiring issue Pump-water W10536347
Lid stays locked or cycle will not start Lid lock failure Washer lid lock WPW10619844
Tub bangs, won’t reach spin speed Suspension wear Washer suspension W10820048

Why it matters

Standing water can lead to odor, poor rinsing, and repeated cycle failures. Forcing a proper drain and spin also helps confirm whether the issue is a simple cycle interruption or a drain system problem (hose, pump, or lid lock).

Last updated: January 2026

On the Kenmore Elite washer model 11027072604, the uL (UL) code means Unbalanced Load. The washer detects the load is off-balance and runs a correction routine before the final spin; if the code stays on, you need to redistribute the load and restart the spin per the 11027072604 owner's manual.

What to do when you see uL

  • Let the washer finish its unbalanced-load correction routine.
  • If the dial is flashing and uL remains, open the lid and redistribute items evenly.
  • Remove bulky items and rewash them with 1 to 2 smaller items to balance the basket.
  • Avoid washing a single heavy item (blanket, rug, comforter) by itself.
  • Close the lid and press START to resume.

Common causes (and quick checks)

  • Load distribution: Items bunched on one side of the basket.
  • Overloading: Too many items can prevent proper balancing.
  • Floor or leveling: A washer that is not level can amplify vibration and imbalance.
  • Mechanical friction: If the basket feels tight or noisy when turning by hand, friction can contribute to repeated uL events.

When uL keeps coming back

If you repeatedly get uL with normal-sized loads, check for wear in the drive and support system. These parts are commonly involved in imbalance, vibration, or poor spin performance:

Symptom you notice What it often points to Example part for this model
Excessive shaking, banging Worn suspension support Washer suspension W10820048
Grinding, roaring in spin Tub bearing/shaft wear Whirlpool washer tub bearing and drive shaft kit W10435302
Basket not spinning smoothly Drive hub wear Hub W10820039

Why it matters

An unbalanced load can prevent a full-speed spin, leaving clothes wetter and putting extra stress on the tub, bearings, and suspension over time.

Last updated: January 2026

For Kenmore Elite washer model 11027072604, “size” usually means the washer’s physical footprint (so it fits your space) and the installation clearances needed for safe operation and service access. We use the 11027072604 owner's manual for the exact dimensions and clearance diagram.

What to measure (and where)

Measure your laundry space first, then compare to the washer specs.

  • Width: wall to wall at the narrowest point
  • Height: floor to the lowest shelf or cabinet above
  • Depth: back wall to the front edge, plus room for hoses and the lid
  • Doorway path: hallways, door openings, and turns to the laundry area
  • Drain and hookups: standpipe or laundry tub height, outlet location, faucet reach

Installation spacing and hookup requirements (from the manual)

The manual for model 11027072604 includes specific installation guidance we follow when planning a fit.

  • The washer is tested for 0 in (0 cm) clearance on the sides
  • Extra spacing is recommended for easier installation and servicing
  • Extra spacing on all sides helps reduce noise transfer
  • For a closet installation with a door, top and bottom ventilation openings are required
  • Standpipe drain requirements include a 2 in (5 cm) minimum standpipe diameter and a standpipe height of at least 39 in (99 cm) and no higher than 96 in (244 cm) from the bottom of the washer

Quick reference table

Item to plan for Model 11027072604 requirement Why it matters
Side clearance 0 in tested Confirms basic fit between walls/cabinets
Closet door ventilation Required openings top and bottom Prevents heat and moisture buildup
Standpipe height 39 to 96 in Helps prevent siphoning and drain overflow
Standpipe diameter 2 in minimum Supports proper drain flow

Why it matters

Correct sizing prevents “won’t fit” surprises, reduces vibration and noise, and avoids drain or hose problems that can cause poor draining or leaks.

Last updated: January 2026

Most common symptoms to help you fix your washers

Choose a symptom to see related washer repairs.

Main causes: clogged drain hose, house drain clogged, bad drain pump, water-level pressure switch failure, bad control b…

Main causes: broken lid switch or lid lock, bad pressure switch, broken shifter assembly, faulty control system…

Main causes: worn agitator dogs, bad clutch, broken motor coupler, shifter assembly failure, broken door lock, suspensio…

Main causes: water heater failure, bad water temperature switch, faulty control board, bad water valve, faulty water tem…

Main causes: lack of electrical power, wiring failure, bad power cord, electronic control board failure, bad user interf…

Main causes: no water supply, bad water valves, water-level pressure switch failure, control system failure, bad door lo…

Main causes: unbalanced load, loose spanner nut, worn drive block, broken shock absorber or suspension spring, debris in…

Main causes: leaky water inlet valve, faulty water-level pressure switch, bad electronic control board…

Main causes: bad lid switch or door lock, bad timer or electronic control board, wiring failure, bad water inlet valve a…

Repair guides for electric ranges

How to replace an oven temperature sensor on an electric range

How to replace an oven temperature sensor on an electric range

These step-by-step instructions guide you through replacing an oven temperature sensing probe.…

Repair time and Difficulty

 15 minutes or less
How to replace an electric range oven control board

How to replace an electric range oven control board

If the electronic oven control board isn't powering the bake and broil functions, you can replace it in less than half a…

Repair time and Difficulty

 15 minutes or less
How to replace a range surface element control switch

How to replace a range surface element control switch

The surface element control switch lets you turn the stovetop elements on and off, and to set the heat level. These step…

Repair time and Difficulty

 15 minutes or less

Effective articles & videos to help repair your washers

Use the advice and tips in these articles and videos to get the most out of your washer.

How auto-load sensing washers work (and when they don't)

How auto-load sensing washers work (and when they don't)

Your washer barely fills or seems stuck in sensing mode? Find out how auto-load sensing and Precise Fill features work, …

How to remove the main control board and user interface from a Maytag Epic Z front-load washer

How to remove the main control board and user interface from a Maytag Epic Z front-load washer

Get step-by-step instructions for removing the main electronic control board and the control panel from a Maytage Epic Z…

Using a wiring schematic to trace a current video

Using a wiring schematic to trace a current video

Find out what’s wrong with your appliance by following a circuit.…

Parts & More

Blender
Dishwasher
Drill Press
Dryer
Electric Range
Electric Wall Oven
Gas Range
Generator
Jointer/Planer
Microwave
Refrigerator
Router
Side-By-Side Refrigerator
Snowblower
Washer