

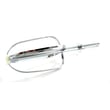
How to find discontinued appliance parts?
For a discontinued part on your Kenmore mixer model 23869239, start by searching by the full model number and any numbers printed on the original part; then look for an updated replacement, a compatible substitute, or a used/NOS option. The fastest path is confirming the exact part identity first, then widening the search.
Step 1: Identify the exact part you need
Before you shop, match the part as precisely as possible. This prevents ordering a look-alike that will not fit.
- Find the model tag and confirm it reads 23869239
- Write down any numbers stamped on the failed part (molded plastic numbers, motor label numbers, switch markings)
- Take clear photos from multiple angles (connectors, mounting points, shaft shape)
- Note symptoms (won’t start, sparks, burning smell, speed control issues, stripped gears)
- Check whether the issue could be a cord, switch, or internal wiring problem
Helpful reference: how to find your appliance model number (and what it means for parts)
Step 2: Search smarter (what usually works)
Discontinued parts are often still available under a different number or as a compatible substitute.
| What to try | Why it helps | What to record |
|---|---|---|
| Search by model number | Narrows to the correct product family | 23869239 + part name |
| Search by part markings | Finds the same component sold elsewhere | All label/stamp numbers |
| Look for “substitute” or “replacement” notes | Points to updated part numbers | Old and new numbers |
| Compare photos and measurements | Confirms fit when listings are vague | Length, shaft type, connector style |
Step 3: If the part is truly no longer available
When there is no current replacement, these options typically solve it:
- Use a compatible substitute (same electrical rating, same mounting, same connector style)
- Rebuild the failed section (common for cords, terminals, and some wiring)
- Use a donor unit for parts (same model or close variant)
- Replace the appliance if the motor or gearcase is not economically repairable
If you’re troubleshooting a possible electrical failure first, use: how to tell if a fuse is blown and how to use a multimeter to test electrical parts video
Why it matters
With small appliances like mixers, a single mismatched switch, speed control, or motor component can cause overheating, poor performance, or immediate failure. Confirming identity and compatibility first saves time and prevents repeat repairs.
Last updated: February 2026
What are the most common issues with 23869239?
The most common problems we see with the Kenmore 23869239 mixer are power issues (won’t start or cuts out), speed control problems (only one speed or surging), and mechanical wear (noisy operation or poor mixing). Most fixes start with basic checks, then testing the cord, switch, and motor circuit.
Common symptoms and what they usually point to
- Mixer won’t turn on: bad outlet, damaged power cord, failed switch, blown internal fuse (if equipped)
- Runs intermittently: loose wiring connection, worn cord strain relief, overheating motor/thermal protector
- Only one speed or speeds jump: worn speed control plate, dirty contacts, failing control board (on electronic models)
- Loud grinding or squealing: worn gears, dry or contaminated grease, failing bearings
- Beater stops under load: stripped gear, worn coupler, weak motor, overloaded bowl
Quick checks we recommend first
- Unplug the mixer; inspect the cord and plug for cuts, burn marks, or loose blades.
- Try a different outlet; avoid GFCI outlets that may trip under load.
- Check for a jam: remove attachments and spin the planetary (beater shaft) by hand; it should turn smoothly.
- Smell for overheating; a hot electrical odor after short use points to motor or wiring issues.
- If you’re comfortable testing, use a multimeter to check continuity through the cord and switch.
Basic troubleshooting map
| Symptom | Most likely area | Typical next step |
|---|---|---|
| Dead, no sound | Power path | Test outlet, cord, switch continuity |
| Hums but won’t turn | Drive train | Check for jam, worn gears, seized bearing |
| Surges at low speed | Speed control | Clean/inspect contacts, check control components |
| Noisy under load | Gears/bearings | Inspect gearcase, refresh grease, replace worn parts |
Why it matters
Catching a failing cord, switch, or gear early helps prevent motor damage and reduces the chance of a sudden stop mid-mix. It also helps you order the correct replacement parts for the Kenmore 23869239.
For model-number and parts lookup tips, use how to find your appliance model number (and what it means for parts).
Last updated: March 2026
What is the average lifespan of 23869239?
A Kenmore mixer like model 23869239 typically lasts 10 to 15 years with normal home use and basic care. Lifespan depends most on load size (heavy doughs), ventilation, and keeping the drive and attachments from binding.
Typical lifespan and what affects it
Most countertop mixers fail early from overheating, worn drive components, or damage caused by overloading. These factors have the biggest impact:
- Workload: frequent bread dough and thick batters shorten life compared to light mixing
- Speed habits: running high speed under heavy load increases heat and wear
- Cooling and airflow: blocked vents and flour buildup trap heat
- Attachment fit: bent beaters or a misaligned bowl can strain gears and the motor
- Storage and handling: drops and cord damage create intermittent power issues
How to help your mixer reach the high end of the range
Use these practices to reduce wear on the motor, gears, and speed control:
- Mix heavy dough at low speed and in smaller batches
- Stop if you smell hot insulation or the housing feels unusually hot; let it cool
- Keep vents clear; brush off flour and wipe the exterior after use
- Avoid forcing attachments on or off; confirm they seat smoothly
- Unplug before cleaning or checking anything near moving parts
Quick guide: “repair or replace” decision
| What you notice | Most common cause | Best next step |
|---|---|---|
| Motor runs but beater stalls | worn drive components or overload | reduce batch size; inspect for binding |
| Burning smell or hot housing | overheating motor or speed control issue | stop use; cool down; check airflow |
| Intermittent power | damaged cord, switch, or internal wiring | inspect cord; consider electrical testing |
| Loud grinding | gear wear or foreign material | stop use to prevent further damage |
Why it matters
A mixer that is overheating, grinding, or stalling can quickly turn a small wear issue into a motor or gear failure. Catching symptoms early usually extends service life and reduces the chance of a sudden breakdown.
For safe electrical checks (like verifying a cord or switch), we use a meter and follow basic test steps from [how to use a multimeter to test electrical parts video].
Last updated: March 2026