Installation guide
 Owner’s manual
 Error Codes



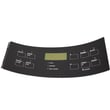
What does F90 mean on a Kenmore stove?
On Kenmore electric range model 79092409013, the F90 error code points to a problem with the oven door lock system; the control is not sensing the door lock moving or unlocking correctly (often during or right after a self-clean cycle).
What to do first
- Press Cancel/Off to stop the cycle and clear the display.
- Let the range cool completely; the lock can stay engaged until temperatures drop.
- Reset power: turn the range breaker off for 1 minute, then back on.
- Try starting Bake for 1 to 2 minutes, then cancel; this can re-check the lock position.
- If the door is locked, avoid forcing it; wait for cool-down and retry the reset.
Common causes (and what they affect)
| Likely cause | What you may notice | Typical fix |
|---|---|---|
| Door lock motor or switch issue | Door stays locked, F90 returns | Replace the lock assembly |
| Wiring/connection problem to lock | Intermittent F90, works sometimes | Inspect and repair connections |
| Control not reading lock position | F90 with normal lock movement | Diagnose control and lock circuit |
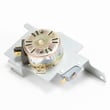
A common repair for repeated F90 is replacing the door lock motor and switch assembly: range oven door lock motor and switch assembly 5304528973.
Why it matters
During self-clean, the range uses the door lock as a safety system. If the control cannot confirm the lock position, it stops the cycle and posts an error to prevent unsafe operation.
Helpful reference
For model-specific keypad steps and any related codes, use the owner's manual and our Kenmore 790 self-cleaning range error codes guide.
Last updated: February 2026
How do I know what model my Kenmore oven is?
Your Kenmore oven (range) model number is printed on a rating label attached to the appliance. On Kenmore electric ranges like model 79092409013, the label is typically found around the oven door frame (door jamb) or behind the lower storage drawer area.
Where to look first (fastest checks)
- Open the oven door and check the frame around the opening (door jamb).
- Pull out the bottom storage drawer and look on the frame behind it.
- Check the back of the range near the vent area.
- Look along the side panel edge if the range is slightly pulled forward.
What the model label looks like
Most Kenmore range labels include:
- Model number (example: 79092409013)
- Serial number
- Electrical ratings (volts/amps)
- Sometimes a manufacturing date code
Why it matters
We use the exact model number to match the correct parts, diagrams, and instructions for your Kenmore electric range. Even small model-number differences can change which bake element, control switch, or oven sensor fits.
Quick reference
| If you find this | What to do next |
|---|---|
| A full model number like 79092409013 | Use it to select matching parts and diagrams |
| Only partial numbers | Keep looking for the full rating label |
| Label is worn or missing | Check the storage drawer area and rear panel again under good lighting |
Helpful documentation
Your installation guide also includes key safety and installation notes (clearances, grounding, and anti-tip bracket checks) that can help you identify the appliance and keep it set up correctly.
Last updated: February 2026
Why is my Kenmore electric range not heating up?
If your Kenmore electric range model 79092409013 is not heating, the most common causes are a failed bake or broil element, a bad oven temperature sensor, or a power supply issue (the range can light up but still not heat if one leg of 240V is missing). Use the steps below to pinpoint the failure safely.
Quick checks (fastest wins first)
- Confirm the oven is set to Bake (not Delay Start or Sabbath mode, if equipped).
- Try Broil; if broil heats but bake does not, the bake circuit is the likely issue.
- Check your home breaker: many ranges use a double-pole breaker; a half-tripped breaker can leave you with lights but no heat.
- If the oven was recently moved or installed, verify the power cord connections at the terminal block are tight and correct (the installation instructions warn not to loosen factory-installed terminal block nuts).
- Look for obvious damage: blistering, cracks, or holes on the element.
Parts that commonly cause “no heat” on this model
These parts are listed for Kenmore 79092409013 and are frequent fixes when the oven will not heat:
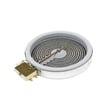
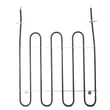
- Frigidaire range bake element 316413800
- Frigidaire range broil element 316203301
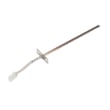
- Frigidaire range oven temperature sensor 316490000
What each symptom usually points to
| Symptom | Most likely cause | What to do next |
|---|---|---|
| Bake does not heat; broil works | Bake element or wiring | Inspect and test bake element for continuity |
| Broil does not heat; bake works | Broil element or wiring | Inspect and test broil element for continuity |
| Both bake and broil do not heat | Power supply, control issue, or sensor-related fault | Check breaker and terminal block; then test sensor |
| Oven heats but temperature is inaccurate | Temperature sensor drifting | Test/replace sensor |
How to test safely (basic DIY)
- Disconnect power at the breaker before removing panels or testing parts.
- Pull the range forward carefully and inspect the cord and terminal block area; a damaged connection can stop heating.
- Use a multimeter to check continuity on the bake element, broil element, and oven temperature sensor.
Why it matters
An oven that will not heat is often a simple electrical or heating-circuit failure. Catching a loose terminal block connection or a burned-out element early helps prevent repeat failures and reduces the chance of overheating wiring.
For model-specific operating settings and diagnostics, use the installation guide and your owner's manual.
Last updated: February 2026
How big is the Kenmore 79092409013?
The Kenmore 79092409013 is a 30-inch class freestanding electric range. For a safe fit, plan around the required cabinet clearances and the exact overall dimensions shown in the installation guide, including how far the range can sit back and how the anti-tip bracket is positioned.
What size details you should measure for
Before you move the range or finalize cabinetry, we recommend confirming:
- Overall width (this model class is designed for a 30-inch opening)
- Overall height (affected by leveling legs and floor height)
- Overall depth (door and handle add depth)
- Rear fit and cord space (how the back of the range sits relative to the wall)
- Required clearances to cabinets above and beside the cooktop
Clearances that matter for this model
The installation instructions call out minimum clearances to reduce fire and burn risk and to prevent cabinet cut mistakes:
- Vertical clearance above the cooktop: 30 inches minimum to the bottom of an unprotected wood or metal cabinet
- Reduced vertical clearance: 24 inches minimum only when the cabinet bottom is protected as specified in the instructions
- Rear clearance guidance: the instructions state 0-inch minimum at the rear, meaning the range is permitted to be installed flush to the rear wall when all other listed dimension and clearance requirements are met
- Overhead storage: avoid cabinets directly above surface elements when possible
- If overhead cabinets exist: a hood that projects at least 5 inches beyond the cabinet bottom helps reduce burn risk
Typical overall size expectations (for planning)
Use these as planning ranges; confirm the exact numbers for your unit in the installation guide.
| Measurement | Typical for 30-inch freestanding electric ranges | Notes |
|---|---|---|
| Width | About 30 in. | Designed for standard 30-in. spaces |
| Height | About 36 in. | Leveling legs can raise or lower it |
| Depth | About 25 to 28+ in. | Handle and door profile change depth |
Why it matters
Correct dimensions and clearances help the range sit level, keep required spacing from combustible surfaces, and ensure the anti-tip bracket can be fully engaged.
Last updated: February 2026
How do you reset a Kenmore 79092409013 oven?
To reset your Kenmore 79092409013 electric range oven, do a full power reset: turn the range off, switch the circuit breaker off for 1 to 5 minutes, then restore power and set the clock. This clears many temporary control glitches.
Quick reset steps (power reset)
- Turn OFF the oven and all surface elements.
- Switch the range circuit breaker OFF (or remove the fuse).
- Wait 1 to 5 minutes.
- Switch the breaker ON.
- Set the clock and test Bake and Broil.
- If an error code returns, write it down before resetting again.
If an error code comes back after resetting
A reset can clear a one time fault; repeating codes point to a specific circuit such as the temperature sensor, keypad, door lock, or control.
- Look up the code in Kenmore 790 self-cleaning range error codes
- If you see temperature related symptoms (overheating, underheating, F code tied to sensor), check the frigidaire range oven temperature sensor 316490000
What to check before you reset again
- Control panel key stuck or held down; press each key to confirm it releases
- Oven door not fully closed (common after self-clean)
- Range overheated; let it cool completely, then retry
- Power supply issue; confirm the breaker is fully seated on and not tripping
- Loose wiring at the terminal block; follow the safety and access steps in the installation guide
Common symptoms and the next step
| Symptom after reset | What it usually means | What to do next |
|---|---|---|
| Clock is flashing | Power was interrupted | Set clock, test oven |
| Same code returns | Ongoing fault | Use the error code guide and troubleshoot by code |
| Oven will not heat | Heating circuit issue | Test Bake and Broil; inspect elements and wiring |
| Door stays locked | Latch/lock circuit issue | Let cool, then check the lock system |
Why it matters
Resetting restores the electronic control to a known state. If the same symptom returns immediately, that repeatable behavior helps pinpoint the failing part or circuit so you avoid unnecessary part replacement.
Last updated: February 2026