Get free shipping on your order, with any water filter subscription. Find my filter

Open Hamburger Menu
Sears Parts Direct
Tips to find your model number

GE GTV21ESSJ1WW electric dryer Parts

Here are the diagrams and repair parts for GE GTV21ESSJ1WW electric dryer, as well as links to manuals and error code tables, if available.

GE GTV21ESSJ1WW electric dryer
By Schematic
By Part
SELECT DIAGRAM
?

This is the number corresponding to the part on the diagram / schematic

Browse Parts for GTV21ESSJ1WW Electric Dryer

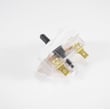
  • Dryer Push-to-start Switch for GE GTV21ESSJ1WW - Part WE4M416

    Backsplash, blower & motor assembly diagram

    Dryer Push-to-start Switch

    In Stock
    $31.55
    16% OFF Phone Price : $37.55Info Icon
    Minus Item
    Qty
    Plus Item
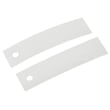
  • Dryer Front Bearing Drum Slide White 2-pack for GE GTV21ESSJ1WW - Part WE03X37318

    Front panel & door diagram

    Dryer Drum Front Glide Pad

    Part #WE1M504

    Replaced by #WE03X37318

    Info Icon
    Manufacturer substitution
    This part replaces WE1M504. Substitute parts can look different from the original.
    In Stock
    $11.35
    15% OFF Phone Price : $13.35Info Icon
    Minus Item
    Qty
    Plus Item
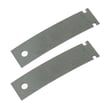
  • Dryer Front Bearing Drum Slide Green 2-pack for GE GTV21ESSJ1WW - Part WE03X37317

    Front panel & door diagram

    Dryer Drum Front Glide Pad

    Part #WE1M1067

    Replaced by #WE03X37317

    Info Icon
    Manufacturer substitution
    This part replaces WE1M1067. Substitute parts can look different from the original.
    In Stock
    $19.49
    9% OFF Phone Price : $21.49Info Icon
    Minus Item
    Qty
    Plus Item
  • Kenmore Dryer Rear Bearing for GE GTV21ESSJ1WW - Part WE1M462

    Drum diagram

    Kenmore Dryer Rear Bearing

    In Stock
    $29.47
    17% OFF Phone Price : $35.47Info Icon
    Minus Item
    Qty
    Plus Item
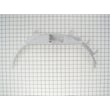
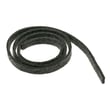
  • Dryer Drum Felt Seal for GE GTV21ESSJ1WW - Part WE09X27634

    Front panel & door diagram

    Felt

    Part #WE9M30

    Replaced by #WE09X27634

    Info Icon
    Manufacturer substitution
    This part replaces WE9M30. Substitute parts can look different from the original.
    In Stock
    $36.53
    14% OFF Phone Price : $42.53Info Icon
    Minus Item
    Qty
    Plus Item
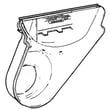
  • G.e. Dryer Lint Chute Assembly for GE GTV21ESSJ1WW - Part WE14X25080

    Front panel & door diagram

    Air Duct Assembly

    Part #WE14M92

    Replaced by #WE14X25080

    Info Icon
    Manufacturer substitution
    This part replaces WE14M92. Substitute parts can look different from the original.
    In Stock
    $79.74
    7% OFF Phone Price : $85.74Info Icon
    Minus Item
    Qty
    Plus Item
  • Kenmore Dryer Rear Bearing O-ring for GE GTV21ESSJ1WW - Part WE1M461

    Drum diagram

    Kenmore Dryer Rear Bearing O-ring

    In Stock
    $20.72
    22% OFF Phone Price : $26.72Info Icon
    Minus Item
    Qty
    Plus Item
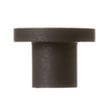
  • Dryer Drum Bearing Bracket for GE GTV21ESSJ1WW - Part WE1M300

    Drum diagram

    Dryer Drum Bearing Bracket

    In Stock
    $47.92
    11% OFF Phone Price : $53.92Info Icon
    Minus Item
    Qty
    Plus Item
  • Dryer Door Switch for GE GTV21ESSJ1WW - Part WE4M415

    Front panel & door diagram

    Dryer Door Switch

    In Stock
    $35.47
    14% OFF Phone Price : $41.47Info Icon
    Minus Item
    Qty
    Plus Item
  • Dryer High-limit Thermostat for GE GTV21ESSJ1WW - Part WE4M137

    Drum diagram

    Std High Lmt

    Part #WE4M457

    Replaced by #WE4M137

    Info Icon
    Manufacturer substitution
    This part replaces WE4M457. Substitute parts can look different from the original.
    In Stock
    $102.10
    11% OFF Phone Price : $114.10Info Icon
    Minus Item
    Qty
    Plus Item

GE Electric Dryer GTV21ESSJ1WW FAQs

On the GE GTV21ESSJ1WW electric dryer, most “sensor” replacement questions come down to a door switch or a thermostat-style sensor. We replace the correct part by first confirming the symptom (won’t start, stops when door moves, no heat, or overheating), then following the access steps in the GTV21ESSJ1WW owner’s manual.

Identify which “sensor” you mean

Use the symptom to narrow it down before you open the cabinet:

  • Dryer won’t start at all: often the door switch or push-to-start switch
  • Starts only when you hold the door closed: door switch alignment or failure
  • Tumbles but won’t heat: often a thermostat or heating circuit issue (also check both breakers)
  • Overheats or shuts off mid-cycle: high-limit or safety thermostat, or restricted venting

Quick safety and prep

Before any test or replacement:

  • Unplug the dryer or switch off both breakers (many electric dryers use 2 breakers)
  • Let the heater area cool completely
  • Pull the dryer forward and avoid crushing the vent duct
  • Take a photo of wire locations before disconnecting anything
  • Use a small container for screws so nothing gets lost

Common replacements for this model

These are the most common “sensor/switch” parts customers replace on this GE dryer.

Symptom Likely part Example part for this model
Won’t start when door is closed Door switch Dryer door switch WE4M415
Won’t start unless you press hard Push-to-start switch Dryer push-to-start switch WE4M416
Overheats or trips thermal protection Safety thermostat Dryer safety thermostat WE4M160

Why it matters

Replacing the wrong “sensor” wastes time and can leave the real problem (like a vent restriction or failed switch) unresolved. The manual’s troubleshooting section also points to power supply issues where the dryer can tumble but not heat if only one breaker trips.

Last updated: February 2026

On the GE GTV21ESSJ1WW electric dryer, the thermal fuse is typically mounted on the blower housing inside the cabinet, near where the exhaust air leaves the drum. You usually access it by unplugging the dryer and removing a panel to reach the blower duct area.

Where to look on this model

On most GE electric dryers like model GTV21ESSJ1WW, the thermal fuse is found in the airflow path so it can sense overheating quickly.

Common access points:

  • Behind the lower front access area (if equipped)
  • On or near the blower housing (exhaust fan housing)
  • Close to the exhaust outlet duct connection
  • Sometimes near the lint duct assembly inside the cabinet

For the exact panel removal and cabinet access steps for GTV21ESSJ1WW, follow the GTV21ESSJ1WW installation guide.

Quick safety steps before you open the dryer

Because this is a 240V electric dryer, we always treat it as a high-voltage repair.

  • Unplug the dryer (do not rely on the control being “off”)
  • Turn off the dryer breaker (typically 30 amp)
  • Let the heater area cool completely
  • Wear gloves; cabinet edges can be sharp
  • Never run the dryer with covers removed

Thermal fuse vs. thermostats (what you might see nearby)

These parts are often mounted close together on the blower or heater duct.

Part type What it does Common symptom when failed
Thermal fuse One-time safety cutoff for overheating Dryer will not run (often no motor)
Operating thermostat Cycles heat on and off Poor drying, temperature issues
High-limit thermostat Backup overheat protection Heat cuts out, long dry times

If you are also chasing a “no heat” complaint, the heating circuit parts may be involved, including the mica unit WE11M10001 (heating element assembly).

Why it matters

A blown thermal fuse usually means the dryer overheated from restricted airflow (lint screen, blower duct, or vent). Replacing the fuse without fixing the airflow problem often leads to repeat failure.

Last updated: February 2026

On your GE GTV21ESSJ1WW electric dryer, the model and serial tag (where you will also find the information needed to match the correct replacement part) is typically located inside the dryer door opening, either on the door frame or just inside the door.

What to look for on the label

The label usually includes several identifiers. For ordering parts, we use the model number first, then the serial number if needed.

  • Model number (example: GTV21ESSJ1WW)
  • Serial number (helps confirm production run and compatible parts)
  • Electrical ratings (voltage/amps)
  • Sometimes a manufacturing date code

For the exact label location and how GE describes it for your unit, check the GTV21ESSJ1WW installation guide.

Quick steps to find it

  1. Open the dryer door.
  2. Look along the door opening on the cabinet frame.
  3. Check the inside edge of the door itself.
  4. Wipe dust off the sticker so the characters are readable.
  5. Write the model and serial number down exactly as shown.

Why it matters when ordering parts

Many GE dryers share similar-looking components, but parts like a drum belt, door switch, or timer can vary by model and serial range. Using the correct model number helps ensure the part you order fits and works correctly.

What you have What it’s used for Example on this model page
Model number Identifies the exact dryer design GTV21ESSJ1WW
Serial number Confirms production details Printed on the same tag
Part ID Identifies the specific replacement part listing WE03X29897

Common mix-ups to avoid

  • Don’t use numbers from the control panel or cycle knob; those are not the model.
  • Don’t order by a part’s stamped number alone; match it to the model first.
  • If the tag is damaged, use the GTV21ESSJ1WW owner’s manual to confirm where GE places identification information and what to record.

Last updated: February 2026

Most common symptoms to help you fix your dryers

Choose a symptom to see related dryer repairs.

Main causes: bad gas valve coils, broken heating element, tripped safety thermostat or fuse, bad operating thermostat, c…

Main causes: clogged exhaust system, heating system failure, deposits on moisture sensor, control system failure…

Main causes: clogged exhaust vent, bad motor relay, loose dryer door catch, bad door switch, control system failure, fau…

Main causes: door switch failure, lack of power, broken belt, blown thermal fuse, bad drive motor, control system failur…

Main causes: damaged door strike, worn door catch…

Main causes: lack of electrical power, bad power cord, wiring failure, bad control board, blown thermal fuse, bad door s…

Main causes: bad timer or electronic control board, door switch failure…

Main causes: bad drum support roller, damaged idler pulley, broken blower fan blade, worn drum glide bearing, bad drive …

Most common repair guides to help fix your dryers

These step-by-step repair guides will help you safely fix what’s broken on your dryer.

How to replace an electronic control board in an electric dryer

How to replace an electronic control board in an electric dryer

The electronic control board manages the components and controls the cycle times in your electric dryer. Follow these st…

Repair time and Difficulty

 45 minutes or less
How to replace an igniter in a gas dryer

How to replace an igniter in a gas dryer

The igniter in a gas dryer glows white hot during the to light the gas that heats the air in the dryer. If the dryer air…

Repair time and Difficulty

 60 minutes or less
How to replace a dryer thermistor

How to replace a dryer thermistor

The thermistor senses the air temperature in the dryer. If your dryer overheats or doesn't heat at all, the thermistor …

Repair time and Difficulty

 30 minutes or less

Effective articles & videos to help repair your dryers

Use the advice and tips in these articles and videos to get the most out of your dryer.

How to use your clothes dryer efficiently

How to use your clothes dryer efficiently

Get expert tips on using your dryer efficiently to save energy.…

Are DIY appliance repairs safe?

Are DIY appliance repairs safe?

Find out how to stay safe when repairing your appliances.…

Keeping your smart appliances secure from hackers

Keeping your smart appliances secure from hackers

Find out how to protect your smart appliances from malevolent invasions by hackers.…

Parts & More

Electric Cooktop
Electric Range
Exercise Cycle
Front-Engine Lawn Tractor
Furnace
Gas Line Trimmer
Ice Cream Maker
Lawn Tractor Attachment
Lawn Vacuum
Parts
Refrigerator
Side-By-Side Refrigerator
Washer