Installation guide
 Owner’s manual
 Error Codes



How to change GE side-by-side water filter?
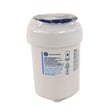
To change the water filter in your GE ZISP420DKCSS side-by-side refrigerator, open the top access panel, slowly twist the old cartridge to the left to remove it, then install the new cartridge by aligning the arrows and turning it to the right until it stops (do not overtighten). See the owner's manual for the exact steps and reset procedure.
Step-by-step: replace the filter cartridge
- Locate the filter behind the top access panel.
- Remove the old filter by slowly turning it left; do not pull down on it.
- Fill the new cartridge with tap water first for better initial flow.
- Align the arrow on the cartridge with the arrow on the holder.
- Insert the top of the cartridge into the holder (do not push it up).
- Turn the cartridge right until it stops; it will raise itself into position.
Flush and reset after installation
After installing the new filter, we recommend clearing air and resetting the indicator.
- Dispense water for about 1-1/2 gallons (about 3 minutes) to clear the system and reduce sputtering.
- Press and hold the RESET WATER FILTER pad for 3 seconds (location varies by model: dispenser or temperature control panel).
| Task | What you should see | Typical time/amount |
|---|---|---|
| Flush the system | Water flow becomes steady | ~1-1/2 gallons (about 3 minutes) |
| Reset the light | Red/amber light clears | Hold 3 seconds |
Which filter does this model use?
For the ZISP420DKCSS, a common replacement is the GE refrigerator water filter MWFP. Match the cartridge style and confirm fit before ordering.
Why it matters
A fresh refrigerator water filter helps maintain water flow to the dispenser and ice maker, and it prevents sputtering and trapped air after a filter change.
Last updated: February 2026
What is the most common problem with a GE refrigerator?
The most common issue we see with GE refrigerators like model ZISP420DKCSS is a cooling complaint (fresh food or freezer too warm). In many cases, it is caused by settings, door sealing/leveling problems, or airflow restrictions that keep the system from stabilizing properly (often needing a full 24 hours after changes). See the owner's manual for the model-specific “Problem Solver” checks.
Most common symptoms and what to check first
- Too warm in fresh food or freezer: confirm temperature controls are set cold enough; avoid frequent/long door openings.
- Door not closing properly: check for packages blocking the door; inspect the door gasket for being out of position.
- Temperature not matching the set point: allow 24 hours after plugging in, changing settings, adding warm food, or after a defrost cycle.
- Long run times: normal after first startup; modern variable-speed compressors can run longer to maintain even temperatures.
- Small or hollow ice cubes: a clogged water filter is a common cause; replace the refrigerator water filter MWFP.
Quick troubleshooting guide (common problems vs. likely causes)
| Problem you notice | Likely cause | What we recommend |
|---|---|---|
| Refrigerator does not operate | Defrost cycle, control set to OFF, no power | Check power and settings; wait about 30 minutes if in defrost |
| Fresh food/freezer too warm | Controls not cold enough, door openings, door left ajar | Adjust controls; reduce openings; confirm doors seal |
| Door won’t close | Package interference, gasket out of position, unit not level | Clear obstructions; reseat gasket; level per install steps |
| Ice cubes are small/hollow | Water filter clogged, RO system interaction | Replace filter; use bypass plug if applicable |
Why it matters
Cooling and temperature stability affect food safety, ice production, and energy use. Simple issues like a door left slightly open, a mispositioned gasket, or not waiting the full 24 hours after adjustments can look like a major failure when the sealed system is actually working normally.
Helpful DIY resources
Last updated: February 2026
How do I find the model number on my ZISP420DKCSS?
For your GE ZISP420DKCSS refrigerator, the model number and serial number are printed on an ID label inside the fresh food (refrigerator) compartment. Look on the lower right-hand side, beneath the climate control drawer.
Where to look (quick checklist)
- Open the fresh food door (not the freezer door)
- Look along the lower right interior wall
- Check beneath the climate control drawer area
- Find a label that lists Model and Serial
- Write both numbers down before ordering parts or scheduling service
What the label typically includes
| Label item | What it’s used for |
|---|---|
| Model number | Matching parts and diagrams to your exact refrigerator |
| Serial number | Identifying production details for service and support |
Tips for reading and using the number
- Copy the model number exactly as shown (letters and numbers)
- Take a clear photo of the label for reference
- Use the model number when selecting items like a water filter or door gasket
- If the label is hard to read, wipe it gently with a damp cloth and dry it
Why it matters
GE built-in and side-by-side refrigerators can have similar-looking doors, dispensers, and control panels, but parts like the main control board, temperature sensor, or water filter head can vary by model. Using the exact model number helps ensure a proper fit and correct function.
For a diagram-style reference to common label locations and model identification info, use the ZISP420DKCSS owner’s manual.
Last updated: March 2026