Installation guide
 Owner’s manual


Can a dryer run on a 110 outlet?
No. The GE GFDN110ED1WW electric dryer requires a dedicated 120/240V (or 120/208V) 30-amp circuit, so it will not run from a standard 110 to 120V household outlet. Using the correct outlet and wiring method is required for safe operation.
What power this dryer needs
Per the installation requirements, this dryer uses a 3-wire or 4-wire power supply connection on a 30-amp circuit.
- Dedicated single-phase circuit: 120/240V or 120/208V, 60 Hz
- Circuit size: 30 amps (time-delay fuses or circuit breakers)
- Connection type: 3-wire or 4-wire (4-wire required for mobile home installations)
- Do not use an extension cord or adapter plug
For the exact wiring diagrams and terminal block instructions, follow the installation guide.
Quick comparison: 110 to 120V outlet vs dryer circuit
| Item | Standard household outlet | Required for GFDN110ED1WW |
|---|---|---|
| Voltage | 110 to 120V | 120/240V (or 120/208V) |
| Typical breaker | 15A or 20A | 30A |
| Plug type | 2 or 3 prong (varies) | 3 or 4 prong dryer cord |
| What it powers | Small appliances | Electric heating element and motor |
Why it matters
An electric dryer needs 240V to power the heating element and enough amperage to run safely without overheating wiring. Plugging into a standard outlet (or using adapters) can create a serious electrical hazard and the dryer will not heat or run correctly.
If you are trying to solve a power or “won’t start” problem
Before replacing parts, we recommend these checks:
- Confirm the dryer is on a dedicated 30A breaker and the breaker is fully reset
- Verify the outlet matches the dryer cord (3-prong or 4-prong) and the cord is secured
- Inspect the terminal block connections for looseness or heat damage
- Make sure the terminal block cover is installed after servicing
- If the dryer has power but will not heat, the heating circuit may need diagnosis (element, thermostats, thermistor)
If you are troubleshooting no-heat symptoms, the dryer heating element WE11M10001 is one of the common components in the heating circuit for this model.
Last updated: February 2026
Is it worth it to fix a dryer?
Yes, it’s worth fixing your GE GFDN110ED1WW dryer when the problem is a common wear item (noise, no heat, long dry times) and the repair cost is well under the price of a comparable replacement. Repairs that restore safe airflow and proper heat are usually the best value.
Quick decision checklist
- The dryer is under 10 years old and the cabinet and drum are in good shape.
- The issue is heat-related (no heat, overheating, long dry times) and you can correct airflow and replace a thermostat or heater part.
- The issue is noise or thumping and you can replace drum support parts.
- The repair is one major part or a small set of wear parts, not multiple major assemblies.
- The dryer has no signs of electrical burning at the cord/terminal area.
Common repairs on this model that are usually worth it
These are typical “high-impact” fixes that often bring performance back quickly:
- Replace a failed heater: dryer heating element WE11M10001
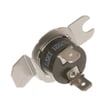
- Fix overheating or cycling issues: dryer high-limit thermostat WE4M137 or dryer safety thermostat WE4M160
- Fix squealing or scraping: dryer drum glide bearing WE03X37319 and dryer drum glide bearing, upper WE03X37320
- Restore airflow if the internal duct is damaged or packed with lint: duct complete trap WE14M119
When replacement makes more sense
Replacement is usually the better call when:
- The dryer needs multiple expensive assemblies (for example, motor plus control board plus drum).
- You have repeated failures tied to poor venting that cannot be corrected.
- The unit has major structural damage (drum damage, cabinet damage) or persistent burning smell from wiring.
Cost and complexity comparison
| Repair type | Typical symptom | DIY difficulty | Usually worth it? |
|---|---|---|---|
| Drum glides/bearings | Squeal, scrape, thump | Medium | Yes |
| Thermostats/thermistors | No heat, overheating, long dry | Medium | Yes |
| Heating element | No heat | Medium | Yes |
| Control board or motor | Won’t start, erratic operation | High | Sometimes |
Why it matters (safety and performance)
For electric dryers like the GFDN110ED1WW, correct installation and venting directly affect drying time and fire risk. We follow the guidance in the installation guide to keep airflow strong (rigid metal ducting, proper exhaust to outdoors) and to avoid unsafe electrical setups (no extension cords or adapter plugs).
Last updated: February 2026
What is the most common problem with a GE dryer?
The most common GE dryer problem is poor drying or no heat, usually caused by restricted airflow (lint buildup or a crushed vent) or a failed heating component. On the GE GFDN110ED1WW, start by confirming the dryer is vented outdoors with proper 4-inch metal ducting as shown in the installation guide.
Most common symptoms and what they usually mean
- Runs but clothes stay damp: clogged vent, blocked exhaust hood damper, or heating issue
- No heat at all: failed heating element, thermostat, or thermistor
- Stops early or cycles oddly: airflow restriction causing overheating, or sensor/thermistor issues
- Squealing or scraping noise: worn drum glides or bearing surfaces
- Won’t start: power supply issue, door switch, or control problem
Quick checks we recommend first (fast, high-impact)
- Clean the lint screen and check for waxy residue from dryer sheets.
- Inspect the vent path for kinks, crushed sections, or heavy lint.
- Verify the outside exhaust hood damper opens and closes freely.
- Confirm you are using rigid metal 4-inch ducting (plastic flex duct is unsafe and restricts airflow).
- If the drum is noisy, check wear items at the front of the drum.
Parts that commonly fix these issues on this model
If airflow is good and the dryer still will not heat or is overheating, these model-matched parts are common suspects:
| Symptom | Common part to check | Example part for GFDN110ED1WW |
|---|---|---|
| No heat or weak heat | Heating element | Dryer heating element WE11M10001 |
| Overheats, shuts down, or heat is erratic | High-limit thermostat | Dryer high-limit thermostat WE4M137 |
| Squeal/scrape at drum front | Drum glide | Dryer drum glide bearing WE03X37319 |
Why it matters
Airflow problems do more than slow drying; they also drive higher temperatures inside the heater housing and drum area. That extra heat shortens the life of parts like the heating element, thermostats, and thermistors, and it can also trigger nuisance shutdowns.
Last updated: February 2026