 Owner’s manual
 Error Codes



How many cubic feet is my Maytag dryer?
We can’t confirm the exact drum capacity (cubic feet) for Maytag model MDET236AYW from the model-specific information available here. The most reliable way is to check the specifications section in your MDET236AYW use & care manual or the model/serial tag inside the door opening.
How to find the capacity on your exact dryer
Capacity is usually listed as “drum capacity” or “capacity” in cubic feet.
- Check the specifications page in the MDET236AYW use & care manual
- Look for a model/serial label inside the dryer door opening (capacity is sometimes listed there)
- If the label does not list capacity, use the manual’s spec section as the source of truth
- Avoid using capacity from “similar-looking” Maytag dryers; model families can vary
If you can’t find it in the manual
If the manual doesn’t state cubic feet for MDET236AYW, you can still estimate load size safely by how the drum is filled.
- Fill the drum no more than about 3/4 full for most loads
- Leave space for items to tumble freely (improves drying and reduces wrinkles)
- For bulky items (blankets/comforters), dry one at a time and reposition during the cycle
Why it matters
Knowing capacity helps prevent overloading, which can cause longer dry times, uneven drying, and extra wear on the belt, rollers, and idler.
| What you’re trying to do | Best way for MDET236AYW |
|---|---|
| Get the exact cubic feet | Use the specs in the MDET236AYW use & care manual |
| Improve drying performance without the number | Don’t overload; keep venting clear; clean lint screen |
Last updated: January 2026
Where is the moisture sensor located on my Maytag dryer?
On the Maytag MDET236AYW dryer, the exact moisture sensor location is not identified in the model’s use and care information; Maytag used different sensor layouts across similar dryers. In most sensor-dry designs, the sensor is inside the drum area where clothes can touch it; confirm the exact spot using the MDET236AYW use & care manual.
Where to look first (common locations on Maytag sensor dryers)
If your MDET236AYW has Sensor cycles, check these typical moisture-sensing areas:
- Just inside the door opening on the front bulkhead (front inside panel)
- Near the lint screen housing area (varies by design)
- Low in the drum opening where damp clothes regularly brush past
- Behind the front panel on some designs (requires disassembly)
What it usually looks like
Moisture sensors are commonly simple metal contacts that detect moisture through the load.
- Two metal strips or bars close together
- Mounted so clothing rubs across them during tumbling
- Connected by wires to the control system
Quick checks before assuming the sensor is “bad”
Sensor-dry complaints are often caused by residue or airflow issues.
- Clean the lint screen and confirm strong airflow at the outside vent hood
- Wipe any metal sensor contacts you find with rubbing alcohol to remove dryer-sheet residue
- Avoid heavy dryer-sheet use for a few loads and re-test Sensor cycles
- If drying is slow, inspect and clean the exhaust ducting (restricted venting can mimic sensor problems)
| What you notice | More likely cause | First step |
|---|---|---|
| Stops early, clothes still damp | Sensor contacts coated | Clean contacts; reduce dryer sheets |
| Runs long on Sensor cycles | Vent restriction | Check lint screen, duct, outside hood |
| No heat at all | Heating circuit issue | Test heat components and power supply |
Why it matters
The moisture sensor helps Sensor cycles end at the right time; when contacts are coated or airflow is restricted, you can get damp loads, overdrying, or longer cycle times.
Last updated: January 2026
What is the average lifespan of a Maytag dryer?
We can’t confirm an “average lifespan” for the Maytag MDET236AYW from model-specific documentation because the use & care information focuses on safe operation and maintenance, not expected service life. In practice, lifespan varies widely based on venting, lint control, and how quickly wear issues are corrected.
What we can confirm for MDET236AYW (maintenance that supports longer life)
The MDET236AYW use & care guidance emphasizes airflow and lint control. See the maintenance and exhaust sections in the MDET236AYW use & care manual.
- Clean the lint filter before or after each load
- Keep the area around the exhaust opening free of lint, dust, and dirt
- Inspect and clean the dryer exhaust system about once a year
- Make sure the outside exhaust hood opens and closes freely
- Avoid overloading; overloading restricts tumbling and can cause uneven drying
Why dryers “wear out” sooner (most common contributors)
Even when the motor and drum are still good, restricted airflow can cause slow drying and extra heat stress.
- Crushed, clogged, or overly long vent runs
- Using non-metal or thin foil ducting that traps lint
- Lint buildup in the exhaust duct or outside hood
- Loads that are too large (restricted tumbling)
- Loads that are too small to tumble well (can reduce drying efficiency)
Quick symptom guide (what to check first)
| Symptom | Most likely first check | Why it matters |
|---|---|---|
| Drying takes too long | Lint filter and venting | Poor airflow is a top cause of slow drying |
| No heat | Heat setting selected, power/gas supply | Basic setup issues can mimic failures |
| Dryer stops heating | Overheating protection | Vent restriction can trigger safety cutoffs |
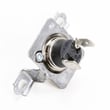
If you’re troubleshooting “no heat” or repeated shutoffs, a failed thermal fuse is one possible cause; for this model, see dryer thermal fuse, 352-degree f WP40113801.
Why it matters
For the MDET236AYW, the manual’s exhaust tips make it clear that good venting is essential. Keeping airflow strong helps drying performance and reduces overheating that can shorten component life.
Last updated: January 2026
What is the most common problem with the Maytag dryer?
For the Maytag MDET236AYW, the most common dryer complaints we see are no heat, won’t start, and long dry times. A very common root cause is restricted airflow (lint buildup or a crushed vent), which can overheat the dryer and open a safety device such as a thermal fuse.
Quick checks first (fastest fixes)
- Clean the lint screen before every load; replace it if it’s torn or warped.
- Confirm strong airflow at the outside vent hood while the dryer runs.
- Make sure the door fully closes and the control dial is pushed in to start.
- Check the home breaker or fuses (many electric dryers can run but not heat if one leg is tripped).
- Avoid overloading; bulky loads dry unevenly and take longer.
Most common “no heat” causes on this model
Airflow problems are the biggest driver of heating issues. If the exhaust is restricted, the dryer can run hot enough to open a safety device and stop heat.
Common parts involved:
- Dryer thermal fuse, 352-degree f WP40113801
- Heat element WPY503978
- Limit thermostat WPW10116735
- Dryer operating thermostat WP37001136
Symptoms-to-cause guide
| Symptom | Most likely cause | What to check |
|---|---|---|
| Runs but no heat | Open safety device or heater circuit issue | Venting, thermal fuse, thermostats, heating element |
| Won’t start | Power supply or start/door circuit issue | Breaker/fuse, door switch engagement, control dial pushed in |
| Takes too long to dry | Restricted exhaust airflow | Lint screen, ducting, outside hood flap |
| Squealing/thumping | Wear in drum support system | Belt, idler, drum support roller |
Why it matters
Restricted venting does not just slow drying; it can overheat the dryer and repeatedly open safety components. Keeping the lint screen, ducting, and vent hood clear improves drying performance and helps prevent repeat failures.
Model-specific reference
For operating tips, exhaust guidance, and the troubleshooting chart (including notes like Damp Dry providing 20 minutes of tumbling followed by 10 minutes of cool-down on select models), use the MDET236AYW dryer manual.
Last updated: January 2026





