Get free shipping on your order, with any water filter subscription. Find my filter

Open Hamburger Menu
Sears Parts Direct
Tips to find your model number

Kenmore 41793042300 dryer Parts

Here are the diagrams and repair parts for Kenmore 41793042300 dryer, as well as links to manuals and error code tables, if available.

Kenmore 41793042300 dryer
By Schematic
By Part
SELECT DIAGRAM
?

This is the number corresponding to the part on the diagram / schematic

Browse Parts for 41793042300 Dryer

  • Dryer Wire Retainer Clip for Kenmore 41793042300 - Part 131063700

    Front panel/lint filter diagram

    Dryer Wire Retainer Clip

    Part #131063700

    The manufacturer no longer makes this part, and there's no substitute part

  • Switch-opt for Kenmore 41793042300 - Part 134053600

    Control/top panel diagram

    Switch-opt

    Part #134053600

    The manufacturer no longer makes this part, and there's no substitute part

  • Dryer Moisture Sensor Control Board for Kenmore 41793042300 - Part 134216300

    Control/top panel diagram

    Dryer Moisture Sensor Control Board

    Part #134216300

    The manufacturer no longer makes this part, and there's no substitute part

  • Rack for Kenmore 41793042300 - Part 134121200

    Cabinet/drum diagram

    Rack

    Part #134121200

    The manufacturer no longer makes this part, and there's no substitute part

  • Rotary Knob for Kenmore 41793042300 - Part 131689300

    Control/top panel diagram

    Rotary Knob

    Part #131689300

    The manufacturer no longer makes this part, and there's no substitute part

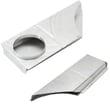
  • Cover for Kenmore 41793042300 - Part 131363200

    Cabinet/drum diagram

    Cover

    Part #131363200

    The manufacturer no longer makes this part, and there's no substitute part

  • Dryer Wire Harness for Kenmore 41793042300 - Part 134006600

    Control/top panel diagram

    Dryer Wire Harness

    Part #134006600

    The manufacturer no longer makes this part, and there's no substitute part

  • Temperature Switch for Kenmore 41793042300 - Part 131777901

    Control/top panel diagram

    Temperature Switch

    Part #131777901

    The manufacturer no longer makes this part, and there's no substitute part

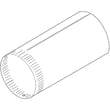
  • Tube for Kenmore 41793042300 - Part 134200801

    Burner diagram

    Tube

    Part #134200801

    The manufacturer no longer makes this part, and there's no substitute part

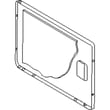
  • Dryer Door Outer Panel for Kenmore 41793042300 - Part 131789303

    Front panel/lint filter diagram

    Dryer Door Outer Panel

    Part #131789303

    The manufacturer no longer makes this part, and there's no substitute part

Kenmore Dryer 41793042300 FAQs

For Kenmore dryer model 41793042300, the model number and serial number are printed on an identification plate on the left side of the door opening. Use that exact model number when ordering parts, checking wiring diagrams, or confirming features.

Where to look on your Kenmore dryer

Check these common ID-plate locations first (start with the door opening):

  • Left side of the door opening (most common on this Kenmore 417-series platform)
  • Inside the door opening on the cabinet frame
  • Back panel (less common)
  • Behind the lint screen housing (on some designs)

If the label is worn, wipe it gently with a damp cloth and read it under a flashlight.

What the model number looks like (and why it matters)

Kenmore model numbers are usually all digits. For this dryer family, you will often see a prefix like 417. on the ID plate, followed by the full model.

Quick ID checklist

  • Copy the full model number exactly as shown (all digits)
  • Copy the serial number as shown (helps with production date and revisions)
  • Take a clear photo of the plate for future reference
  • Use the model number to match the correct belt, drum bearing, door switch, timer, and other parts

Model number vs. serial number

Item What it tells you Used for
Model number Exact dryer design and parts fit Parts lookup, diagrams, manuals
Serial number Production run details Service history, version changes

Why it matters

Using the exact model number prevents ordering the wrong Kenmore dryer parts, especially for wear items like the drum belt, drum glides, and switches that can vary by revision.

For additional identification details and record-keeping, use the 41793042300 owner’s manual.

Last updated: February 2026

To remove the main panels on a Kenmore dryer model 41793042300, we start by disconnecting power, then release the top and front panel fasteners so the cabinet can open up for service. Use the disassembly steps and screw locations shown in the 41793042300 owner's manual.

Safety first (before you touch any panel)

  • Unplug the dryer (or switch off the breaker) to prevent electric shock.
  • If you have a gas dryer, shut off the gas supply valve before opening the cabinet.
  • Wear cut-resistant gloves; cabinet edges can be sharp.
  • Keep screws grouped by location so reassembly is straightforward.

Typical panel removal steps (top and front)

Most Kenmore 417-series dryers open similarly:

  • Remove the lint screen (if it’s in the door opening) and any screws near the lint screen housing.
  • Release the top: insert a flat-blade screwdriver or putty knife under the front edge of the top to pop the spring clips, then lift the top.
  • Remove the control console screws (if the console blocks the top or front panel screws) and tilt the console up/back.
  • Remove the front panel screws (usually inside the cabinet near the top corners).
  • Disconnect the door switch wiring harness before fully removing the front panel.
  • Lift the front panel up and off the lower retaining tabs.

What you’ll see inside (and what it helps you access)

What you’re trying to fix Panels you usually remove Common related parts for this model
Drum not turning Top + front Belt 134503600
Squealing or thumping Top + front Dryer drum bearing 131825900, dryer drum glide 137513300
Door won’t stay closed Front Frigidaire dryer door catch 131658800, strike 5303207102

Why it matters

Removing the correct panel the correct way prevents bent cabinet metal, broken clips, and pinched wiring. It also makes it easier to reach high-wear items like the drum belt, drum bearing, and door switch without creating new problems.

Last updated: February 2026

Kenmore Elite dryers typically do not have a dedicated reset button. For Kenmore model 41793042300, the practical reset is a power reset: unplug the dryer (or switch the breaker OFF) for about 5 minutes, restore power, then try starting a cycle using the normal start procedure in the 41793042300 owner's manual.

How to reset and restart safely

  • Turn the cycle selector to OFF.
  • Unplug the dryer (or turn the circuit breaker OFF).
  • Wait 5 minutes.
  • Restore power.
  • Close the door, then turn the START knob clockwise to ON, hold 1 to 2 seconds, and release.

If it still will not start (quick checks)

From the common “won’t start” checklist for this style of Kenmore dryer:

  • Confirm the outlet has power and the plug fits tightly.
  • Check the house fuse(s) or breaker; reset/replace as needed.
  • Make sure the dryer is on a separate circuit (overload can trip the breaker).
  • Confirm the door is fully closed; a bad door switch can prevent starting.
  • If the drum will not turn and you hear the motor but no movement, inspect the belt.

Parts that commonly relate to “won’t start” symptoms

Symptom Common related part Example part for this model
Dryer won’t start when door closes Door switch or latch system Drive drum switch 134813601
Motor runs but drum does not tumble Drum belt Belt 134503600
Intermittent start or no response Start switch Start switch 134398300

Why it matters

A power reset clears a stuck control state and forces a fresh start sequence. If the dryer still will not start after a reset, the issue is usually power supply, door-switch safety circuit, or a failed start component, not a “missing reset button.”

Last updated: February 2026
Most common symptoms to help you fix your dryers

Choose a symptom to see related dryer repairs.

Main causes: bad gas valve coils, broken heating element, tripped safety thermostat or fuse, bad operating thermostat, c…

Main causes: clogged exhaust system, heating system failure, deposits on moisture sensor, control system failure…

Main causes: clogged exhaust vent, bad motor relay, loose dryer door catch, bad door switch, control system failure, fau…

Main causes: door switch failure, lack of power, broken belt, blown thermal fuse, bad drive motor, control system failur…

Main causes: damaged door strike, worn door catch…

Main causes: lack of electrical power, bad power cord, wiring failure, bad control board, blown thermal fuse, bad door s…

Main causes: bad timer or electronic control board, door switch failure…

Main causes: bad drum support roller, damaged idler pulley, broken blower fan blade, worn drum glide bearing, bad drive …

Most common repair guides to help fix your dryers

These step-by-step repair guides will help you safely fix what’s broken on your dryer.

How to replace an electronic control board in an electric dryer

How to replace an electronic control board in an electric dryer

The electronic control board manages the components and controls the cycle times in your electric dryer. Follow these st…

Repair time and Difficulty

 45 minutes or less
How to replace an igniter in a gas dryer

How to replace an igniter in a gas dryer

The igniter in a gas dryer glows white hot during the to light the gas that heats the air in the dryer. If the dryer air…

Repair time and Difficulty

 60 minutes or less
How to replace a dryer thermistor

How to replace a dryer thermistor

The thermistor senses the air temperature in the dryer. If your dryer overheats or doesn't heat at all, the thermistor …

Repair time and Difficulty

 30 minutes or less

Effective articles & videos to help repair your dryers

Use the advice and tips in these articles and videos to get the most out of your dryer.

How to use your clothes dryer efficiently

How to use your clothes dryer efficiently

Get expert tips on using your dryer efficiently to save energy.…

Are DIY appliance repairs safe?

Are DIY appliance repairs safe?

Find out how to stay safe when repairing your appliances.…

Keeping your smart appliances secure from hackers

Keeping your smart appliances secure from hackers

Find out how to protect your smart appliances from malevolent invasions by hackers.…

Parts & More

Bottom-Mount Refrigerator
Dishwasher
Dryer
Electric Range
Gas Snowblower
Gas Walk-Behind Mower
Line Trimmer
Others
Parts
Range
Refrigerator
Riding Mowers & Tractors
Snowblower
Vacuum Cleaner
Washer