 Owner’s manual


How to identify a Kenmore washer model?
Your Kenmore washer model number is printed on the appliance’s model and serial tag. For Kenmore model 11047531700, you’ll typically find that tag around the door opening on a front-load washer, under the lid on a top-load washer, or on the back panel near the power cord.
Where to look on Kenmore washers
Check these common tag locations first:
- Front-load washers: inside the door opening (around the frame) or just behind the door
- Top-load washers: under the lid (along the rim of the tub opening)
- All styles: rear panel near the power cord entry, or along a side edge of the cabinet
- Sometimes: behind the lower access panel (if your model has one)
What the model number looks like
Kenmore model numbers are often 11 characters or longer. Many Kenmore laundry models start with 110. followed by more digits (for example, 11047531700).
| What you see on the tag | What it means | Why it matters |
|---|---|---|
| Model number (example: 11047531700) | Identifies the exact washer design | Ensures parts match your washer |
| Serial number | Identifies the production unit | Helps with service history and age |
| Electrical ratings | Voltage/amps info | Useful for safe servicing |
Why it matters
We use the model number to match the correct Kenmore washer parts (like a door boot, drive belt, or electronic control) because small design changes can affect fit and wiring.
Helpful tip for parts lookup
When you write the model number down, copy it exactly (all digits, no spaces). Then use it with the 11047531700 owner’s manual to confirm features and maintenance steps before ordering parts.
Last updated: February 2026
What is the average lifespan of a Kenmore washer?
A Kenmore washer typically lasts 10 to 15 years. For your Kenmore 11047531700, routine care (proper loading, periodic cleaning, and keeping water flow strong) helps you reach the high end of that range and reduces wear on common maintenance items like belts and filters.
What affects washer lifespan most
- Overloading: strains the drive system, tub support, and bearings
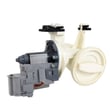
- Poor drainage or restricted flow: increases run time and stress on the pump and controls
- Skipped cleaning: leads to odor, residue buildup, and seal issues
- Unlevel installation: increases vibration and can shorten shock absorber life
- Hard water: accelerates mineral buildup in hoses and internal waterways
Maintenance that extends life (practical checklist)
Use the care steps in the 11047531700 owner's manual as your baseline, then keep these habits consistent:
- Clean the door seal and wipe moisture after laundry day
- Run a periodic cleaning cycle (hot wash with a washer cleaner) to reduce residue
- Check inlet hoses for bulges, cracking, or leaks; replace as needed
- Keep the washer level and stable; re-check leveling legs after moves
- Empty pockets and use the right detergent amount to prevent excess suds
Parts that commonly wear over time
The manual notes that some items are considered normal wear parts (for example, filters and belts). For this model, these are common examples:
| Wear item | What you may notice | Example part for this model |
|---|---|---|
| Drive belt | Slipping, squealing, weak spin | Washer drive belt WP8540101 |
| Filter | Drain issues, debris buildup | Filter WPW10730972 |
| Door boot | Leaks at the door, mildew odor | Washer door boot WPW10111435 |
Why it matters
A washer that is cleaned, leveled, and not overloaded runs with less vibration and shorter cycle stress. That directly reduces strain on the drive belt, door boot, and electronic control components, which helps the washer stay reliable longer.
Last updated: February 2026
How to hard reset Kenmore washer?
To hard reset your Kenmore washer model 11047531700, unplug it for 60 seconds, then plug it back in and try starting a cycle again. This power reset clears minor control glitches; for a stuck cycle, use the STOP and START steps in the 11047531700 owner's manual.
Quick reset options (from easiest to strongest)
- Power reset: Unplug washer for 60 seconds, then reconnect power.
- Cancel the current cycle: Select STOP twice to power down and unlock the door (it may drain first if water is hot/high).
- Restart with a new cycle: Select STOP once, choose a new cycle and options, then select and hold START for about 1 second.
- Pause and resume: Select STOP to pause; select and hold START for about 1 second to continue.
- Manual drain (if it will not unlock): Select STOP, choose RINSE/DRAIN & SPIN, turn 2ND RINSE off, then hold START about 1 second to begin draining.
What to expect after you reset
| What you do | What the washer does | What it means |
|---|---|---|
| Unplug for 60 seconds | Control reboots | Fixes many “frozen panel” issues |
| STOP twice | Powers down, door unlocks (after draining if needed) | Cancels a cycle safely |
| Hold START 1 second | Starts or resumes | Confirms the control accepted the command |
If the reset does not fix the problem
- Check whether Controls locked is on; a locked control panel can look like a failure.
- If the washer repeatedly stops mid-cycle, note any displayed code and use the Kenmore 110 high efficiency front load washer error codes guide.
- If the door will not unlock, run the manual drain steps above before troubleshooting parts.
- If you have repeated drain issues, inspect the drain path and consider checking the filter WPW10730972 for blockage (if your configuration uses it in the drain system).
Why it matters
A hard reset and proper cycle cancel prevent repeated start attempts that can leave the door locked, keep water in the tub, or trigger more error codes. Using the STOP and START sequence also confirms whether the user interface is responding normally.
Last updated: February 2026
Is it worth repairing a Kenmore washing machine?
Yes, repairing a Kenmore washer is worth it when the fix restores reliable operation for less than the cost of replacing the machine, especially for common wear items like belts, door seals, and drain components. For Kenmore model 11047531700, we start by confirming the symptom and checking the troubleshooting guidance in the 11047531700 owner's manual.
A practical way to decide (repair vs. replace)
Use these checkpoints to make a clear call:
- Repair cost vs. replacement cost: If the total repair (parts + labor) is clearly lower than a comparable new washer, repair usually wins.
- What failed: Wear items (belt, door boot, clamps, hoses) are typically straightforward; major tub or control failures can be higher cost.
- How the washer has been maintained: Regular cleaning and correct loading often mean a longer remaining life.
- Downtime and convenience: If you need a fast fix, in-stock parts can shorten the timeline.
- Safety and skill level: Follow the manual’s safety guidance; do not service moving components or attempt repairs beyond your skill.
Common repairs that are often “worth it” on this model
These are frequent front-load washer fixes that can restore performance:
- Drain or pump restriction cleanup; check the filter WPW10730972
- Leaks at the door opening; replace the washer door boot WPW10111435
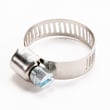
- Door boot clamp issues; replace the washer door boot spring clamp WP8540108
- No spin or squeal; replace the washer drive belt WP8540101
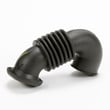
- Dispenser leaks or poor dispensing; inspect the washer dispenser hose W11366227
Quick cost-to-impact guide
| Repair type | Typical impact | Usually worth it when… |
|---|---|---|
| Belt, boot, clamps, hoses | Restores basic operation, stops leaks/noise | Parts are moderate cost and the washer is otherwise solid |
| Control board or user interface | Fixes dead unit or erratic operation | Diagnosis is confirmed and the rest of the machine is in good shape |
| Tub or basket related | Addresses severe noise/leaks | Total cost stays well below replacement |
Why it matters
A targeted repair can extend the life of your Kenmore 11047531700 for years. The manual also notes that items like filters and belts are normal wear components, so replacing them is a normal part of ownership, not a sign the washer is “done.”
Last updated: February 2026
Why is my Kenmore washer leaking from the bottom?
For Kenmore washer model 11047531700, a bottom leak is usually caused by a loose or damaged fill hose connection, a drain hose installation issue, oversudsing from non-HE detergent, or water dripping when the door is opened mid-cycle. Use the checks in the 11047531700 owner's manual to pinpoint the source.
Quick checks that fix most bottom leaks
- Tighten fill hoses at the washer and at the wall valves; then run water and recheck.
- Confirm hose gaskets are seated in both ends of each fill hose (a twisted gasket can drip down the cabinet).
- Inspect the drain hose routing; it should be secured to the standpipe or laundry tub and not forced straight down.
- Use only HE detergent; non-HE detergent can oversuds and leak from the rear, then run down to the base.
- Avoid opening the door after the cycle starts; water can drip off the inside of the door and look like a bottom leak.
Where the leak usually shows up (and what it points to)
| What you see | Most likely cause | What to do first |
|---|---|---|
| Water appears during fill | Fill hose loose or gasket mis-seated | Tighten hoses; reseat gaskets |
| Water appears during drain/spin | Drain hose not secured or household drain backing up | Reposition/secure drain hose; check standpipe/tub drain |
| Sudsy water, leak from rear | Too much detergent or non-HE detergent | Switch to HE; reduce dose; run a rinse/drain |
| Drips right after opening door | Normal drip from door interior | Keep door closed once cycle starts |
Parts that commonly relate to leaks on this model
If you find the leak is coming from the door area (front lower edge), the door seal and clamp are common wear items:
- Washer door boot WPW10111435 (torn, warped, or not sealing)
- Washer door boot spring clamp WP8540108 (loose or not seated evenly)
Why it matters
A “bottom leak” often travels along the cabinet base before it shows up on the floor, so the real source can be higher (fill hoses, door boot, or drain hose). Finding the exact point of first drip prevents repeat leaks and protects flooring.
Last updated: February 2026





