Installation guide
 Owner’s manual




How do I reset my Frigidaire dryer FER641FS0?
To reset your Frigidaire dryer model FER641FS0, unplug it (or switch the breaker off) for about 2 to 5 minutes, then restore power and try starting a cycle again. This clears many control glitches and is the first step after a no-start or error condition.
Reset steps (safe and effective)
- Turn the cycle selector to OFF.
- Unplug the dryer from the wall outlet (or turn OFF the dryer breaker).
- Wait 2 to 5 minutes.
- Restore power.
- Close the door fully, then press and hold Start for about 2 seconds (or turn the START knob to ON, hold 1 to 2 seconds, and release).
- If the dryer was running, let the drum stop completely before reaching inside.
If the dryer still will not start after the reset
A reset will not fix a hard stop caused by power supply issues, a door switch problem, or an open safety device.
- Confirm the plug fits tightly in the outlet.
- Check the house fuse(s) or circuit breaker; many dryers use a dedicated circuit.
- Make sure the cycle selector is not set to OFF.
- Verify the door is latching; a worn catch can prevent starting.
- If the dryer stopped and now will not run, a tripped thermal limiter is a common cause.
| Symptom after reset | Most common cause | What to check next |
|---|---|---|
| No lights, no response | No power | Breaker, outlet, cord connection |
| Drum turns, no heat | Heating circuit issue | Fuses, airflow, heater components |
| Won’t start unless door is pushed | Door latch issue | Door catch and strike alignment |
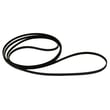
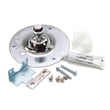
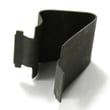
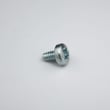
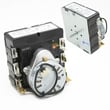
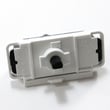
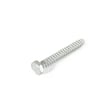
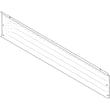
Parts that commonly relate to “won’t start” or “stopped mid-cycle”
Why it matters
Resetting restores normal operation after a brief power interruption or control hiccup, but it also helps you quickly separate a simple glitch from a real issue like a blown fuse, poor airflow, or a tripped thermal safety device.
For model-specific operating steps and control behavior, follow the FER641FS0 owner’s manual.
Last updated: January 2026
How much does it cost to replace a heating element in a Frigidaire dryer?
For a Frigidaire FER641FS0 dryer, replacing the heating element typically costs about $200 to $400 total (part plus labor). If you do the repair yourself, the heating element assembly is commonly about $100 to $200, and a no-heat issue can also be caused by a thermal limiter or airflow problem.
What makes up the total cost
- Heating element part: often the biggest portion of the DIY cost
- Labor: commonly 1 to 2 hours depending on access and condition of fasteners
- Related safety parts: thermal limiter or high-limit thermostat may need replacement if they opened from overheating
- Vent cleaning: restricted venting can overheat the heater circuit and shorten part life
Parts that commonly relate to “no heat” on this model
If your FER641FS0 runs but will not heat, we check these items first:
- House power supply (many electric dryers need two fuses/breakers; one can trip and the drum still turns)
- Venting and lint buildup (restricted airflow increases drying time and overheating risk)
- Thermal safety devices (thermal limiter, high-limit thermostat)
- Heating element assembly
Helpful model references: FER641FS0 owner's manual, FER641FS0 installation guide.
Quick cost comparison
| Repair path | Typical out-of-pocket cost | Best when |
|---|---|---|
| DIY heating element only | $100 to $200 | Dryer heats intermittently or element tests open |
| DIY with safety parts | $120 to $300 | Overheating, burnt smell, repeated no-heat |
| Service call (part + labor) | $200 to $400 | You want diagnosis and installation handled |
Why it matters
A dryer that “runs but won’t heat” is often a power or airflow issue, not just the heater. The installation instructions warn that lint and duct restrictions can clog ductwork, create a fire hazard, and increase drying times; correct vent length and bends also matter for safe operation.
Last updated: January 2026
Is 7.4 cubic feet a large dryer?
Yes. A 7.4 cubic foot dryer is considered large capacity; it typically handles bigger mixed loads and bulky items (like comforters) with fewer cycles. For your Frigidaire FER641FS0 dryer, load size still depends on fabric type and airflow, so proper venting matters.
What “large capacity” means in real use
Most standard-capacity dryers are roughly 5.0 to 7.0 cu. ft.; 7.4 cu. ft. sits in the large-capacity range.
Typical benefits:
- Fewer loads for families and heavy laundry days
- More room for bulky items to tumble (better drying when airflow is good)
- Less wrinkling when you avoid overpacking
- Better efficiency when loads are sized correctly
How to load a large-capacity dryer for best results
Even with a large drum, overloading can increase dry time and wear on the drum belt, idler, and bearings.
We recommend:
- Fill the drum loosely; items should tumble freely
- Dry heavy items (towels, jeans) separately from lightweight items
- Clean the lint screen every load
- Use timed dry for very bulky loads if auto cycles end too soon
- Keep the exhaust duct as short and straight as possible
Venting and airflow: the hidden factor behind “capacity”
Your installation instructions emphasize that lint buildup and restrictive ducting can increase drying times and create a fire hazard. The guide also provides maximum vent-length limits based on duct type and number of 90° turns. Use the venting charts and requirements in the FER641FS0 installation guide to match your setup.
Quick venting comparison (typical guidance)
| Duct type | Best use | Drying performance |
|---|---|---|
| Rigid metal duct | Most installations | Best airflow, shortest dry times |
| Flexible metal duct | Only when needed | More restriction, longer dry times |
Why it matters
A “large” 7.4 cu. ft. drum only performs like a large dryer when airflow is strong. Good venting and routine lint removal help your FER641FS0 dry faster, run cooler, and reduce strain on key parts like the drum belt and heating system.
Last updated: January 2026