Installation guide




How to find the thermal fuse on a Maytag dryer?
On the Maytag commercial dryer model MDE17PDAYW1, the thermal fuse (thermal cut-off) is typically mounted on the blower housing or exhaust duct inside the cabinet. We access it by disconnecting power, opening the cabinet, and following the airflow path from the lint screen area toward the blower and vent outlet.
Where to look first
On dryers like MDE17PDAYW1, we usually find the thermal fuse in one of these spots:
- On the blower housing near where the vent duct exits the dryer
- On the exhaust/heat duct close to the blower
- Near the lint chute area (follow the airflow path from the lint screen)
- Close to the high-limit thermostat on the heater or ducting (design varies)
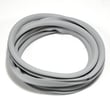
If you are already servicing airflow parts, inspect sealing surfaces too; a damaged seal can contribute to lint leaks and restrictions (example: dryer lint chute seal WP697813).
Safe access steps (typical cabinet access)
Use the safety and access guidance in the installation guide as your baseline, then follow these common service steps:
- Disconnect electrical power at the plug or breaker
- Remove the lint screen; take out any screws that secure the lint screen housing (if present)
- Remove the front panel (often screws along the bottom edge and/or inside the door opening)
- If needed for access, remove the drum to fully expose the blower housing and ducting
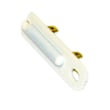
- Look for a small, flat, two-wire safety device mounted with 2 screws (the thermal fuse)
How to confirm you found the thermal fuse
A thermal fuse is a one-time safety device; when it opens, the dryer often will not heat and may not run (wiring varies).
| Check | What to do | What it means |
|---|---|---|
| Visual check | Identify a small device with 2 terminals on the blower/duct | Common thermal fuse appearance |
| Continuity test | Test across terminals with a multimeter (power disconnected) | No continuity means the fuse is blown |
| Airflow check | Inspect venting and lint buildup | Restrictions commonly cause repeat failures |
For the testing method, follow how to tell if a fuse is blown.
Why it matters
The thermal fuse prevents overheating. If you replace a blown fuse without correcting the airflow problem (blocked vent, lint buildup, crushed duct), the replacement fuse can open again quickly.
Last updated: February 2026
Where can I get Maytag replacement parts?
You can get replacement parts for your Maytag commercial dryer model MDE17PDAYW1 directly from the parts list for this model, which helps ensure you match the correct fit and electrical ratings. For installation and maintenance details that affect part selection, use the installation guide.
Best way to buy the right part for MDE17PDAYW1
When you shop by model number, you avoid common mix-ups like ordering the wrong heating circuit part or a similar-looking drum support.
- Match the full model number MDE17PDAYW1 before ordering
- Compare the part name and part ID, not just the photo
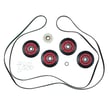
- Replace wear items in sets when recommended (rollers, seals, belt components)
- For heat or no-heat issues, confirm airflow and safety devices before replacing parts
- Keep your serial number handy for service history and configuration
Common replacement parts customers order for this dryer
These are frequently replaced items for noise, no-heat, or door issues on commercial dryers:
| Symptom | Common part to check | Example part on this model page |
|---|---|---|
| Squealing, thumping, rumbling | Drum support rollers and related wear parts | Support WPW10314173 |
| No heat or overheating | Thermal cut-off and high-limit thermostat | Dryer thermal cut-off fuse kit 279973, dryer high-limit thermostat WP3391914 |
| Door won’t stay closed | Door latch/catch | Catch 279570 |
| Long dry times | Lint screen and airflow path | Screen W10120998 |
Why it matters (especially for commercial dryers)
Commercial dryers run more cycles, so correct parts and good airflow are critical. The installation instructions also call out vent maintenance; lint should be removed from the exhaust vent about every 2 years (or more often with heavy use), which helps prevent overheating and repeat fuse failures.
Last updated: February 2026
Why is my Maytag dryer leaking water from the bottom?
Water under a Maytag MDE17PDAYW1 commercial dryer is almost always condensation or an external water source, not the dryer “making” water. The most common causes are a restricted exhaust vent that traps humid air, a cold vent run that sweats, or a spill or drain issue near the dryer.
Quick checks that fix most leaks
- Clean the lint screen and confirm it seats correctly in the housing.
- Inspect the entire vent path for lint buildup, crushed flex duct, or a stuck damper.
- Make sure the vent terminates outdoors and is not blocked by a screen, snow, or debris.
- Check for water sources above or beside the dryer (washer overflow, utility sink splash, pipe sweating).
- Verify the dryer is level so any condensation does not pool toward the front or one corner.
What to inspect on the dryer
Even though the installation instructions focus on vent safety and periodic vent cleaning, that guidance directly applies to water issues because poor airflow increases condensation.
Airflow and lint sealing points to check:
- Lint screen area and housing for gaps or heavy lint buildup
- Blower and ducting for lint accumulation
- Door seal area for excessive moist air leakage
If you find damaged sealing surfaces, a worn lint chute seal can let humid air escape and condense inside the cabinet. For this model, the dryer lint chute seal WP697813 is a common sealing part to inspect.
Common causes and what you will see
| What you notice | Most likely cause | What to do |
|---|---|---|
| Puddle after a long cycle | Restricted vent causing condensation | Clean/shorten vent run; clear outside hood |
| Water only in cold weather | Vent pipe sweating (cold duct) | Insulate duct; improve airflow |
| Water near wall behind dryer | Backdraft or blocked damper | Clear hood; replace damaged venting |
| Random puddles | Nearby plumbing/washer splash | Trace drips; dry area and recheck |
Why it matters
Water inside the cabinet can lead to corrosion, wet lint buildup, and repeated overheating trips. Keeping the exhaust opening area clear and having the dryer exhaust vent cleaned periodically (as outlined in the installation guide) helps prevent both moisture problems and airflow-related shutdowns.
Last updated: February 2026