Installation guide
 Owner’s manual


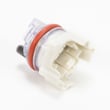
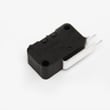
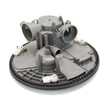
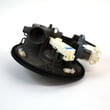
Can you still get parts for a Kenmore dishwasher?
Yes. We still support Kenmore dishwasher parts, and for Kenmore model 66513279K110 many common repair parts are available, including wash system, drain, sealing, and rack hardware. The key is matching parts by the full model number and using the diagrams and procedures in the 66513279K110 installation guide.
What you can typically still buy for this Kenmore dishwasher
For 66513279K110, these are the most common, still-replaceable items for leaks, poor cleaning, and draining issues:
- Heating parts for drying and water temperature
- Drain components for standing water and slow drain
- Water fill components for no-fill or underfill
- Filters and spray arms for poor wash performance
- Door seals and venting parts for leaks and moisture
Examples of in-stock parts for model 66513279K110
Here are a few model-matched parts that are commonly replaced:
| Symptom | Likely part | What it affects |
|---|---|---|
| Dishes not drying, water not heating | Dishwasher heating element W10518394 | Heats water and supports drying |
| Water left in tub | Dishwasher drain pump WPW10348269 | Pumps water out to the drain |
| Poor cleaning, debris in wash | Dishwasher filter W10872845 | Traps soil to protect the pump |
| Leaks at the door | Dishwasher door seal and strike kit W10542314 | Helps the door seal and latch correctly |
How to make sure you order the right part
Even within the Kenmore 665 series, small design changes can affect fit. We recommend these checks before ordering:
- Confirm the full model number on the dishwasher label: 66513279K110
- Match the symptom to the system (fill, wash, drain, heat, door)
- Compare the part name and part ID to your diagram callouts
- If you are installing under a hard countertop (granite, marble, solid surface), follow the side-mount guidance in the install instructions
- After any repair, verify the dishwasher is level front-to-back and side-to-side
Why it matters
Dishwashers are tightly integrated systems; using the correct Kenmore model number helps ensure the replacement part fits, seals, and connects properly. That prevents repeat leaks, poor wash results, and installation issues.
Last updated: February 2026
Is it worth repairing a Kenmore dishwasher?
Yes, repairing a Kenmore dishwasher model 66513279K110 is usually worth it when the problem is a single failed part (like a drain pump, inlet valve, or heating element) and the repair cost stays well below the price of a replacement dishwasher. It becomes less worthwhile when multiple major components fail at once.
Quick way we decide: repair vs. replace
We use these practical checkpoints to decide if a repair makes sense:
- Age: Under 10 years old typically favors repair; 10+ years old depends on condition and repair scope.
- Repair cost: If the repair is under 50% of replacement cost, repair usually wins.
- Failure type: One clear failure (no-drain, no-fill, no-heat) favors repair; repeated leaks or multiple symptoms at once favors replacement.
- DIY ability: If you can safely test and replace parts, you can save a lot on labor.
- Performance issues: Poor drying or long cycles can be normal on energy-efficient models; confirm settings in the 66513279K110 installation guide.
Common repairs that are often worth it on 66513279K110
These are frequent, fixable problems where replacing a single part often restores normal operation:
- Not draining: check the drain path, then consider the dishwasher drain pump WPW10348269
- Not filling: verify water is on, then consider the dishwasher water inlet valve WPW10327249
- Not drying or not heating: consider the dishwasher heating element W10518394
- Weak wash or poor coverage: inspect for clogs or damage, then consider the dishwasher spray arm WPW10491331
- Cloudy water or soil redeposit: clean the filter area and consider the dishwasher filter W10872845
What to check before buying parts
The installation instructions include a simple “does not operate” checklist that can prevent unnecessary part replacement. Use this sequence first:
| Symptom | Fast check | What it points to |
|---|---|---|
| Won’t start | Door fully latched; breaker/fuse OK | Latch/power issue, not a pump |
| No water inside after start | Water supply turned on | Inlet valve or supply problem |
| Stops early | Restart shortest cycle and observe | Control, door latch, or fill/drain issue |
| Poor drying | Rinse aid filled; heated dry option used | Normal operation or heater issue |
Why it matters
A targeted repair keeps your undercounter dishwasher running, avoids the hassle of reinstallation, and often costs far less than replacing the unit. It also helps you avoid “guessing” and swapping parts that are not actually failed.
Last updated: February 2026
Why is water standing in the bottom of my Kenmore dishwasher?
Water standing in the bottom of your Kenmore 66513279K110 dishwasher almost always points to a drain problem (blocked filter, kinked drain hose, or a drain pump that is jammed or failing). Start with the filter and hose checks; they solve most “won’t drain” complaints.
Quick checks that fix most standing-water issues
- Cancel the cycle (or advance to Drain) and listen: a steady hum with little or no water movement often means a blockage at the pump or hose.
- Remove the lower rack and clean the filter area; food and labels commonly restrict flow.
- Check the sink drain/disposer inlet where the dishwasher hose connects; clear any buildup.
- Inspect the drain hose routing for kinks, crushing, or a low spot that traps water.
- If you recently installed the dishwasher, confirm the drain hose is positioned correctly per the installation guide.
Parts that commonly cause standing water on this model
If cleaning and hose checks do not restore draining, these model-matched parts are the most common next suspects:
| Symptom | Most likely cause | Model-matched part to consider |
|---|---|---|
| Hums but won’t drain | Pump impeller jammed or pump motor weak | Dishwasher drain pump WPW10348269 |
| Drains slowly, debris keeps returning | Filter cup clogged or damaged | Dishwasher filter W10872845 |
| Intermittent draining, leaks at pump area | Seal/grommet not sealing | Dishwasher pump grommet WPW10538166 |
Why it matters
Standing water can lead to odors, poor cleaning, and repeated cycle interruptions. A restricted drain path also makes the drain pump work harder, which can shorten pump life.
Helpful safety and setup notes
- Disconnect power at the breaker before reaching near the pump area.
- Avoid routing drain lines where they can contact the motor or legs; keep proper clearance during installation.
- After any repair, run a short cycle and verify normal fill and drain operation.
Last updated: February 2026