 Owner’s manual


How to take front panel off Maytag dryer?
To remove the front panel on your Maytag PYE2000AYW dual-fuel dryer, we unplug the dryer first, then open the top so we can access the front panel fasteners and disconnect the door switch wiring before lifting the panel off the lower retaining clips. Use the PYE2000AYW owner's manual for safety notes and access details.
- Unplug the dryer from the wall outlet.
- Shut off the gas supply valve (recommended any time you open the cabinet).
- Let the dryer cool completely.
- Wear cut-resistant gloves; cabinet edges can be sharp.
- Open the top: Insert a putty knife under the front edge of the top, about 4 inches in from each side, and release the spring clips; lift the top. (This is the same access method used for drum light service in the manual.)
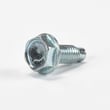
- Remove front panel fasteners: With the top raised, remove the screws securing the front panel to the cabinet (locations vary by revision, but they are typically along the top inside edge).
- Disconnect wiring: Unplug the door switch connector (and any harness clips attached to the front bulkhead) so the panel can come free.
- Lift off the panel: Tilt the front panel forward slightly, then lift it up and off the lower retaining clips/tabs.
| What you see | Common cause | What to do next |
|---|---|---|
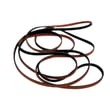
| Belt dust, drum not turning | Worn or broken belt | Inspect the dryer drum belt 341241 |
| Loud rumble or scraping | Worn glides or seal | Inspect drum contact points and felt seal |
| Poor airflow, long dry times | Lint buildup in blower/duct | Clean lint path and venting |
Removing the front panel correctly prevents broken wiring at the door switch and avoids bending the front bulkhead. It also gives you access to high-wear items like the drum belt, glides, and blower area that commonly affect noise and drying performance.
Last updated: February 2026
Where is the thermal fuse on a Maytag 2000 series dryer?
On the Maytag PYE2000AYW dryer, the thermal fuse is mounted on the blower housing, typically behind the rear access panel near the exhaust duct connection. You access it from the back of the dryer after unplugging power and shutting off gas (dual-fuel model).
- Unplug the dryer from the wall outlet.
- Shut off the gas supply valve (because PYE2000AYW is a dual-fuel dryer).
- Pull the dryer out so you can reach the rear panel.
- Remove the rear access panel screws and set the panel aside.
- Locate the blower housing near where the vent duct attaches; the thermal fuse is a small, flat safety device with two wires.
- Take a photo of wire placement, then remove the wires and mounting screw(s).
A blown thermal fuse is usually caused by restricted airflow. Before installing a new fuse, we recommend:
- Clean the lint filter and lint screen area.
- Inspect and clear the vent duct for lint buildup or crushed sections.
- Confirm the exterior vent flap opens freely.
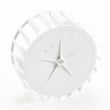
- Check the blower wheel for damage or looseness.
- Make sure the dryer is not pushed back against the vent and kinking the duct.
| Symptom | Most likely cause | What to do next |
|---|---|---|
| Dryer will not run at all | Thermal fuse open, door switch, or power issue | Test the fuse for continuity first |
| Runs but shuts off quickly | Overheating from poor venting | Clean venting and check thermostats |
| Long dry times, hot cabinet | Restricted airflow or blower problem | Inspect ducting and blower wheel |
If the fuse is blown, these related parts are commonly inspected during the same repair:
The thermal fuse is a one-time safety device designed to stop the dryer if it overheats. Replacing the fuse without fixing the airflow restriction often leads to repeat failures and longer dry times.
For diagrams and panel removal guidance specific to this model, use the PYE2000AYW owner's manual.
Last updated: February 2026
Why is my Maytag dryer not starting but has power?
If your Maytag PYE2000AYW dryer has power but will not start, the most common causes are a blown thermal fuse, a tripped breaker (one leg of power), or a door switch or timer issue. We recommend following the no-start checks in the PYE2000AYW owner's manual.
- Confirm the dryer is plugged in and the outlet is firmly seated.
- Reset the house breaker: many dryers can have lights but no motor if one breaker leg trips.
- Close the door firmly; if the door is not fully latched, the motor circuit stays open.
- If the door was opened mid-cycle, push the control dial in again to restart (a common no-start condition).
- Make sure the cycle and temperature are set to a normal drying cycle (not an air-only setting).
A thermal fuse opens when the dryer overheats; when it blows, the dryer typically will not run at all. If airflow is restricted, the replacement fuse can blow again.
- Test the fuse for continuity with a multimeter
- If open, replace it and correct the overheating cause (usually venting)
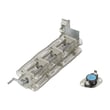
Helpful part for this model: dryer thermal fuse kit LA-1053
The manual emphasizes keeping exhaust ducts free of obstructions and avoiding crushed or clogged venting.
- Clean the lint screen and lint chute
- Inspect the vent hose for kinks or crushing
- Clear the wall vent and confirm the vent flap opens freely
- Keep duct runs as straight and short as practical
| Symptom | Most likely cause | What to do next |
|---|---|---|
| Drum does nothing, no hum | Thermal fuse or door switch | Test fuse and door switch for continuity |
| Hums but will not turn | Belt or drum jam | Inspect belt and drum movement |
| Starts only sometimes | Timer or start switch | Check timer contacts and switch operation |
A dryer that will not start is often protecting itself from an unsafe condition (overheating or an open safety switch). Fixing the root cause, especially vent restriction, prevents repeat failures and improves drying performance.
Last updated: February 2026






