
Get free shipping on your order, with any water filter subscription. Find my filter

Open Hamburger Menu
Sears Parts Direct
Tips to find your model number

Whirlpool LE6880XSW1 dryer Parts

Here are the diagrams and repair parts for Whirlpool LE6880XSW1 dryer, as well as links to manuals and error code tables, if available.

Whirlpool LE6880XSW1 dryer
By Schematic
By Part
SELECT DIAGRAM
?

This is the number corresponding to the part on the diagram / schematic

Browse Parts for LE6880XSW1 Dryer

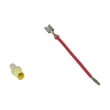
  • Dryer Heating Element Wire Kit for Whirlpool LE6880XSW1 - Part 279457

    Dryer Heating Element Wire Kit

    In Stock
    $10.41
    16% OFF Phone Price : $12.41Info Icon
    Minus Item
    Qty
    Plus Item
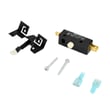
  • Laundry Appliance Door Switch Kit for Whirlpool LE6880XSW1 - Part W10820036

    Dryer Door Switch

    Part #347207

    Replaced by #W10820036

    Info Icon
    Manufacturer substitution
    This part replaces 347207. Substitute parts can look different from the original.
    In Stock
    $23.52
    20% OFF Phone Price : $29.52Info Icon
    Minus Item
    Qty
    Plus Item
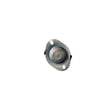
  • Dryer High-limit Thermostat for Whirlpool LE6880XSW1 - Part WP3390291

    Thermostat

    Part #696397

    Replaced by #WP3390291

    Info Icon
    Manufacturer substitution
    This part replaces 696397. Substitute parts can look different from the original.
    In Stock
    $43.31
    12% OFF Phone Price : $49.31Info Icon
    Minus Item
    Qty
    Plus Item
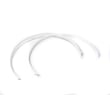
  • Whirlpool Dryer Drum Front Bearing for Whirlpool LE6880XSW1 - Part 279441

    Bearing Ring

    Part #692526

    Replaced by #279441

    Info Icon
    Manufacturer substitution
    This part replaces 692526. Substitute parts can look different from the original.
    In Stock
    $49.68
    11% OFF Phone Price : $55.68Info Icon
    Minus Item
    Qty
    Plus Item
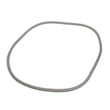
  • Whirlpool Dryer Door Seal for Whirlpool LE6880XSW1 - Part W10906683

    Seal

    Part #692494

    Replaced by #W10906683

    Info Icon
    Manufacturer substitution
    This part replaces 692494. Substitute parts can look different from the original.
    In Stock
    $62.10
    9% OFF Phone Price : $68.10Info Icon
    Minus Item
    Qty
    Plus Item
  • Dryer Tri-ring Retainer for Whirlpool LE6880XSW1 - Part WPW10512946

    Dryer Tri-ring Retainer

    Part #690997

    Replaced by #WPW10512946

    Info Icon
    Manufacturer substitution
    This part replaces 690997. Substitute parts can look different from the original.
    In Stock
    $8.53
    10% OFF Phone Price : $9.53Info Icon
    Minus Item
    Qty
    Plus Item
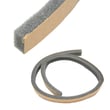
  • Dryer Lint Duct Housing Seal for Whirlpool LE6880XSW1 - Part WP339956

    Dryer Lint Screen Housing Foam Seal

    Part #339956

    Replaced by #WP339956

    Info Icon
    Manufacturer substitution
    This part replaces 339956. Substitute parts can look different from the original.
    In Stock
    $7.44
    12% OFF Phone Price : $8.44Info Icon
    Minus Item
    Qty
    Plus Item
  • Whirlpool Dryer Drum Front Bearing for Whirlpool LE6880XSW1 - Part W11035878

    Bearing Seal

    Part #692493

    Replaced by #W11035878

    Info Icon
    Manufacturer substitution
    This part replaces 692493. Substitute parts can look different from the original.
    In Stock
    $58.92
    9% OFF Phone Price : $64.92Info Icon
    Minus Item
    Qty
    Plus Item
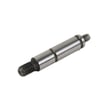
  • Dryer Drum Support Roller Shaft for Whirlpool LE6880XSW1 - Part WPW10359269

    Shaft

    Part #339489

    Replaced by #WPW10359269

    Info Icon
    Manufacturer substitution
    This part replaces 339489. Substitute parts can look different from the original.
    In Stock
    $50.53
    11% OFF Phone Price : $56.53Info Icon
    Minus Item
    Qty
    Plus Item
  • Drum for Whirlpool LE6880XSW1 - Part 695587

    Drum

    Part #695587

    The manufacturer no longer makes this part, and there's no substitute part

Whirlpool Dryer LE6880XSW1 FAQs

The Whirlpool LE6880XSW1 is a timer-based dryer and does not display electronic fault codes like F3 E3. If you are seeing “F3 E3,” it is coming from a different Whirlpool dryer model with a digital display, or from a separate device (laundry center, smart plug, etc.).

First: confirm what model is actually showing the code

Check the model tag on the dryer cabinet (typically inside the door opening) and match it to the display unit.

  • If the tag says LE6880XSW1, treat the problem as a symptom (no heat, long dry times, shuts off) instead of an error code.
  • If the tag shows a different Whirlpool model number, use that model’s error-code steps.
  • If the code appears on a wall control or app, troubleshoot that device separately.
What to do for LE6880XSW1 (common “code-like” complaints)

These checks fix the most common issues that get mistaken for an error code problem.

  • Clean the lint screen and confirm strong airflow at the outside vent hood.
  • Verify the drum turns smoothly; a slipping drum can cause overheating and poor drying.
  • If the dryer runs but won’t heat, check the house power supply (electric dryers need full 240V).
  • If the dryer overheats or stops mid-cycle, inspect heat-related safety components.
Quick symptom-to-part guide
What you notice What it usually points to Model-compatible part
Drum won’t turn or slips Worn/broken drive belt Belt 341241
Squeal, belt not tracking well Worn idler pulley Dryer idler pulley WP691366
No heat or heat cuts out Thermal safety opened Cut-off 279769
Why it matters

Error-code instructions only apply to electronic-control dryers. Using them on a mechanical model wastes time; focusing on airflow, drum drive, and heat safety parts gets the dryer drying safely and consistently.

Last updated: February 2026

Replacing a heating element in a Whirlpool dryer typically costs $100 to $350 total, with many repairs landing around $230 when you include parts and labor. For Whirlpool LE6880XSW1, your final cost depends most on whether you DIY or hire service, and whether any wiring or thermal safety parts also need replacement.

What drives the total price
  • Labor vs. DIY: Labor is usually the biggest cost if you hire a technician.
  • What failed: A broken element is common, but a blown thermal cut-off can point to airflow problems.
  • Extra parts needed: Burnt connectors or heat-damaged wiring can add cost.
  • Vent condition: Restricted venting can overheat the heater circuit and cause repeat failures.
  • Access and time: Some dryers take longer to open and reassemble.
Typical cost breakdown (parts + labor)
Scenario What you pay for Typical total cost
DIY replacement Part(s) only $30 to $150
Service call repair Trip + labor + part(s) $150 to $350
Heater circuit refresh Heater-related parts + wiring + labor $200 to $400
Parts that are commonly replaced with heater problems

Even when the heating element is the main issue, we often see heat-related damage nearby.

Why it matters

A dryer that overheats because of poor airflow can take longer to dry, waste energy, and repeatedly blow heat-safety parts. Before and after the repair, cleaning the lint screen area and checking the vent path helps protect the new heater circuit.

For airflow-related symptoms, use our dryer takes a long time to dry guide to pinpoint venting and lint restrictions.

Last updated: February 2026

Your Whirlpool dryer’s model number is printed on the appliance’s ID label, not on the control panel. On Whirlpool dryers like model LE6880XSW1, the label is typically found around the door opening or on the door frame; match the full model number exactly when ordering parts.

Where to look on a Whirlpool dryer

Check these common ID-label locations first:

  • Door frame (open the dryer door and look along the front frame)
  • Inside the door opening near the lint screen housing
  • Behind the door on the cabinet lip
  • Rear panel label (less common, but possible)
What the label looks like and what to copy

The label usually lists multiple identifiers. Copy them exactly (including letters and numbers).

  • Model number (this is what you need for diagrams and parts)
  • Serial number (helps confirm production run)
  • Electrical rating (volts/amps, useful for troubleshooting)
Quick ID checklist
Item on label Why it matters Example format
Model number Ensures correct-fit parts for your dryer LE6880XSW1
Serial number Helps narrow variations by production Letters + numbers
Type/voltage Helps confirm power requirements 240V (typical electric)
Why it matters

Even one character off can pull up the wrong Whirlpool dryer parts list. Using the exact model number helps you choose the right wear items (like a belt, thermal fuse, or door switch) the first time.

If you are ordering a common replacement part

Once you confirm the model number, you can match symptoms to the right part. For example, if the drum will not tumble but the motor runs, the belt 341241 is a common wear item to check.

Last updated: March 2026
Most common symptoms to help you fix your dryers

Choose a symptom to see related dryer repairs.

Main causes: bad gas valve coils, broken heating element, tripped safety thermostat or fuse, bad operating thermostat, c…

Main causes: clogged exhaust system, heating system failure, deposits on moisture sensor, control system failure…

Main causes: clogged exhaust vent, bad motor relay, loose dryer door catch, bad door switch, control system failure, fau…

Main causes: door switch failure, lack of power, broken belt, blown thermal fuse, bad drive motor, control system failur…

Main causes: damaged door strike, worn door catch…

Main causes: lack of electrical power, bad power cord, wiring failure, bad control board, blown thermal fuse, bad door s…

Main causes: bad timer or electronic control board, door switch failure…

Main causes: bad drum support roller, damaged idler pulley, broken blower fan blade, worn drum glide bearing, bad drive …

Most common repair guides to help fix your dryers

These step-by-step repair guides will help you safely fix what’s broken on your dryer.

How to replace an electronic control board in an electric dryer

How to replace an electronic control board in an electric dryer

The electronic control board manages the components and controls the cycle times in your electric dryer. Follow these st…

Repair time and Difficulty

 45 minutes or less
How to replace an igniter in a gas dryer

How to replace an igniter in a gas dryer

The igniter in a gas dryer glows white hot during the to light the gas that heats the air in the dryer. If the dryer air…

Repair time and Difficulty

 60 minutes or less
How to replace a dryer thermistor

How to replace a dryer thermistor

The thermistor senses the air temperature in the dryer. If your dryer overheats or doesn't heat at all, the thermistor …

Repair time and Difficulty

 30 minutes or less

Effective articles & videos to help repair your dryers

Use the advice and tips in these articles and videos to get the most out of your dryer.

How to use your clothes dryer efficiently

How to use your clothes dryer efficiently

Get expert tips on using your dryer efficiently to save energy.…

Are DIY appliance repairs safe?

Are DIY appliance repairs safe?

Find out how to stay safe when repairing your appliances.…

Keeping your smart appliances secure from hackers

Keeping your smart appliances secure from hackers

Find out how to protect your smart appliances from malevolent invasions by hackers.…

Parts & More

Band Saw
Boiler
Canister Vacuum
Chipper/Shredder
Countertop Microwave
Cycling
Dishwasher
Dryer
Electric Range
Generator
Lawn & Garden Engine
Parts
Power Sander
Range
Refrigerator
Router
Side-By-Side Refrigerator
Top-Mount Refrigerator