Installation guide
 Owner’s manual


Are all microwave oven combos the same size?
No. Microwave wall oven combos are not all the same size; they’re built around common cabinet widths (typically 24, 27, or 30 inches), but the exact cutout and overall dimensions vary by brand and model. For KitchenAid model KEMC378KSS01, use the KEMC378KSS01 installation guide to match your cabinet cutout.
Most built-in microwave/oven combos are grouped by nominal width, but these details often differ:
- Cutout width/height/depth (the cabinet opening)
- Overall appliance dimensions (front frame and chassis)
- Trim/face frame overlap (how much it covers the cutout edges)
- Electrical requirements and junction location
- Vent clearances (top, bottom, rear)
We recommend measuring your cabinet opening and comparing it to the model’s required cutout specs.
- Measure cutout width, height, and depth in at least 3 spots
- Check for square and plumb (older cabinets can be out of square)
- Confirm power supply matches the unit requirements
- Verify door swing clearance and nearby drawer/door interference
- Use the exact model specs in the KEMC378KSS01 installation guide
These are common nominal categories; your exact numbers must match the installation specs.
| Nominal category | Typical cabinet width | Common use case |
|---|---|---|
| 24-inch class | About 24 inches | Smaller kitchens, tight cutouts |
| 27-inch class | About 27 inches | Many standard wall oven cabinets |
| 30-inch class | About 30 inches | Wider cabinets, larger capacity |
A combo unit that is even slightly off can cause installation problems like gaps around the trim, binding doors, poor ventilation, or an unsafe electrical setup. Matching the cutout and clearance specs prevents rework and protects the appliance.
Last updated: January 2026
What are the disadvantages of a microwave oven combo?
A microwave oven combo like the KitchenAid KEMC378KSS01 saves space, but the main disadvantages are higher purchase cost, more complex repairs, and the fact that if one section (microwave or oven) has a failure, it can affect how you use the whole unit. See the KEMC378KSS01 owner's manual for feature and use details.
- Higher upfront cost than buying a separate wall oven and countertop or built-in microwave.
- More complicated troubleshooting and repairs because the unit combines multiple heating systems, controls, and safety interlocks.
- Downtime risk: if the microwave side fails (for example, a door safety issue), you may lose microwave use until it’s repaired.
- Capacity tradeoffs: the microwave cavity and oven cavity sizes can be smaller than standalone units in the same cabinet space.
- Ergonomics: depending on installation height, the microwave can be awkward to load, especially with hot liquids.
- Learning curve: combo models often have more modes (microwave, convection, combination cooking) and more settings to master.
Combo units can cook very well, but some foods may not match the results of specialized appliances.
| Task | What you may notice | What helps |
|---|---|---|
| Crisping and browning | Some foods may not brown like a dedicated oven or air fryer | Use the correct rack/pan and the recommended mode |
| Large batch cooking | Less usable space than a full-size standalone oven | Plan multiple batches, use convection when available |
| Microwave speed | If incoming voltage is low, cooking can take longer | Have an electrician verify supply voltage and grounding |
This model uses a combined electrical setup; the microwave portion is supplied from the 240-volt circuit used for the lower oven (with the microwave operating on the 110-volt side). Proper grounding and correct installation matter for performance and safety. Use the KEMC378KSS01 installation guide for cabinet, electrical, and mounting requirements.
Understanding these disadvantages helps you decide whether to repair, replace, or keep the combo unit, and it sets realistic expectations for cooking results, service complexity, and day-to-day convenience.
Last updated: January 2026
What is Sabbath mode on a KitchenAid oven?
Sabbath mode on the KitchenAid KEMC378KSS01 is a special operating mode that keeps the oven in a continuous Bake setting until you turn it off; it also limits which keys work, disables tones, and suppresses most display updates so the oven runs without audible or visual changes.
- The oven stays in a Bake mode continuously until you cancel it.
- Only limited keypad functions work (typically number and start pads).
- Audible tones are disabled.
- The display does not show most messages or temperature changes.
- Normal feedback you expect during cooking is reduced.
We recommend setting up everything you need before enabling Sabbath mode so you do not have to rely on disabled keys or tones.
- Confirm the oven is in a standard Bake mode before enabling Sabbath mode.
- Use an oven thermometer if you need a visual temperature reference.
- Avoid frequent door openings; heat recovery takes longer in built-in ovens.
- Plan cook times in advance since tones and many prompts are suppressed.
| Feature | Normal bake | Sabbath mode |
|---|---|---|
| Keypad response | Full keypad | Limited keys only |
| Tones | On (unless muted) | Off |
| Display updates | Normal prompts and temp changes | Minimal or suppressed |
| Bake operation | Cycles normally | Continuous bake until canceled |
Sabbath mode is designed for situations where you want the oven to operate without tones and without typical display or control changes. Knowing what is disabled helps prevent confusion if the oven seems “unresponsive” while it is actually operating as intended.
For the exact key sequence and model-specific behavior, follow the steps in the KEMC378KSS01 owner’s manual.
Last updated: January 2026
Why won't my KitchenAid microwave work?
If your KitchenAid KEMC378KSS01 microwave will not run at all (no display, no response, or it stops immediately), the most common causes are a power supply issue, a blown internal fuse, an overheated safety device, or a door switch problem that prevents the unit from starting.
- Confirm the outlet has power by plugging in a small lamp.
- Reset the kitchen breaker (microwaves can trip a GFCI or breaker without obvious signs).
- Make sure the door closes firmly and the latch feels normal (a misaligned door can keep it from running).
- Clean the door and sealing surfaces; buildup can prevent a proper close.
- Review the troubleshooting steps in the KEMC378KSS01 owner's manual.
If power is good and the door is closing normally, these parts are frequent culprits:
- Internal fuse: a blown fuse can leave the microwave completely dead.
- Door interlock switch: if it fails, the microwave may act dead or refuse to start for safety.
- High-limit thermostat: opens if overheating is detected.
- Electronic control: less common, but possible if the display is erratic or buttons do not respond.
Helpful model-matched parts to consider:
- Fuse (black) WP4375321
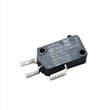
- Microwave door interlock switch W10211972
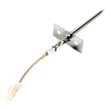
- Range high-limit thermostat WP9759243
Use this order to avoid replacing parts unnecessarily:
- Verify incoming power and breaker/GFCI.
- Inspect door alignment and latch feel.
- Test the fuse for continuity.
- Test door interlock switches for proper open/close operation.
- Check the high-limit thermostat for continuity (when cool).
| What you see | Most likely cause | What to do next |
|---|---|---|
| No display, totally dead | Blown fuse or no power | Check breaker/outlet; test fuse |
| Display works, will not start | Door switch/latch issue | Inspect door close; test interlock switch |
| Runs briefly then stops | Overheat protection opening | Check cooling airflow; test thermostat |
| Buttons unresponsive/erratic | Control issue | Power reset; inspect wiring connections |
Microwave door interlock and overheat protection circuits are designed to prevent unsafe operation. Fixing the root cause (not just restoring power) helps prevent repeat fuse blows and protects the control and high-voltage components.
Last updated: January 2026