 Owner’s manual



How do I reset the lid lock on my Whirlpool washer?
On the Whirlpool WFW8410SW02, the “lock” is the washer door lock (not a lid lock). We reset it by canceling the cycle correctly: press PAUSE/CANCEL twice to power down and unlock, or press PAUSE/CANCEL once while Add a garment is lit to unlock so you can open the door.
- If Add a garment is lit and the door is locked: press PAUSE/CANCEL once; the door unlocks so you can open it.
- If you want to fully stop the cycle: press PAUSE/CANCEL twice; the washer powers down and the door unlocks.
- If the door stays locked because water is still inside: run DRAIN/SPIN, then the door unlocks at the end.
- Open the door, then close it firmly until you hear the lock click before starting a new cycle.
- If CONTROL LOCKED is on: press and hold END OF CYCLE SIGNAL for 3 seconds to unlock the controls.
- Water level or temperature is high: the washer drains automatically before it unlocks.
- Drain issue: run DRAIN/SPIN to clear remaining water.
- Control lock is enabled: unlock controls (END OF CYCLE SIGNAL for 3 seconds).
- Door not closing easily: remove a caught item and close the door firmly.
| Symptom | Most likely cause | What to do next |
|---|---|---|
| Door won’t unlock after cancel | Water still in tub | Run DRAIN/SPIN |
| Buttons don’t respond | Control lock enabled | Unlock controls |
| Door won’t latch/lock | Worn strike or latch | Inspect strike and latch |
If the door will not latch or stay locked during a cycle, these model-matched parts are common fixes:
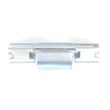
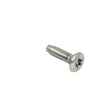
- Washer door strike WP8540221 (door alignment and engagement)
- Latch WPW10253483 (door lock mechanism)
The door lock is a safety feature; the washer keeps the door locked during the wash cycle and may delay unlocking until it is safe (especially if water remains in the tub).
For the exact button sequences and indicator lights on your control panel, follow the owner's manual.
Last updated: February 2026
Is 4.5 cu ft a large capacity washer?
Yes. A 4.5 cu. ft. washer is considered large capacity; it typically handles bulky items (like a comforter) and larger mixed loads with fewer cycles. For the most accurate load guidance and cycle tips for your Whirlpool WFW8410SW02, use the owner's manual.
Most washers in the 4.5 cu. ft. range are designed to wash:
- A large mixed load (everyday clothes) in one cycle
- Bulky items such as a comforter or sleeping bag
- Multiple bath towels in a single load
- Larger loads without an agitator taking up tub space (common in front-load designs)
Even with a large tub, loading technique matters more than “how much fits.” We recommend:
- Load loosely; don’t pack items down
- Keep the top of the load below the door opening so items can tumble
- Mix large and small items to balance the spin
- Use HE (High Efficiency) detergent only; too much soap can trigger suds issues
- Choose the right cycle for bulky items so the washer can ramp up to a stable spin
| Tub size | Typical use case | What you’ll notice |
|---|---|---|
| Under 4.0 cu. ft. | Smaller households, lighter loads | More loads per week |
| 4.5 cu. ft. and up | Families, towels, bedding | Fewer loads; easier bulky-item washing |
A true large-capacity washer helps reduce total loads, water, and energy use per week. Your WFW8410SW02 also adjusts water use to the load, so correct loading and HE detergent help prevent “SD” (suds routine) events and improve rinsing performance.
Last updated: February 2026
What is the life expectancy of a Whirlpool washing machine?
A Whirlpool washing machine typically lasts 10 to 14 years with normal household use and basic maintenance. For your Whirlpool WFW8410SW02 front-load washer, following the care and operating guidance in the owner's manual helps you get the longest service life.
Most washers fall into these real-world ranges:
- Front-load washers: about 10 to 12 years
- Top-load washers: about 11 to 14 years
- Heavy use (large family, daily loads): lifespan trends toward the lower end of the range
These are the most common life-reducers we see with front-load washers like the WFW8410SW02:
- Overloading the drum (extra strain on the drive system and bearings)
- Using non-HE detergent or too much detergent (excess suds, residue buildup)
- Ignoring small leaks at the door boot or hoses
- Poor leveling (more vibration, faster wear)
- Letting moisture sit in the door area (odor, mildew, seal deterioration)
A few habits make a measurable difference:
- Use HE detergent only and measure carefully (the manual calls this out)
- Run periodic cleaning cycles and wipe the door area dry
- Check fill hoses for bulges, cracking, or seepage; replace as needed with a correct hose such as the washer fill hose WP89503
- Watch for door seal leaks; a torn seal often points to replacing the washer door boot WPW10111435
- Keep the washer level to reduce vibration and stress on the drive belt and motor
| What you’re seeing | Often means | Typical next step |
|---|---|---|
| Small leak at door opening | Door boot wear or clamp issue | Inspect boot and clamps; replace boot if torn |
| Won’t spin or slips under load | Belt wear or drive issue | Inspect belt; replace if glazed/cracked |
| Error code or dead controls | Control or wiring problem | Use diagnostics and error code chart |
If you’re troubleshooting an error code, use our Whirlpool duet he front load washer error codes guide to narrow the failure to a system (drain, door lock, motor, control).
Knowing the expected lifespan helps you plan: if your WFW8410SW02 is near the 10 to 14 year mark, investing in wear items (hoses, door boot, belt) can be smart, while major tub or control repairs may need a cost comparison.
Last updated: February 2026
What is the most common problem with Whirlpool washers?
On Whirlpool washers, the most common problems are draining issues, leaks, and poor spin performance. On the Whirlpool WFW8410SW02, those symptoms often tie to oversudsing (the washer may show “SD”), off-balance loads during spin, or a restriction in the drain path; use the WFW8410SW02 owner's manual to match symptoms to checks.
- Won’t drain or leaves clothes too wet: drain hose kink, drain restriction, debris in the pump area
- Leaks at the front: door boot not sealing, boot damage, clamp not seated
- No spin or weak spin: off-balance load, oversudsing, drive system wear
- Noisy or vibrating: washer not level, feet not firmly on the floor, pedestal not secured
- Error codes: oversudsing events, electrical or control-related faults
- Use HE detergent only and measure carefully; “SD” means a suds routine activated to clear excess suds.
- If there is standing water, run Drain/Spin, then retry with a smaller load.
- Level the washer so all four feet contact the floor; tighten the leveling leg nuts.
- Check the door seal area for debris (socks, hair, detergent buildup) that prevents sealing.
- Verify the drain hose is not kinked and is not pushed too far down the standpipe.
| Symptom | Most likely category | Best next step |
|---|---|---|
| “SD” displayed | Oversudsing | Reduce detergent; use HE only; rerun cycle |
| Loud vibration in spin | Off-balance or leveling | Redistribute load; re-level washer |
| Water on floor at front | Door seal/clamp | Inspect boot seating and clamp fit |
| Won’t drain | Drain restriction | Check drain hose and drain path |
- Drain restriction: trap WPW10405608 or filter WPW10730972
- Door leak: washer door boot WPW10111435 and washer door boot spring clamp WP8540108
- Spin slipping: washer drive belt WP8540101
Drain, leak, and spin problems can cause longer cycles, wetter loads, odors, and floor damage. Fixing oversudsing, leveling, and drain restrictions early helps the washer reach high-speed spin as designed.
Last updated: February 2026





