How to replace leaf blower fuel lines
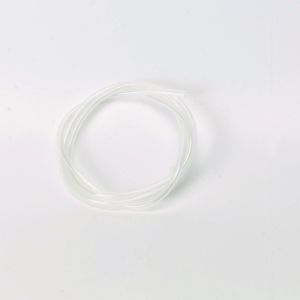
This step-by-step repair guide shows how to remove and replace leaf blower gas lines. Fuel lines can clog, crimp or crack. Damaged leaf blower gas lines restrict gas flow and prevent the engine from starting and running. Clear clogs and check for crimps or cracks in the fuel lines. Replace any cracked or damaged leaf blower fuel lines with a manufacturer-approved gas leaf blower part.
This basic procedure works for replacing MTD, Husqvarna, Poulan, Weed Eater, Troybilt and Craftsman leaf blower fuel lines.
If the engine won't start after replacing leaky leaf blower gas lines, you may need to rebuild the carburetor, following the instructions in How to Rebuild a Leaf Blower Carburetor.
Instructions
- 01.
Drain the fuel tank
In a well-ventilated area, remove the fuel cap and empty the fuel from the fuel tank into an approved storage container.
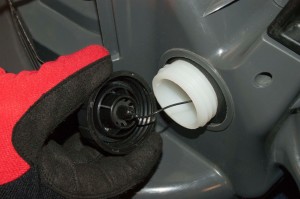
PHOTO: Drain the fuel tank.
- 02.
Disconnect the spark plug wire
To ensure that the leaf blower can’t start, disconnect the wire from the spark plug.
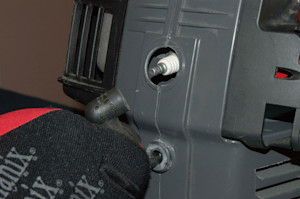
PHOTO: Disconnect the wire from the spark plug.
- 03.
Remove the blower tube
Loosen the thumb screw on the front of the housing and pull the blower tube off.
- 04.
Remove the air filter cover
Remove the screws from the air filter cover and then remove the air filter cover.
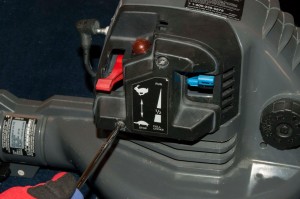
PHOTO: Remove the air filter cover screws.
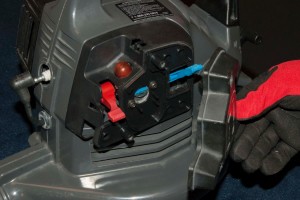
PHOTO: Remove the air filter cover.
- 05.
Remove the carburetor
Remove the carburetor mounting screws.
Pull out the air box and release it from the carburetor throttle and choke levers.
Note the configuration of the small and large fuel lines on the carburetor so you can reconnect them correctly later and then remove the fuel lines from the carburetor.
Remove the carburetor from the engine.
Remove the screws from the carburetor adapter.
Pull the carburetor adapter and air dam off of the engine.
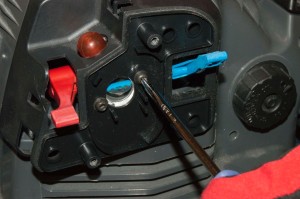
PHOTO: Remove the carburetor mounting screws.
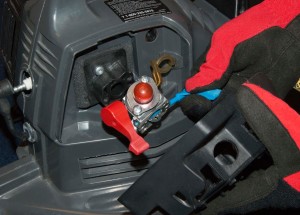
PHOTO: Pull off the air box.
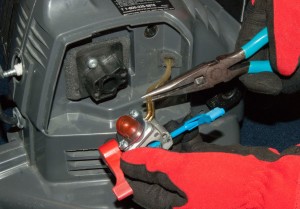
PHOTO: Remove the fuel lines from the carburetor.
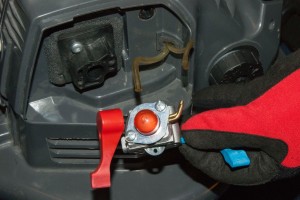
PHOTO: Remove the carburetor.
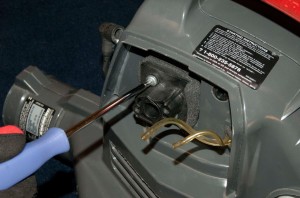
PHOTO: Remove the adapter screws.
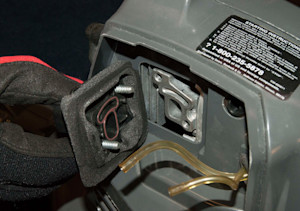
PHOTO: Remove the carburetor adapter and air dam.
- 06.
Remove the fuel tank
Remove the screws from the front of the muffler guard cover and pull the guard cover off the muffler.
Remove the blower tube thumb screw from the front of the housing.
Remove the screws from the right side of the housing and pull the left side of the housing off the blower. The fan cover and handle come off with the housing.
Remove the fuel tank from the housing.
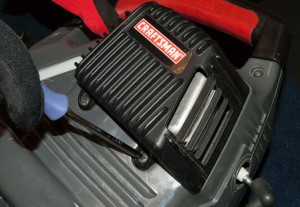
PHOTO: Remove the muffler guard cover screws.
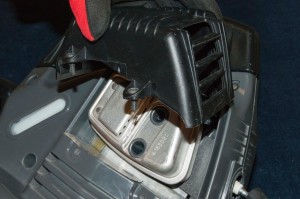
PHOTO: Remove the muffler guard cover.
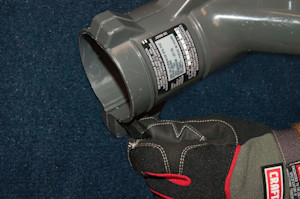
PHOTO: Remove the blower tube thumb screw.
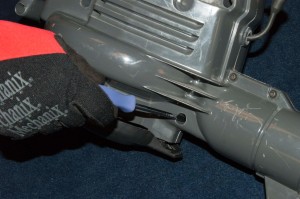
PHOTO: Remove the right side blower housing screws.
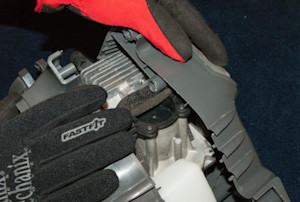
PHOTO: Pull off the left side housing.
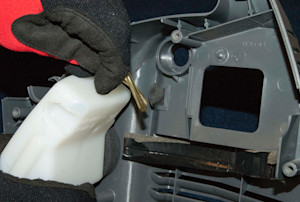
PHOTO: Remove the fuel tank.
- 07.
Pull the fuel lines out of the tank
The end of the small fuel line is connected to the fuel filter inside the tank. Use needle-nose pliers to fish the fuel filter out of the mouth of the tank. Remove the fuel filter from the end of the small fuel line.
Pull the small fuel line out of the tank through the mounting hole.
Push the large fuel line into the tank through the mounting hole and pull it out of the mouth of the tank.
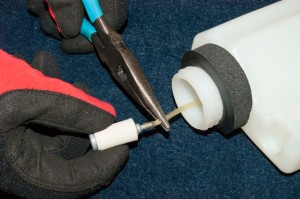
PHOTO: Pull the fuel filter out of the mouth of the tank.
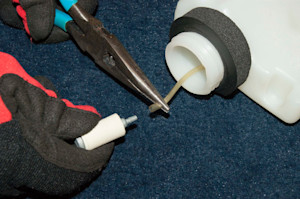
PHOTO: Remove the fuel filter.
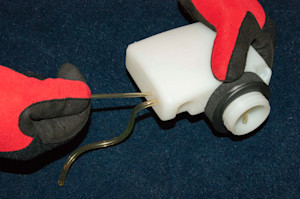
PHOTO: Pull the small fuel line out of the tank.
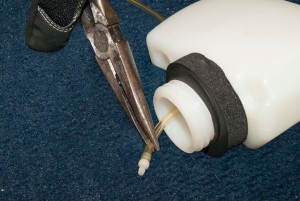
PHOTO: Pull the large full line out through the mouth of the fuel tank.
- 08.
Install the large fuel line
Cut one end of the large fuel line at an angle.
Push the angled end into the tank through the mounting hole far enough that you can grab the end through the mouth opening with needle-nose pliers. Cut the angled end of the large fuel line square and install the grommet on the end.
Tug the opposite end of the large fuel line until the grommet touches the side of the tank.
Cut the large fuel line to the same length as the original large fuel line.
Tip: To ease threading, lubricate the fuel lines with a drop of oil.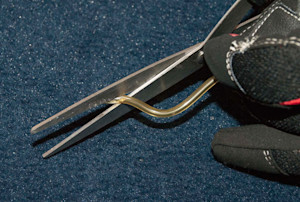
PHOTO: Cut one end of the large fuel line at an angle.
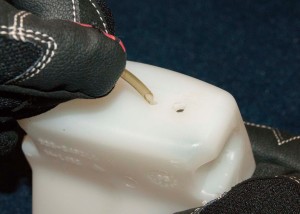
PHOTO: Push the angled end of the fuel line through the mounting hole.
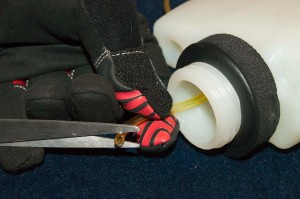
PHOTO: Cut the angled end of the fuel line square.
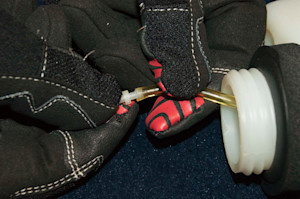
PHOTO: Install the grommet.
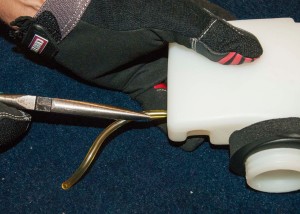
PHOTO: Tug the fuel line to position the grommet.
- 09.
Install the small fuel line
Cut one end of the small fuel line at an angle.
Push the angled end into the tank through the mounting hole far enough that you can grab the end through the mouth opening with needle-nose pliers Pull the small line out the mouth of the tank. Cut the angled end of the fuel line square and attach the fuel filter.
Push the small line back into the tank through the mouth opening. Tug the other end of the small fuel until the filter rests on the bottom of the tank.
Cut the small fuel line to the same length as the original small fuel line.
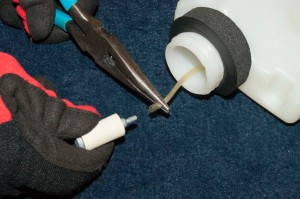
PHOTO: Attach the fuel filter.
- 10.
Reinstall the left side of the housing
Position the left side of the housing near the leaf blower and thread the fuel lines through the hole in the housing near the carburetor.
Position the handle properly and push the housing back together, making sure the eyelet for the starter pull cord is properly positioned.
Insert the thumb screw in the housing at the front of the blower and rotate the screw just until it catches the nut; don’t tighten it yet.
Loosely install two other housing screws to keep the housing in place while you install the fan cover.
Pry the tab on the fan cover spring out until it is in the loaded position. Snap the fan cover into the housing while holding the spring in the loaded position.
Insert all of the housing screws and tighten them firmly.
Reinstall the guard cover on the muffler.
Reinstall the fuel cap.
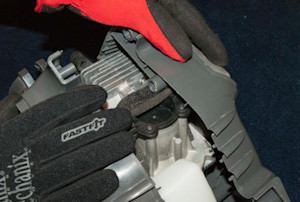
PHOTO: Reinstall the left side housing.
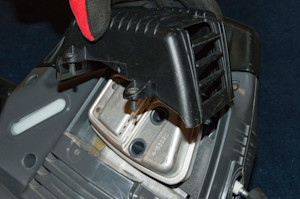
PHOTO: Reinstall the muffler guard cover.
- 11.
Reinstall the carburetor
Push the fuel lines onto the proper connections on the carburetor. Insert the carburetor into the air box with the throttle and choke levers positioned properly.
Position the carburetor on the side of the engine and reinstall the mounting screws.
Position the air filter cover over the carburetor and secure it with the mounting screws.
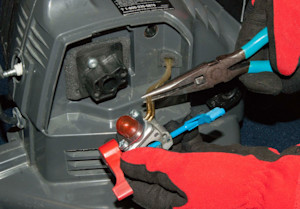
PHOTO: Reconnect the fuel lines.
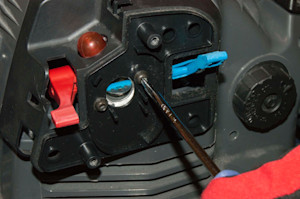
PHOTO: Reinstall the carburetor mounting screws.
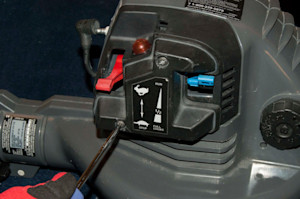
PHOTO: Reinstall the air filter cover.
- 12.
Reinstall the blower tube
Push the blower tube back on the front of the housing and tighten the thumb screw.
- 13.
Connect the spark plug
Reattach the spark plug wire.
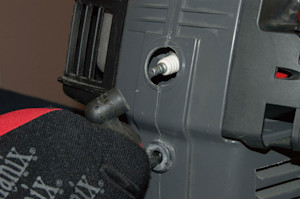
PHOTO: Reattach the spark plug wire.
Symptoms for gas leaf blowers
Choose a symptom to see related leaf blower repairs.
Main causes: cracked fuel lines, leaky carburetor seals, damaged fuel tank cap, cracked fuel tank…
Main causes: damaged fan blade, engine needs a tune up, dirty carburetor…
Main causes: stale fuel, dirty air filter, bad spark plug, cracked fuel lines, clogged carburetor…
Main causes: mixing too much 2-cycle oil with the gas, dirty air filter, clogged carburetor, engine needs tune up…
Main causes: bad gas, clogged air filter, cracked fuel lines, clogged fuel filter, dirty carburetor, bad spark plug, wor…
Repair guides for gas leaf blowers
These step-by-step repair guides will help you safely fix what’s broken on your leaf blower.

How to replace a leaf blower carburetor
The carburetor could be the problem If the leaf blower engine won't start even though there's fuel in the tank. Follow t…

How to replace leaf blower fuel lines
Leaf blower fuel lines deteriorate with time and eventually can split or crack. You can remove and replace them yourself…

How to rebuild a leaf blower carburetor
If the leaf blower engine won't start even though there's fuel in the tank, the carburetor could be the problem. Follow …
Articles and videos for gas leaf blowers
Use the advice and tips in these articles to get the most out of your leaf blower.
Learn about the top 10 must-have electric lawn & garden tools for 2023…

Get answers to frequently asked questions about Sears and Sears PartsDirect.…
Follow this advice for caring for your leaf blower.…