


What tiller is made in the USA?
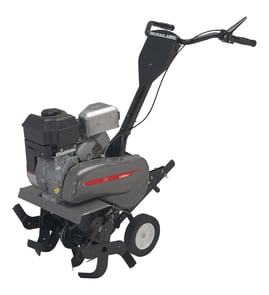
Some tillers are made in the USA, but it varies by brand and even by specific model and production run. For your Craftsman model 917298241 front-tine tiller, the most reliable way to confirm country of origin is to check the product ID plate or engine label on the machine itself.
Look for a permanent label on the tiller frame (often near the handle base, tine shield, or transmission housing) and check the engine’s data tag.
- Check the tiller’s product ID plate for “Made in …” or “Assembled in …”
- Check the engine label separately (engine origin can differ from the tiller)
- Look for wording like “Made in USA”, “Assembled in USA”, or “Made in USA with global materials”
- Record the full model number and any serial number for reference
- If the label is missing, compare your hardware and assemblies to known parts for the model
If you are shopping specifically for a USA-made tiller, Mantis is widely known for designing, engineering, and manufacturing many of its tillers in the United States.
| What you’re checking | Where to look | What it tells you |
|---|---|---|
| Tiller origin | Frame/product ID plate | Where the tiller was made or assembled |
| Engine origin | Engine shroud or block tag | Where the engine was made |
| Model identity | Model and serial label | Helps match the correct parts and specs |
Country of origin can affect parts sourcing, service options, and long-term support. Even when a tiller is USA-made, wear items like tines, belts, and fasteners still need to match the exact model.
If you are maintaining this tiller while you confirm origin, these model-matched parts can help you identify assemblies:
- Weld tine 584971502 (tine assembly reference)
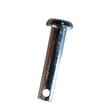
- Depth stake 532446066 (depth control reference)
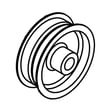
- Tiller engine sheave 592642101 (drive/pulley reference)
Last updated: January 2026
What are the common problems with lawn tillers?
Common problems we see on the Craftsman 917298241 front-tine tiller include hard starting (fuel or ignition issues), tines that will not drive (belt, clutch cable, or sheave problems), and poor tilling depth (depth stake hardware out of adjustment or worn). These checks solve most complaints fast.
- Won’t start or starts then dies: stale fuel, clogged fuel filter, dirty carburetor, fouled spark plug
- Runs rough or lacks power: restricted fuel flow, dirty air filter, spark plug gap/wear
- Tines won’t turn or slip under load: loose or stretched clutch cable, worn belt, damaged engine sheave
- Poor tilling depth or bouncing: depth stake set too shallow, missing pin/retainer, worn tines
- Controls feel loose or don’t return: weak or missing springs/retainers
- Drain old gasoline and refill with fresh fuel (especially after storage).
- Inspect the spark plug; clean or replace if fouled.
- Check the air filter and throttle/choke operation.
- Verify tine engagement: with the engine off, inspect belt tension and linkage travel.
- Confirm the depth stake is installed correctly and set for the soil conditions.
| Symptom | Part to inspect | What it does |
|---|---|---|
| Tines won’t engage | Cbl/cltch t 583731701 | Transfers lever movement to the clutch/tine drive system |
| Tines slip | Tiller engine sheave 592642101 | Drives the belt; wear can reduce grip and speed |
| Won’t hold depth | Depth stake 532446066 | Sets tilling depth and stabilizes the tiller |
A tiller that is fuel-starved or has a slipping tine drive can feel “underpowered” even when the engine is fine. Fixing the root cause protects the belt, sheaves, and tine components and improves soil breakup.
Last updated: January 2026
How often should I change the oil in my tiller?
For the Craftsman 917298241 5-hp front-tine tiller, we recommend changing the engine oil after the first few hours of break-in, then about every 50 hours of use or at least once per season (once a year) if you use it lightly.
- New or rebuilt engine: change oil after the first 5 to 10 hours of run time
- Normal use: change oil every 50 hours
- Seasonal use: change oil once per year, even if you do not hit 50 hours
- Dusty, hot, or heavy tilling: change oil more often (about every 25 hours)
- Warm the engine for 2 to 3 minutes so the oil flows out faster.
- Shut the engine off and let it cool briefly; keep hands clear of the muffler.
- Clean dirt from around the fill and drain areas so debris does not enter the crankcase.
- Check the oil level and color; dark, gritty oil means it is time.
| What you see on the dipstick | What it usually means | What we recommend |
|---|---|---|
| Honey/amber, smooth | Oil is still serviceable | Recheck at next use |
| Dark brown/black | Normal breakdown from heat | Change oil now |
| Gritty or sludgy | Dirt contamination or overdue service | Change oil now; inspect air filter |
| Milky/foamy | Moisture contamination | Change oil now; run to fully warm and recheck |
Fresh oil protects the crankshaft, piston, and bearings from wear. On a small 5-hp tiller engine, dirty oil can quickly lead to hard starting, overheating, and shortened engine life.
If the tiller vibrates heavily or the drive system is slipping, fix that first so the engine is not overworked. These model-matched parts are commonly involved:
- Tiller engine sheave 592642101 (drive pulley that helps transfer power)
- Cbl/cltch t 583731701 (clutch cable that controls engagement)
- Idler pad 532109227 (helps maintain proper belt tension)
Last updated: January 2026
Where is the model number on a Craftsman rear tine tiller?
The model number on most Craftsman tillers is on a product ID label attached to the tiller frame. Even though model 917298241 is a Craftsman front-tine tiller (not rear-tine), you typically find the label near the tine guard/shield area, on the frame rail, or near the engine and fuel tank.
Check these common label locations first (front-tine and rear-tine designs use similar ID tag placement):
- On the tine guard or tine shield near the tines
- On the main frame rail (left or right side)
- Near the engine mounting base or engine plate
- On or near the fuel tank area
- Near the handle support brackets/uprights
Record the full model number and any other IDs shown so you can match the correct parts diagrams.
- Model number (for the tiller parts list)
- Serial number (helps match production changes)
- Engine model/type/code (for engine-specific parts like carburetor or ignition)
Use a fixed, easy-to-spot assembly on the tiller to compare diagrams and confirm you are in the right section. For example, the depth control area is often distinctive; the depth stake 532446066 is one reference part used on this Craftsman 917298241 tiller.
| ID you find | What it identifies | Best use |
|---|---|---|
| 9-digit number (often starts with 917) | The tiller model | Selecting the correct diagrams and parts |
| Engine model/type/code | The engine | Ordering engine-only parts |
| Partial/worn sticker | Incomplete ID | Match by assemblies (tines, depth stake, controls) |
Using the correct model number prevents ordering the wrong cable, tine, belt, or hardware. Small design differences (like depth stake style or control linkage routing) change which parts fit.
Last updated: January 2026