 Owner’s manual


What size is the Kenmore 11022802100 washer?
The Kenmore 11022802100 washer is a full-size top-load washer; most units in this design class are about 27 inches wide and roughly 38 to 43 inches tall. For the exact cabinet and clearance dimensions used for installation, follow the spacing diagrams in the 11022802100 owner's manual.
Typical dimensions and what to plan for
When you are measuring a laundry area, we recommend planning for both the washer cabinet and the space needed for hoses, lid opening, and service access.
- Width: typically about 27 in.
- Height: typically about 38 to 43 in. (varies by console style)
- Depth: typically about 25 to 28 in. (plus hose clearance)
- Floor support: plan for a sturdy floor that can handle the washer, water, and load weight
- Leveling: install on a level floor; avoid carpeting for best stability
Installation spacing (clearances)
The manual includes recessed area and closet installation guidance, including minimum ventilation openings and recommended spacing for easier service.
| Location | What to allow | Why |
|---|---|---|
| Behind washer | Extra room for fill hoses and drain hose | Prevents kinks and leaks |
| Above washer | Space for lid to open fully | Easier loading and unloading |
| Sides/front | Room to level and service the cabinet | Faster repairs and less vibration |
Why it matters
Correct sizing prevents installation problems like crushed hoses, poor draining, excessive vibration, and difficulty opening the lid. It also helps avoid noise issues and makes future repairs (like a drain pump or lid switch replacement) much easier.
Last updated: January 2026
How to hard reset kenmore washer?
For Kenmore washer model 11022802100, a hard reset is simple: unplug the washer (or switch off the breaker) for 2 minutes, then restore power and start a normal cycle. This clears many temporary control and cycle issues without changing any mechanical settings; see the 11022802100 owner's manual for normal start and stop steps.
Hard reset steps (recommended)
- Turn the Cycle Selector (Timer) knob to OFF.
- Unplug the washer (or turn OFF the circuit breaker).
- Wait 2 minutes.
- Restore power.
- Close the lid, select a cycle, then pull the Cycle Selector knob out to start.
If it still will not start or finish a cycle
These checks solve the most common “looks dead” or “won’t spin/drain” complaints on this style of Kenmore top-load washer.
- Confirm the lid is fully closed; a failed lid switch can stop agitation or spin.
- If the tub will not drain, check for a clog or a failed pump.
- If the motor runs but the washer will not agitate or spin, inspect the motor coupling.
- If the washer stops mid-cycle, push the Cycle Selector knob in to stop, then pull it out to restart.
Common parts tied to “won’t run” symptoms
| Symptom | Likely area to check | Example part for this model |
|---|---|---|
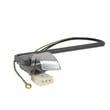
| Won’t spin or agitate with lid closed | Lid safety circuit | Washer lid switch WP3949238 |
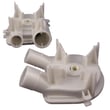
| Won’t drain or leaves water in tub | Drain system | Washer drain pump WP3363394 |
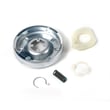
| Motor runs but no movement | Drive connection | Coupling 285753A |
Why it matters
A hard reset restores power to the timer and safety circuits and clears a “stuck” cycle state. If the washer still will not run after a reset, the issue is usually a lid switch, drain problem, or a drive component rather than the control itself.
Last updated: January 2026
How to unclog drain hose on Kenmore washer?
To unclog the drain hose on your Kenmore washer model 11022802100, unplug the washer, drain out any standing water, then straighten and clear the hose from the washer to the standpipe. A kinked or clogged drain hose is a common cause of “won’t drain/won’t spin” symptoms.
Safety and prep
- Unplug the washer before moving it or removing panels
- Turn off both water faucets
- Protect the floor with towels or a shallow pan
- Expect water to spill when the hose is removed
Step-by-step: clear the drain hose
- Check for kinks first. Pull the washer forward and inspect the full hose path; straighten any sharp bends.
- Verify the drain height. The drain hose should not be routed higher than 96 in. (2.4 m) above the floor.
- Remove the hose and flush it. Detach the hose from the washer outlet and from the standpipe/laundry tub; run hot water through it to push out lint, coins, or small socks.
- Clear stubborn blockages. Use a flexible drain snake or carefully feed a plastic zip tie through the hose; avoid sharp tools that can puncture it.
- Reinstall and secure. Reattach the hose and clamp it firmly; then secure the hose to the standpipe or tub so it cannot slip out during draining (see the 11022802100 owner's manual).
If it still will not drain
These checks isolate whether the clog is in the hose, the home drain, or the pump.
- Confirm the standpipe or laundry tub drain can handle 17 gal (64 L) per minute
- Listen for the drain pump running during the drain portion of the cycle
- Check the pump inlet for debris; replace the pump if it is jammed or leaking
| Symptom | Most likely cause | What to do next |
|---|---|---|
| Hums but no draining | Pump jam or blockage | Inspect pump inlet; consider replacing washer drain pump WP3363394 |
| Drains slowly | Partial clog in hose or home drain | Flush hose; clear standpipe |
| Won’t spin and clothes are wet | Drain restriction or lid switch issue | Clear drain path; test washer lid switch WP3949238 |
Why it matters
A restricted drain hose prevents proper draining, and this model uses a neutral drain sequence (it drains first, then begins spinning). Clearing the hose restores normal drain and spin performance and helps prevent leaks from an improperly seated or unsecured hose.
Last updated: January 2026
How to fix fe code kenmore washer?
On Kenmore washer model 11022802100, an FE code points to an overfill condition; the washer may keep filling or run the drain pump to protect against flooding. The most common fix is correcting a water inlet valve that is not shutting off, then verifying the pressure switch hose is clear. See the 11022802100 owner's manual for safety and operating guidance.
Quick checks we recommend first
- Unplug the washer; turn off both hot and cold water faucets.
- If water continues to flow into the tub with power off, the inlet valve is stuck open.
- If the tub is overfilled, set the timer to Spin/Drain to remove water (lid closed).
- Check the small air pressure hose from the tub to the pressure switch for kinks, cracks, or soap scum blockage.
- Confirm the drain hose is secured and routed correctly (a siphon can mimic fill problems).
Parts that commonly solve an FE overfill problem
In this model family, these parts are the usual suspects when the washer overfills or acts like it is overfilling.
| Symptom | Most likely cause | What to do |
|---|---|---|
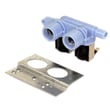
| Water keeps entering with washer unplugged | Inlet valve stuck open | Replace the washer inlet valve 285805 |
| Fills too long, then drains or errors | Pressure sensing issue (hose/switch) | Clear/replace hose; test switch |
| Intermittent fill and stop, lid-related behavior | Lid switch not closing reliably | Inspect/replace the washer lid switch WP3949238 |
Why it matters
An FE overfill condition can lead to leaks, floor damage, and poor wash results. Shutting off the water supply and correcting the inlet valve or pressure sensing issue prevents repeat overfilling and protects the washer’s drive system and cabinet.
Safety and setup reminders
The manual emphasizes basic safety and proper installation practices that help prevent flooding and vibration issues.
- Do not reach into the washer if the tub or agitator is moving.
- Turn off the water supply when the washer is not in use for extended periods.
- Keep the drain hose secured to the tub/standpipe and the washer properly leveled.
Last updated: January 2026





