 Owner’s manual




How do I find the model number on my 48624628?
The model number for this Craftsman brush guard is typically printed on the product identification label or on the original packaging; once you confirm it reads 48624628, you can match hardware and diagrams using the 48624628 owner's manual.
Where to look on a Craftsman brush guard
Check these common spots first:
- On a sticker or stamped tag on the brush guard frame (often on the back side)
- Near the mounting points or frame brace area
- On the shroud or inside edge of the guard where it is protected
- On the carton, assembly bag, or instruction sheet if you still have them
- On your purchase paperwork (model is often listed with the attachment name)
What to write down (so parts match)
Record the model number exactly as shown, plus any extra identifiers.
| Item to record | Example | Why it matters |
|---|---|---|
| Model number | 48624628 | Ensures diagrams and parts lists match |
| Brand | Craftsman | Helps narrow compatible attachments |
| Part numbers on hardware bags | 43350, 43070 | Speeds up finding the right fasteners |
Why it matters
Craftsman attachments can look similar across model families, but small differences in mounting hardware and latch components affect fit. Confirming 48624628 helps you select the correct brush guard parts such as a latch spring or end cap.
If the label is missing or unreadable
Use these identification clues to match the correct parts list:
- Compare your latch style to the lawn tractor brush guard attachment latch 66696BL3
- Check whether your guard uses an end cap like the lawn tractor brush guard end cap 28713
- Match your frame brace shape to the lawn tractor brush guard frame brace 26729BL1
Last updated: March 2026
How do I troubleshoot my 48624628?
To troubleshoot the Craftsman 48624628 brush guard, focus on fit, alignment, and latch operation: most issues come from loose hardware, a misaligned frame brace, or a worn latch/spring. Use the diagrams and assembly steps in the 48624628 owner's manual as you inspect.
Common symptoms and fixes
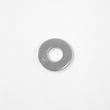
- Rattling or vibration: tighten mounting fasteners; replace worn washers or lock nuts
- Won’t latch or pops open: inspect the latch and spring for wear, bending, or loss of tension
- Guard sits crooked: check the frame brace and mounting points for bending; re-square and retighten
- Interference with hood/grille: loosen mounts, reposition to center, then tighten evenly
- Missing protective pieces: replace end caps or shroud to prevent sharp edges and reduce flex
Step-by-step troubleshooting (10 minutes)
- Park on level ground, shut off the mower, remove the key, and let hot surfaces cool.
- Grab the guard and try to move it; any movement at the mounts means hardware needs tightening.
- Verify the latch fully engages; replace the lawn tractor brush guard attachment latch 66696BL3 if it is bent or won’t hold.
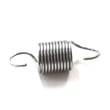
- Check spring tension; replace the lawn tractor brush guard latch spring 42117 if the latch feels weak.
- Inspect the brace and guard for bends; replace the lawn tractor brush guard frame brace 26729BL1 if it is deformed.
Hardware check (what “good” looks like)
| Item | Good condition | Replace when |
|---|---|---|
| Fasteners | Tight, threads clean | Stripped, rusted solid, won’t torque |
| Latch | Closes smoothly, holds firmly | Won’t stay closed, visibly bent |
| Spring | Snaps latch closed | Stretched, broken, low tension |
Why it matters
A brush guard that is loose or misaligned can damage mounting points over time and may contact the mower body. Keeping the latch and brace tight helps protect the front end and reduces vibration.
Last updated: March 2026
What is the average lifespan of 48624628?
The average lifespan of the Craftsman 48624628 brush guard is 10 to 15 years with normal residential use and basic care (keeping hardware tight and preventing rust). You can confirm maintenance and inspection points in the 48624628 owner's manual.
What affects brush guard lifespan most
These factors determine whether you land closer to 10 years or 15 years:
- Impacts (curbs, stumps, trailer ramps) that bend the guard or mounting points
- Corrosion from fertilizer, road salt, or storing outdoors
- Loose fasteners that let the guard vibrate and oval out mounting holes
- Missing protective pieces (end caps, shroud) that expose edges to damage
- Frequent removal and reinstallation without re-torquing hardware
Quick inspection checklist (seasonal)
We recommend checking these items at the start of the mowing season and mid-season:
- Verify the latch engages fully; replace a weak spring like the lawn tractor brush guard latch spring 42117
- Confirm the guard is not contacting the hood, grille, or tires
- Tighten mounting bolts and replace stripped nuts or washers as needed
- Look for cracks at welds and mounting tabs
- Touch up chipped paint to slow rust
Typical replacement triggers
| What you see | What it usually means | What to do |
|---|---|---|
| Guard rattles or won’t stay latched | Worn latch parts or weak spring | Inspect latch and spring, replace if needed |
| Guard sits crooked | Bent frame or brace | Inspect brace and mounting points |
| Rust-through or sharp edges | Advanced corrosion | Replace the damaged section or assembly |
Why it matters
A solid brush guard protects the front of your riding mower or tractor from light impacts and debris. Keeping the latch and mounting hardware in good shape prevents vibration damage and helps the guard stay aligned.
Last updated: March 2026