 Owner’s manual
 Error Codes



What is a bottom mounted fridge freezer?
A bottom mounted fridge freezer (bottom-mount refrigerator) keeps the refrigerator section on top and the freezer drawer/compartment on the bottom. On your Amana ARB8057CSL-PARB8057CS2, this design puts everyday fresh foods at eye level and keeps frozen foods below.
How it’s different from other refrigerator styles
Bottom-mount is mainly about where the freezer sits and how you access it.
| Style | Freezer location | What you notice day to day |
|---|---|---|
| Bottom-mount | Bottom drawer/door | Fresh food is easiest to reach |
| Top-mount | Top compartment | Freezer is easiest to reach |
| Side-by-side | Left or right side | Narrower shelves, both sections vertical |
Benefits most owners notice
- Less bending for fresh food items (milk, produce, leftovers)
- Better organization for refrigerated groceries at eye level
- Freezer storage is often deeper, with baskets or drawers
- Works well if you use the refrigerator more than the freezer
Things to know about setup and airflow
For bottom-mount refrigerators, good ventilation and leveling help cooling performance and door sealing.
- Allow about 1/2 inch of air space at the top and back for airflow
- Level the cabinet so doors close and seal consistently
- Avoid overcrowding shelves so cold air can circulate
- Keep the unit out of direct sunlight and away from heat sources
For model-specific guidance on leveling, temperature controls, and features, use the owner's manual.
Why it matters
The bottom-mount layout affects convenience, energy use, and how well the doors seal. When the refrigerator section is used most often, keeping it on top reduces door-open time and makes daily loading and unloading easier.
Last updated: February 2026
How to remove drip pan from Amana refrigerator?
On the Amana ARB8057CSL-PARB8057CS2 bottom-mount refrigerator, the drip pan (drain pan) is typically accessed from the rear near the bottom. We recommend unplugging the refrigerator first, then pulling it out and removing the lower rear access cover so you can slide the pan out carefully.
Steps to remove the drip pan
- Unplug the refrigerator to prevent electrical shock.
- Pull the refrigerator straight out from the wall to create working space.
- Remove the lower rear access panel (use the correct nut driver or screwdriver for the fasteners).
- Locate the shallow drain pan near the compressor area.
- Slide the pan out slowly and keep it level to avoid spills.
- Wash with mild detergent and warm water; dry completely.
- Slide the pan back in fully and reinstall the rear panel.
What to check while you are back there
If you are removing the drip pan because of water on the floor or recurring odors, check these common causes at the same time:
| What you see | Most common cause | What to do next |
|---|---|---|
| Water in pan is normal, but overflowing | High humidity, frequent door openings, or defrost drain issue | Clean the drain area; make sure the pan is seated correctly |
| Water on floor near front | Clogged/iced defrost drain | Clear the drain path and confirm water flows to the pan |
| Musty smell | Standing water and debris in pan | Clean pan and surrounding area thoroughly |
Why it matters
The drip pan is designed to collect defrost water so it can evaporate safely. Keeping it clean helps prevent odors, reduces the chance of overflow, and makes it easier to spot issues like a blocked defrost drain.
Reference for safe cleaning
Follow the safety and cleaning guidance in the owner's manual before cleaning around electrical components and the compressor area.
Last updated: February 2026
What number should my Amana freezer be set at?
For your Amana ARB8057CSL-PARB8057CS2 bottom-mount refrigerator, we set the freezer control to 4 as the starting point, then fine-tune to keep the freezer at 0° to 2°F. After any change, wait 5 to 8 hours (and up to 24 hours for full stabilization). See the owner's manual for the exact control location and adjustment steps.
Recommended freezer setting and target temperature
Most owners get the best results by using the factory-style method: start at the mid setting, then adjust based on actual temperature.
- Start with freezer control set to 4
- Target freezer temperature: 0° to 2°F
- If too warm: turn to the next higher number
- If too cold: turn to the next lower number
- Give changes time: 5 to 8 hours per adjustment
How to do a quick temperature check (the right way)
A control number is only a guide; the real goal is the correct temperature.
- Put a thermometer in a glass (so it measures air temperature more steadily)
- Place the glass in the freezer near the center (not against the back wall)
- Keep the door closed as much as possible
- Check after 24 hours for the most accurate reading
| What you see | What it means | What to do |
|---|---|---|
| Above 2°F | Freezer is too warm | Turn control up 1 number, wait 5 to 8 hours |
| 0 to 2°F | Freezer is on target | Leave the setting as-is |
| Below 0°F | Freezer is too cold | Turn control down 1 number, wait 5 to 8 hours |
Why it matters
Keeping the freezer at 0° to 2°F helps food stay safely frozen, improves ice maker performance, and reduces issues like soft ice cream or frost buildup from frequent temperature swings.
Last updated: February 2026
Why is my Amana refrigerator leaking water on the floor?
Water on the floor around your Amana ARB8057CSL-PARB8057CS2 refrigerator is usually caused by a clogged defrost drain, a shifted or cracked drain pan, or a leaking water supply connection to the ice maker or water valve. We recommend checking the drain path first, then inspecting the water line and valve.
Quick checks that fix most leaks
- Look for ice or debris blocking the defrost drain opening inside the fresh food section or freezer.
- Flush the drain with warm water (a turkey baster works well) until it flows freely to the drain pan.
- Pull the unit forward and confirm the drain pan is centered and not cracked.
- Inspect the water supply line and fittings for drips, especially after the shutoff valve.
- If you have an ice maker, check the fill tube and connections at the back of the cabinet.
Water line and valve issues (ice maker models)
If the leak appears near the back of the refrigerator, the water connection is a top suspect. The manual notes that plastic tubing and certain saddle-type valves can contribute to leaks and low water pressure over time; copper tubing and a proper shutoff valve connection are preferred.
If you suspect the inlet valve is seeping or not closing fully, replacing the valve is a common repair on bottom-mount refrigerators.
| Leak location | Most likely cause | What to do next |
|---|---|---|
| Front/center, intermittent | Defrost drain backing up | Clear and flush the drain path |
| Back/bottom, steady drip | Water line fitting or tubing leak | Tighten fittings; replace damaged tubing |
| Back/bottom, slow seep | Inlet valve leaking | Test and replace refrigerator valve WP12544002 |
Why it matters
A small leak can turn into floor damage and can also lead to ice buildup around the drain area, which can reduce cooling performance and cause recurring puddles.
Helpful references
- Use the owner's manual for model-specific guidance on water connections, leveling, and care.
- For step-by-step diagnostics, follow how to diagnose a faulty refrigerator water inlet valve.
Last updated: February 2026
What are the most commonly replaced parts in a refrigerator?
In most refrigerators (including Amana model ARB8057CSL-PARB8057CS2), the parts we see replaced most often are the door gasket, ice maker and water system parts, light switch and bulbs, and storage components like bins, drawers, and glass shelves. These typically wear out, break, or cause performance issues over time.
Most common replacement parts (and what they affect)
- Door gasket (door seal): prevents warm air leaks that cause long run times and frost
- Ice maker parts: restore ice production when cubes stop forming or ejecting
- Water inlet valve and tubing: fix no-water, slow fill, or leaking water supply issues
- Light switch and bulb: restore interior lighting when the door opens
- Shelves, bins, drawers, and glass: replace cracked or broken storage parts
- Small hardware (screws, brackets, stops): correct loose handles, door alignment, and fit issues
Model-specific examples you can order for ARB8057CSL-PARB8057CS2
| Symptom | Commonly replaced part | Example on this model |
|---|---|---|
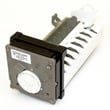
| No ice or poor ice harvest | Ice maker assembly or ice maker mechanism parts | Refrigerator ice maker D7824706Q, refrigerator ice ejector WP627843 |
| No water to ice maker, leaking, or slow fill | Water inlet valve or water line/tube | Refrigerator valve WP12544002, refrigerator tube WP2300868 |
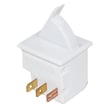
| Light does not come on | Door/light switch or bulb | Refrigerator switch W11396033, bulb replcmt W11447232 |
| Door not sealing well | Door gasket | Gasket, wht W10443317 |
Why it matters
A worn gasket or a water system problem can make the refrigerator run too often and struggle to hold temperature. Your owner's manual also calls out routine care like cleaning condenser coils, which helps reduce run time and prevents avoidable cooling complaints.
Quick checks before you buy a part
- Confirm the symptom is consistent (not intermittent after a recent door opening).
- Inspect the door gasket for gaps, tears, or areas that do not sit flat.
- If the unit runs a lot, clean the condenser coils per the manual.
- For ice and water issues, verify the household water supply is on and the line is not kinked.
- Unplug the refrigerator before any inspection or replacement work.
Last updated: February 2026





