 Installation guide
 Owner’s manual
 Error Codes




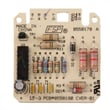
Can you get parts for a Kenmore dryer?
Yes. We carry replacement parts for Kenmore dryers, including the Kenmore model 11079622800, so you can fix common wear items (belts, switches, thermostats) and restore safe, reliable drying. Use the 11079622800 owner's manual to confirm symptoms and maintenance steps before ordering.
Common Kenmore dryer parts you can replace
These are some of the most frequently replaced parts for model 11079622800:
- Dryer drum belt 341241 when the drum will not turn or you hear a slipping squeal
- Door switch (if the dryer will not start when the door is closed)
- Operating thermostat (for overheating or poor temperature control)
- Thermal cut-off kit (after an overheat event)
- Igniter, radiant sensor, or gas valve coils (for a gas dryer that tumbles but will not heat)
How we recommend matching the right part
Start with your full model number and then match by symptom and location.
- Confirm the model tag reads 11079622800
- Compare the part name and ID to what you are replacing
- Check whether your dryer is gas or electric before ordering heat-related parts
- Inspect for lint buildup and vent restrictions first (they can cause overheating and repeat failures)
Quick symptom-to-part guide
| Symptom | Most likely area | Example part for 11079622800 |
|---|---|---|
| Drum will not spin | Drive system | Dryer drum belt 341241 |
| Dryer will not start | Door/start circuit | Dryer door switch |
| Runs but no heat (gas) | Burner/ignition | Dryer valve coil kit, igniter, radiant sensor |
| Shuts off or overheats | Airflow/limit safety | Thermal cut-off kit, venting |
Why it matters
Dryer parts wear out normally (belts, light bulbs, and other expendable items), and restricted venting can shorten the life of heating and safety components. The manual also calls out routine care like cleaning the lint screen and keeping the exhaust area clear to help prevent performance problems.
Last updated: February 2026
How do I tell what model my Kenmore dryer is?
Your Kenmore dryer’s model number is printed on the model and serial number label (rating plate). On Kenmore model 11079622800, you’ll typically find that label in the door opening (door well) or on the cabinet, and it lists both the model and serial number.
Where to look on the dryer
Check these common locations first (use a flashlight and wipe dust off the label):
- Inside the dryer door opening on the cabinet frame (door well)
- Along the front panel just inside the door
- On the back of the dryer cabinet near the top edge
- On the side panel near the rear (less common)
What to write down (and why)
We recommend recording the full model number and serial number exactly as shown on the label. The manual also calls out keeping this information handy for faster service and correct parts lookup.
| What you’ll see | Example | Why it matters |
|---|---|---|
| Model number | 11079622800 | Ensures parts like belts, thermostats, and timers match your exact build |
| Serial number | Varies | Helps identify production series and compatible revisions |
| Gas type info (if gas dryer) | Natural gas or LP convertible | Confirms burner setup and installation requirements |
Tips to avoid common mistakes
- Copy every digit; don’t shorten the number (for example, use 11079622800, not “110.7962”).
- If the label is worn, take a clear photo and zoom in.
- If your dryer is gas, the rating plate can also list burner and gas information used for installation checks.
Why it matters
Kenmore dryers share many similar-looking parts across model families. Using the exact model number helps us match the correct diagrams and parts, such as the dryer drum belt 341241 or the dryer door switch WP3406107, and prevents ordering the wrong replacement.
For label location details and how the information is used, see the 11079622800 owner's manual.
Last updated: February 2026
How much does it cost to replace a temperature sensor on a dryer?
For a Kenmore dryer model 11079622800, replacing a temperature-sensing part typically costs $20 to $60 for the part, plus $100 to $250 for labor if you hire service; total installed cost is commonly $120 to $310. Confirm the exact sensor type and access steps in the 11079622800 owner's manual.
What affects the total cost
- Which “temperature sensor” it is: operating thermostat, high-limit thermostat, thermistor, or radiant sensor (gas models)
- Service call minimum: many companies charge a flat diagnostic fee that applies even if you decline repair
- Vent restriction: overheating from poor airflow can damage sensors and fuses, increasing parts and labor
- Stacked repairs: techs often recommend replacing related wear items while the dryer is open
Typical price ranges (parts and labor)
| Item being replaced | Typical part cost | Typical labor time | Notes |
|---|---|---|---|
| Operating thermostat | $20 to $50 | 0.5 to 1.0 hr | Common “cycling” temperature control |
| Thermistor (if equipped) | $20 to $60 | 0.5 to 1.0 hr | Used on some electronic-control dryers |
| Radiant sensor (gas) | $20 to $50 | 0.5 to 1.0 hr | Helps confirm burner flame/heat |
| Thermal cut-off or fuse (overheat protection) | $10 to $40 | 0.5 to 1.0 hr | Often fails when venting is restricted |
How we recommend you confirm the right part
- Check your symptom: no heat, overheats, shuts off early, or won’t start after overheating
- Use the wiring diagram and component locations in the 11079622800 installation guide to plan access and reassembly
- If your dryer is gas and heat is intermittent, consider the dryer radiant sensor WP338906 as a common temperature-related suspect
- If the dryer runs but heat cycles oddly, the dryer operating thermostat WP3387134 is a frequent replacement item
Why it matters
A failed temperature-sensing component can cause long dry times, overheating, or repeated safety shutoffs. Fixing airflow issues (lint screen, duct, outside hood) at the same time helps the new sensor last and keeps drying performance consistent.
Last updated: February 2026
How to hard reset a Kenmore dryer?
A hard reset for your Kenmore dryer model 11079622800 is a power reset: unplug the dryer (or switch the breaker off) for about 1 minute, then restore power and restart the cycle. If it still will not start, confirm the door is fully closed and power is reaching the outlet.
Reset steps (safe, works for most Kenmore dryers)
- Turn the Cycle Selector to Off.
- Unplug the dryer (or turn the circuit breaker off).
- Wait 60 seconds.
- Restore power.
- Close the door, select a cycle, then press PUSH TO START (as described in the 11079622800 owner's manual).
If the dryer still will not start after the reset
Use this quick checklist from the installation and use instructions:
- Verify the dryer is plugged into a grounded 3-prong outlet (no adapter, no extension cord).
- Confirm the household fuse is intact or the circuit breaker has not tripped.
- Make sure the dryer door is closed.
- Try a Timed Dry heated cycle (not an air-only setting) to confirm basic operation.
- For gas models, confirm the gas shutoff valve is open.
| Symptom after reset | Most likely area to check | Common next step |
|---|---|---|
| No lights, no response | Power supply | Check breaker, outlet, cord connection |
| Runs but no heat | Gas supply or heating circuit | Verify gas valve open; then troubleshoot heat |
| Stops when door moves | Door switch or latch | Inspect door closure and switch operation |
Parts that commonly relate to “won’t start” complaints
If the dryer only runs when you press on the door, or it stops when the door is bumped, the door switch circuit is a common failure point.
- Dryer door switch WP3406107
- Door strike and latch alignment (inspect for looseness or wear)
- Start switch and timer contacts (if equipped)
Why it matters
A reset clears a temporary control “hang” and forces a clean restart, but it will not bypass safety circuits. If power, door closure, or (on gas models) the gas supply is not correct, the dryer can appear “dead” even after a reset.
Last updated: February 2026
How to open Kenmore dryer control panel?
On Kenmore dryer model 11079622800, opening the control panel typically means removing the top panel first, then removing the screws that secure the control console so it can hinge forward or lift off for access to the timer or electronic control board. Use the steps in the 11079622800 installation guide for safe access and handling.
Before you start (safety and prep)
- Unplug the dryer (or switch off the breaker) before removing any panels.
- If this is a gas dryer, close the gas shutoff valve before servicing.
- Pull the dryer forward enough to work without crushing or kinking the vent.
- Keep screws organized by location (top, console, brackets).
- Protect the finish by placing a towel on top when lifting panels.
Typical steps to open the control panel
- Disconnect power and confirm the drum light and controls are off.
- Remove the top panel: release the top (usually from the back screws or spring clips), then lift up and slide it back slightly to remove.
- Locate the console mounting screws (often 1/4-in hex-head screws) and remove them.
- Tilt the control panel forward carefully; support it so wiring is not strained.
- If you need deeper access, label and disconnect wire connectors, then remove the console bracket.
What you can access once it’s open
| What you’re checking | Common reason | What to look for |
|---|---|---|
| Timer | No advance, no heat in timed cycles | Burn marks, loose terminals |
| Electronic control | Erratic operation, won’t start | Corrosion, loose plugs |
| Door switch circuit | Won’t run with door closed | Loose connector at switch |
If the dryer will not start after reassembly, the door switch is a common failure point; the dryer door switch WP3406107 is the correct switch listed for this model.
Why it matters
Opening the control panel the right way prevents broken console tabs, pinched wiring, and reassembly issues that can cause a no-start condition or intermittent operation.
Last updated: February 2026
What is the average life of a Kenmore dryer?
A Kenmore dryer typically lasts 10 to 13 years. With consistent care (especially lint and vent cleaning), many Kenmore dryers run 15 years or more; poor airflow and heavy use shorten life. For model 11079622800, follow the maintenance guidance in the 11079622800 owner's manual.
Typical lifespan and what changes it
Most dryers wear out from heat stress, restricted airflow, and normal drum support wear.
- Longer life: clean venting, correct load sizes, stable power/gas supply
- Shorter life: clogged venting, frequent overheating, running overloaded cycles
- Usage matters: multiple loads daily ages a dryer faster than light weekly use
- Environment matters: very cold rooms can affect operation (cycles work best above about 45°F)
Maintenance that adds years (high impact)
These steps reduce overheating and strain on the motor, belt, and thermostats.
- Clean the lint screen every load
- Check and clean the exhaust duct and outside hood regularly (at least yearly)
- Keep the dryer level so the drum and rollers wear evenly
- Avoid overloading; it stretches the belt and stresses the drive system
- Stop using the dryer if you smell burning or notice repeated overheating
Common wear items and what they affect
| Wear item | What you may notice | Typical fix |
|---|---|---|
| Drum belt | Drum will not tumble, motor runs but drum stays still | Replace belt (often with idler/rollers as a set) |
| Idler pulley/rollers | Squealing, thumping, intermittent tumbling | Replace worn pulley/rollers |
| Operating thermostat/thermal cut-off | Overheating, no heat, shuts off mid-cycle | Restore airflow, replace failed safety parts |
If your 11079622800 is squealing or not tumbling, the dryer drum belt 341241 and related drum support parts are common service items.
Why it matters
A dryer that is near end-of-life often costs more to run and is harder on clothing because it needs longer cycles. Keeping airflow strong is the single best way to protect the heater, thermostats, motor, and drum drive.
Last updated: February 2026
What size is a Kenmore Model 11079622800 dryer?
For Kenmore dryer model 11079622800, the overall size is approximately 43 3/8 inches high, 27 inches wide, and 29 inches deep (depth varies slightly by door style). For installation, plan on at least 5 inches of clearance behind the dryer for the exhaust vent elbow; see the 11079622800 installation guide.
Dimensions you can plan around
These measurements come from the installation dimensions section and are the best numbers to use for fit checks.
- Width: 27 in (705 mm)
- Height: 43 3/8 in (1102 mm)
- Depth: about 29 in (737 mm), depending on door configuration
- Behind-dryer clearance: minimum 5 in (127 mm) typically needed for venting with an elbow
- Closet installs: door must allow the dryer door to open fully; ventilation openings are required
Quick reference table
| Measurement | Inches | Millimeters |
|---|---|---|
| Height | 43 3/8 | 1102 |
| Width | 27 | 705 |
| Depth (approx.) | 29 | 737 |
| Recommended vent clearance behind | 5 | 127 |
Why it matters
Correct sizing prevents crushed venting, poor airflow, longer dry times, and overheating. The extra rear clearance is especially important on vented Kenmore dryers because the exhaust elbow needs room to route without kinking.
Tips before you measure your space
- Measure the tightest point (door jambs, trim, baseboards).
- Include space for the gas line and shutoff valve if this is a gas installation.
- If installing in a closet, confirm top and bottom door vent openings meet the guide’s requirements.
- If you plan to service the dryer later, leave extra side clearance for easier access.
Last updated: February 2026








