Installation guide
 Owner’s manual


How do I find the right GE part number?
For your GE dryer model GTD84ECSN0WS, the most reliable way to get the right GE part number is to match the model number from the dryer’s ID tag to the parts list and diagrams for that exact model, then confirm the part by name and location before ordering from the model’s parts list or Sears PartsDirect.
Step-by-step: find the correct part number for GTD84ECSN0WS
- Locate the model/serial tag on the dryer (commonly inside the door opening or on the cabinet opening).
- Write the model number exactly as shown: GTD84ECSN0WS.
- Use the model-specific parts diagrams to identify the part by where it sits in the dryer (heater area, drum support, door, controls).
- Cross-check the part by description and function (for example, heating vs. airflow vs. drum support).
- Verify any installation notes and safety guidance in the GTD84ECSN0WS owner's manual before you start disassembly.
Common “right part” checks that prevent wrong orders
These quick checks help confirm you are selecting the correct replacement part for your GE dryer:
- Symptom match: The part should directly match the problem (no heat, squeal, long dry times, door not latching).
- Exact ID match: Use the exact part ID shown for the model.
- Location match: Confirm the part’s position in the diagram (front vs. rear, upper vs. lower).
- Electrical match: For electrical parts, confirm the dryer is unplugged before inspection and compare connectors visually.
- Ventilation context: Heating and thermostat issues are often caused by restricted venting; confirm airflow before replacing multiple heat parts.
Examples of parts you can match by name and function
| Dryer symptom | Part to check first | Example part on this model page |
|---|---|---|
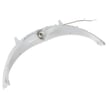
| No heat or weak heat | Heating circuit components | GE dryer heater assembly WE11X21156 |
| Long dry times | Airflow and lint path | GE dryer lint screen WE03X23881 |
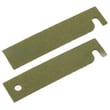
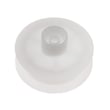
| Squealing or scraping | Drum support wear items | Dryer drum glide bearing WE03X37319 |
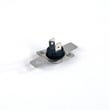
| Overheating or cycling heat oddly | Temperature sensing/safety | Dryer high-limit thermostat WE04X26138 |
Why it matters
GE often uses similar-looking parts across different dryer series, but the correct part number depends on the exact model configuration. Matching by GTD84ECSN0WS first prevents fit issues, wiring mismatches, and repeat repairs.
Last updated: February 2026
How to tell if a dryer thermal fuse is blown?
A blown thermal fuse on your GE GTD84ECSN0WS dryer usually shows up as a dryer that will not start at all, or a dryer that runs but will not heat (depending on design). We confirm the failure by safely disconnecting power and testing the fuse for continuity with a multimeter.
Quick symptoms to look for
- Dryer will not start (no motor run) even though the control panel powers up
- Dryer tumbles but produces no heat
- Cycle stops early and will not restart until it cools (some heat-related failures behave this way)
- You recently had long dry times, then the dryer suddenly stopped heating
- Lint buildup or a crushed/kinked vent hose happened around the same time
How we test a thermal fuse (safe, accurate method)
- Turn off power at the breaker and unplug the dryer (electric dryers can have two breakers/fuses; make sure both are off).
- Access the fuse location (commonly on the blower housing or heater duct, depending on the model).
- Remove at least one wire from the fuse terminal.
- Set a multimeter to continuity or lowest ohms.
- Test across the fuse terminals.
What the meter reading means
| Meter result | What it means | What to do next |
|---|---|---|
| Continuity (near 0 ohms or beep) | Fuse is good | Keep troubleshooting heat or no-start causes |
| No continuity (open/infinite) | Fuse is blown | Replace the fuse and fix the airflow problem that caused overheating |
Why it matters (and what usually causes it)
A thermal fuse is a one-time safety device; when it opens, it is protecting the dryer from overheating. The most common root cause is restricted airflow, such as a clogged lint screen, blocked ducting, or an outside damper that will not open freely. Our GTD84ECSN0WS troubleshooting guidance also points to checking that ducting is clean, unkinked, and unobstructed. Use the owner's manual to review venting and drying-time troubleshooting steps.
Related parts that often get checked during “no heat” troubleshooting
If your dryer tumbles but does not heat, these model-matched parts are commonly involved in the heating circuit:
- Dryer heating element WE11M10001
- Dryer high-limit thermostat WE04X26138
- Dryer safety thermostat WE04X25198
- Dryer heating element control thermistor WE4M398
You can order replacement parts for GE GTD84ECSN0WS from the parts list for this model, or search by model number on Sears PartsDirect.
Last updated: February 2026
What is the lifespan of a GE dryer?
A GE dryer typically lasts 13 years with normal household use. For your specific GE GTD84ECSN0WS dryer, consistent vent cleaning, lint filter care, and avoiding airflow restrictions are the biggest factors that keep the heater, motor, and drum support parts running longer (see the GTD84ECSN0WS owner's manual).
What affects dryer lifespan the most
- Vent restriction (long runs, crushed duct, clogged wall cap) increases heat and wear.
- Lint buildup in the cabinet or ducting raises temperatures and stresses thermostats.
- Overloading strains the drive motor, idler pulley, and drum glides.
- Ignoring noise (squeal, thump, scrape) often leads to bigger drum or belt-drive repairs.
- Power issues (loose cord, weak outlet) can cause intermittent operation and control problems.
Maintenance schedule we recommend
The manual calls out regular care and also notes the exhaust duct should be inspected and cleaned at least yearly.
| Task | How often | Why it matters |
|---|---|---|
| Clean lint screen | Every load | Protects airflow and drying performance |
| Check and clean exhaust ducting | At least yearly | Prevents clogs that lengthen dry time and overheat components |
| Wipe moisture sensor bars (if equipped) | Monthly | Helps auto-dry cycles shut off correctly |
| Confirm transition duct is not kinked/crushed | After moving dryer | Prevents long dry times and overheating |
Parts that commonly wear as a dryer ages
If your GTD84ECSN0WS starts taking longer to dry, overheating, or getting noisy, these are common wear items we see:
- Heating system: dryer heating element WE11M10001, dryer high-limit thermostat WE04X26138
- Drum support and glide points: dryer drum glide bearing WE03X37319, dryer drum glide bearing, upper WE03X37320
- Belt-drive support: dryer idler assembly WE03X27417
- Airflow basics: GE dryer lint screen WE03X23881
Why it matters
A dryer can still “run” well past its typical lifespan, but restricted airflow and worn drum support parts make it run hotter and longer per load. That extra heat and run time accelerates failures in the heating circuit, thermostats, and motor.
Ordering the right parts
We list model-matched replacement parts for GE GTD84ECSN0WS on this page; for broader model searches and ordering, use Sears PartsDirect.
Last updated: February 2026
What is the most common problem with a GE electric dryer?
On a GE electric dryer like model GTD84ECSN0WS, the most common complaint we see is “runs but doesn’t heat” or “takes too long to dry”. In many cases, the root cause is a power supply issue (one breaker tripped) or restricted airflow from lint buildup or a blocked exhaust duct; both are called out in the troubleshooting and care sections of the owner's manual.
Quick checks we recommend first
- Confirm the dryer is on an electric circuit with two breakers/fuses; reset both even if only one looks tripped.
- Clean the lint screen and make sure it seats fully; never run without the filter installed.
- Inspect the vent path for crushing, kinks, or heavy lint; a partially clogged exhaust can greatly increase dry time.
- Try a timed cycle with a heat setting to see if heat returns consistently.
- If clothes have lint, clean the lint screen before each load and avoid overloading.
Most common symptoms and likely causes
| Symptom | Most likely cause | What to do next |
|---|---|---|
| Tumbles but no heat | One house breaker/fuse open (240V not fully present) | Reset/replace both breakers/fuses; then retest heat |
| Long dry times | Exhaust duct restricted | Clean and inspect the full vent run; verify strong airflow |
| Overheating or shutting off | Airflow restriction or temperature sensing issue | Fix venting first; then consider sensor/thermostat testing |
| Lint on clothes | Full lint filter, overloading, sorting issues | Clean filter, reduce load size, sort fabrics |
When a part is the fix (common heating and airflow parts)
If power and venting check out, the next most common repairs involve the heating circuit and temperature sensing. For GTD84ECSN0WS, these parts are frequently involved:
- GE dryer heater assembly WE11X21156 (complete heater assembly)
- Dryer heating element WE11M10001 (heating element)
- Dryer high-limit thermostat WE04X26138 (opens if overheating occurs)
- GE dryer lint screen WE03X23881 (damaged or clogged screen can reduce airflow)
Why it matters
A dryer that “won’t heat” is often a simple electrical or venting issue, and fixing airflow also helps prevent overheating, reduces cycle time, and improves energy efficiency. We also recommend having the interior and exhaust duct cleaned periodically as part of normal maintenance.
You can order replacement parts for your GE GTD84ECSN0WS from the parts list for this model, or search by model number on Sears PartsDirect.
Last updated: February 2026