Error Codes



Where is the model number on a Crosley washer?
On the Crosley washer model VAW3584GW2, the model number is printed on a rating label attached to the washer cabinet. We most often see it under the lid around the opening, on the back of the control console, or on the cabinet side near the bottom.
Common places to check first
- Under the lid, around the tub opening (top rim area)
- Back of the control panel/console
- Left or right cabinet side near the bottom edge
- Rear panel of the washer cabinet
- Along the lid opening where the lid meets the top
Quick tips to find it fast
- Use a flashlight and look for a white or silver sticker with a barcode.
- Wipe dust off the label; detergent residue can hide the print.
- Take a photo and zoom in; model numbers are often small.
- Write down the full model number exactly as shown (letters and numbers).
- If the label is damaged, check nearby surfaces for a second sticker.
What the label usually includes (and why it matters)
The rating label typically lists the model number, serial number, and electrical information. Having the exact model number helps us match the correct washer parts, such as a washer lid lock W11307244 or drive belt W11239857, so the replacement fits and functions correctly.
| You see this on the label | What to do with it |
|---|---|
| Model number (example: VAW3584GW2) | Use it to look up diagrams and compatible parts |
| Serial number | Helps identify production version when parts change |
| Electrical ratings | Useful when diagnosing control or motor issues |
Why it matters
Crosley washers can look similar across multiple model series, but internal components like the lid lock, shift actuator, and drive system can differ. Using the exact model number prevents ordering the wrong part and saves repair time.
Last updated: February 2026
How to clean a Crosley washer?
To clean your Crosley VAW3584GW2 washer, we recommend running an empty hot-water cycle with a washer cleaner, then wiping the lid and tub ring and leaving the lid open to dry. This removes detergent residue, odors, and buildup that can affect wash performance.
Quick cleaning steps (monthly)
- Empty the washer completely.
- Select the hottest water setting available (or a tub clean cycle if your washer has one).
- Add a washer cleaning tablet or liquid washer cleaner directly into the basket (not the dispenser).
- Start the cycle and let it complete.
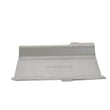
- Wipe the underside of the lid, the top rim, and the washer tub ring WPW10531289 area with a soft cloth.
- Leave the lid open for a few hours so the tub can dry out.
Deep clean for odor, slime, or visible residue
If the washer smells musty or you see buildup, do this once, then return to monthly cleaning.
- Run a hot cycle with washer cleaner.
- Run a second hot cycle with no cleaner to rinse.
- Clean the drain path: check the drain hose for kinks and slow draining.
When to check the drain system
Use this checklist if you notice standing water, sour odors, or poor rinsing:
- Water drains slowly or not at all
- You hear the pump hum but water stays in the tub
- Loads come out with a dirty smell
- The washer stops before spin
A restriction in the drain system can contribute to odors; if draining is consistently weak, the washer drain pump W10919003 is a common service item to inspect.
Helpful guide for error codes
If your VAW3584GW2 shows an error during cleaning or won’t complete the cycle, use Crosley compact top load washer error codes to match the code to the most likely cause.
Why it matters
Regular cleaning helps prevent detergent and fabric softener buildup, reduces odors, and keeps components like the lid area and tub ring from collecting grime that can transfer back onto clothes.
| Cleaning task | How often | What it helps prevent |
|---|---|---|
| Run hot empty cleaning cycle | Monthly | Odors, residue, dull clothes |
| Wipe lid and rim | Monthly | Mildew, grime transfer |
| Leave lid open after loads | Ongoing | Musty smell |
Last updated: February 2026
Why is my Crosley autosensing washer not spinning?
If your Crosley VAW3584GW2 autosensing washer won’t spin, the most common causes are a lid lock that isn’t engaging, a drain problem that leaves water in the tub, or a drive system issue (belt, actuator, or gear case) that prevents the basket from reaching spin speed.
Quick checks we recommend first
- Make sure the lid closes fully and clicks; the washer will not spin if it thinks the lid is open.
- Run a Drain/Spin cycle; if it will not drain, it typically will not spin.
- Reduce the load size and redistribute items evenly (one heavy item can stop spin).
- Verify the washer is level and stable; excessive vibration can trigger a spin stop.
- Unplug the washer for 2 minutes, then retry a spin cycle (simple control reset).
Most likely part-related causes on model VAW3584GW2
Lid lock not locking
A failed lid lock can stop the spin cycle for safety.
- Symptom: Lid never locks, or it locks then immediately unlocks
- Common fix: Replace the lid lock assembly
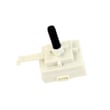
- Part to check: washer lid lock W11307244
Not draining fully (pump or hose restriction)
If water remains in the tub, the control often prevents high-speed spin.
- Symptom: Standing water, slow drain, or humming during drain
- Parts to check: washer drain pump W10919003, hose asm - d W11244231
Drive system not transferring power to the basket
A worn belt, shifting problem, or internal drive issue can prevent spin.
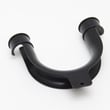
- Parts to check: drive belt W11239857, actuator, shift W11481722, gear case assembly W11454741
Symptoms and what they usually point to
| What you notice | What it usually means | What to check first |
|---|---|---|
| Won’t spin and won’t drain | Drain path problem | Drain pump, drain hose |
| Drains but won’t spin | Lid lock or drive issue | Lid lock, belt, actuator |
| Spins sometimes, then stops | Off-balance or suspension issue | Load balance, damper/suspension |
| Loud rubbing/grinding in spin | Mechanical drive wear | Belt, gear case |
Why it matters
A no-spin condition is often the washer protecting itself (lid not locked, water not drained, or severe imbalance). Fixing the root cause prevents repeat shutdowns and helps avoid extra wear on the drive belt, actuator, and gear case.
Helpful DIY reference
For model-specific fault patterns, we use the Crosley compact top load washer error codes guide to match symptoms to likely causes.
Last updated: February 2026
Why is my Crosley auto sensing washer not draining?
On the Crosley VAW3584GW2 washer, a no-drain problem is usually caused by a clogged drain path, a failed drain pump, or a lid lock issue that prevents the control from completing the drain and spin portion of the cycle. Start with the simplest checks first.
Quick checks that fix most no-drain calls
- Unplug the washer for 1 minute to reset the control, then try a Drain/Spin cycle.
- Make sure the lid fully closes and latches; the washer will not drain/spin normally if it cannot confirm the lid is locked.
- Check the standpipe or laundry tub for a slow household drain (it can look like the washer is not draining).
- Verify the drain hose is not kinked, crushed, or pushed too far down the standpipe.
- Reduce the load size; heavy, waterlogged loads can stall the cycle and leave water behind.
Check for clogs in the drain system
Most clogs are in the drain hose, pump inlet, or the tub-to-pump path (coins, socks, lint). If you hear the pump humming but water barely moves, a blockage is the top suspect.
| What you notice | Most likely cause | What to do next |
|---|---|---|
| Pump hums, little or no water flow | Clog at pump or hose | Inspect hose and pump inlet; clear debris |
| No pump sound at all | Lid lock not engaging or pump not getting power | Confirm lid lock operation; then test pump circuit |
| Drains slowly, then stops | Partial clog or restricted hose routing | Re-route hose, clear restriction |
Parts that commonly cause “won’t drain”
If the drain path is clear, these model-compatible parts are the most common fixes:
- Washer drain pump W10919003 (failed motor, jammed impeller, or internal restriction)
- Hose asm - d W11244231 (split, kinked, or internally restricted drain hose)
- Washer lid lock W11307244 (washer will not proceed to drain/spin if lid lock feedback is wrong)
Why it matters
A washer that cannot drain will often refuse to spin, leaving clothes soaking wet and putting extra strain on the drive system. Fixing the drain issue early helps prevent repeat stoppages and reduces wear on components like the belt and gear case.
For display codes or repeated stopping during Auto Sensing, use our Crosley compact top load washer error codes guide to match the symptom to the most likely circuit or part.
Last updated: February 2026