




Why is my brand new Maytag dryer not drying?
A brand new Maytag dryer like model MDE4057AYW usually fails to dry because it is not getting full heat (240V supply issue), airflow is restricted (venting or lint blockage), or the cycle and load settings are mismatched. Start with power and venting checks before replacing parts.
- Confirm the dryer is on a heated cycle (not Air Fluff or No Heat).
- Clean the lint screen and make sure it is not coated with fabric softener residue.
- Verify strong airflow at the outside vent hood while the dryer runs.
- Check that the exhaust duct is not crushed, kinked, or excessively long.
- For electric dryers, confirm the outlet and breaker supply 240V (a dryer can run but not heat on 120V).
- Avoid overloading; tightly packed loads dry very slowly.
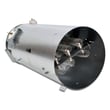
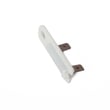
If the drum tumbles but clothes stay cold or damp, the most common cause is partial power loss at the breaker (one leg tripped). If power is correct and airflow is good, then heating circuit parts can be involved, such as the dryer heating element WP307178 or a blown thermal fuse like the dryer thermal fuse, 195-degree f WP33001762.
| What you notice | Most likely cause | What we recommend |
|---|---|---|
| Tumbles, no heat | 240V supply issue, thermal fuse, heater circuit | Check breaker and outlet voltage; then test fuses/heater |
| Heat is weak, long dry times | Restricted venting, lint buildup | Clean vent path end-to-end |
| Shuts off early, clothes damp | Airflow restriction, overloaded drum | Improve airflow; reduce load size |
- Flexible foil vent (poor airflow) or long vent run
- Vent hood flap stuck closed
- Lint buildup in the duct or blower housing
- Lint screen not sealing or missing (inspect the dryer lint filter WP33001808)
Poor airflow and incorrect power cause long dry times, overheating, and repeated shutdowns. Fixing venting and power first prevents unnecessary part replacement and helps the dryer reach proper temperature and moisture-sensing performance.
Last updated: February 2026
How to remove the front panel of a Maytag dryer?
To remove the front panel on a Maytag MDE4057AYW dryer, we unplug the dryer first, then release the top, disconnect the door switch wiring, and remove the front panel mounting screws so the panel can lift off the lower clips. This gives access to the drum, belt, and blower area.
- Unplug the dryer (electric shock hazard).
- If it is a gas dryer, shut off the gas supply valve as well.
- Wear cut-resistant gloves; cabinet edges are sharp.
- Take a photo of wire connections before disconnecting anything.
- Support the drum if you remove the front panel and the drum is no longer supported at the front.
- Disconnect power and pull the dryer forward for access.
- Remove the lint screen, then remove the screws in the lint screen housing (these often secure the top).
- Release the top panel:
- Insert a putty knife a few inches in from each front corner to release the spring clips, then lift the top.
- Disconnect the door switch harness (usually a quick-connect plug near the top right or left of the front panel).
- Remove the front panel screws (commonly inside the cabinet near the upper corners).
- Lift the front panel up and off the lower retaining tabs/clips, then pull it forward.
| Area exposed | Common symptom | Example part for MDE4057AYW |
|---|---|---|
| Drum support | Squealing, thumping | Roller w/bea 12001541 |
| Belt drive | Drum will not tumble | Belt, tumble WP33002535 |
| Overheat protection | Dryer will not heat or stops | Dryer thermal fuse, 243-degree f WP307473 |
- Seat the front panel on the lower clips first, then swing it into place.
- Reconnect the door switch before closing the top.
- Confirm the drum turns freely by hand before restoring power.
Removing the front panel correctly prevents bent cabinet panels, broken door switch wiring, and misalignment that can cause belt wear, drum noise, or poor airflow.
Last updated: February 2026
What's the life expectancy of a Maytag dryer?
A Maytag dryer like model MDE4057AYW typically lasts about 13 years with normal household use and basic maintenance. Keeping airflow strong and replacing wear items early (belt, rollers, thermal fuse) helps you reach that lifespan and avoid breakdowns.
- Airflow and venting: clogged lint paths make the dryer run hotter and work harder.
- Load size: frequent overloading strains the drum support system and motor.
- Heat cycling: long high-heat cycles accelerate wear on thermostats and heating parts.
- Wear parts condition: a worn belt, roller, or idler pulley increases friction and noise.
- Electrical health: loose connections can cause intermittent power or overheating.
- Clean the lint screen every load; replace a damaged screen such as the dryer lint filter WP33001808.
- Vacuum lint from the blower area and exhaust path periodically.
- Confirm the outside vent hood opens fully and is not blocked.
- Stop using the dryer if you smell burning or hear loud squealing or thumping.
- If the drum stops turning, inspect common drive parts like the belt, tumble WP33002535 and drum rollers.
| Symptom | What it often points to | Example part for MDE4057AYW |
|---|---|---|
| Loud thumping/rumbling | Worn drum support rollers | Drum support roller 12001541 |
| Squealing | Belt or idler wear | Belt WP33002535 |
| Runs but no heat | Heating circuit issue | Dryer heating element WP307178 |
| Won’t start or stops mid-cycle | Safety fuse or airflow problem | Dryer thermal fuse WP33001762 |
A dryer near the end of its typical life can still be a great repair candidate when the issue is a normal wear part (belt, roller, thermal fuse). Fixing those early reduces strain on the motor and heating system and helps the dryer dry faster with less energy.
Last updated: February 2026
Where to find part number on Maytag dryer?
On a Maytag dryer like model MDE4057AYW, the part number is usually printed on a sticker or stamped tag on the part itself (not on the control panel). For ordering, we match the part to your model first, then confirm the exact part number for the component you’re replacing.
Check these common ID locations first:
- Door opening: around the door frame or just inside the front panel
- Back panel: near the power cord entry or lower rear area
- Inside the cabinet: behind the front panel or top (after unplugging the dryer)
- On the part itself: stamped/printed on items like the belt, thermal fuse, thermostat, or blower wheel
- Wiring diagram pouch (if present): sometimes includes part references, but the model tag is still the key
The model number identifies the dryer; the part number identifies the replacement component.
| What you’re looking at | Example | What it’s used for |
|---|---|---|
| Dryer model number | MDE4057AYW | Ensures parts compatibility |
| Part ID (Sears PartsDirect identifier) | WP33002535 | Helps you find the exact part page |
| Manufacturer part number | 33001777 | Used by the part maker and cross-references |
Many customers find the part number directly on the old part. For example:
- Belt: often printed on the belt; match it to the belt, tumble WP33002535
- Thermal fuse: typically labeled on the fuse body; common options include dryer thermal fuse, 243-degree f WP307473 or dryer thermal fuse WP33001762
- Blower wheel: may have molded-in numbers; compare to the dryer blower wheel 33001790
Maytag dryers can use different versions of the same-looking component across production runs. Using MDE4057AYW to match the correct part prevents wrong-fit issues, repeat repairs, and return delays.
Last updated: February 2026





