Installation guide
 Owner’s manual
 Error Codes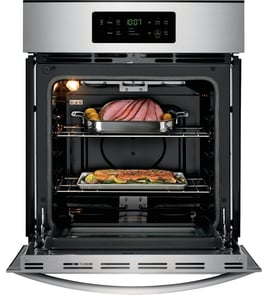




How do I reset my Kenmore Elite electric oven?
To reset your Kenmore Elite wall oven model 79048183002, we recommend doing a simple power reset: turn the oven off, shut off power at the circuit breaker for 3 to 5 minutes, then restore power and set the clock. This clears many control glitches.
Quick reset steps (most common)
- Press OFF/CANCEL to stop any active bake, broil, or self-clean cycle.
- Turn OFF the wall oven breaker (or remove the fuse) at your home electrical panel.
- Wait 3 to 5 minutes.
- Turn the breaker ON.
- Re-set the clock and test BAKE.
If the oven still will not respond
A reset will not fix a hard power or safety-open condition. Check these common causes:
- Tripped breaker (wall ovens often use a 240V double-pole breaker).
- Loose or overheated wiring at the junction box.
- Blown thermal fuse that opened from overheating.
- Failed temperature sensor causing abnormal heating behavior.
- Control board issue if the display is dead or keys do not respond.
Parts that commonly relate to “won’t heat” or “dead display” symptoms
| Symptom after reset | What to check first | Example part for this model |
|---|---|---|
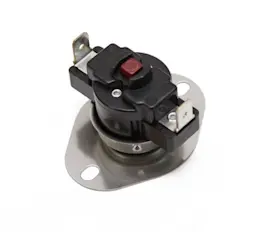
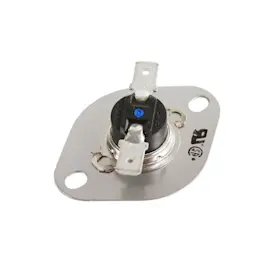
| Oven dead, no heat | Overheat protection opened | Wall oven thermal fuse 5304506123 |
| Temps inaccurate, long preheat | Sensor out of range | Range oven temperature sensor 5304504897 |
| Intermittent power, burning smell | Power connection issue | Terminal block (inspect wiring) |
Why it matters
A wall oven reset is mainly a control reboot. If power wiring is loose or a safety device opened, the oven can stay off until the underlying electrical or overheating problem is corrected.
Safety note for built-in wall ovens
Disconnect power before any inspection. The installation instructions for 79048183002 call out grounding requirements and disconnecting power to the junction box before making electrical connections; follow the installation guide.
Last updated: February 2026
How do I unlock a Kenmore Elite oven door?
To unlock the door on your Kenmore Elite wall oven model 79048183002, cancel the current cycle first, then press and hold STOP/CLEAR for about 5 seconds until you hear the lock mechanism click and the door releases. If the oven is still hot, the lock can stay engaged until it cools.
Quick unlock steps
- Press STOP/CLEAR once to cancel baking, broiling, or self-clean.
- Press and hold STOP/CLEAR for 5 seconds.
- Listen for a click from the door lock motor.
- Wait 30 to 90 seconds for the latch to retract.
- If the display shows a lock indicator, let the oven cool down and try again.
- If power was interrupted, restore power and repeat the hold-to-unlock step.
If the door is locked after self-clean
During or right after self-clean, the door lock is heat-protected and commonly stays locked until the oven cavity temperature drops.
| Situation | What to do | What to expect |
|---|---|---|
| Self-clean just ended | Wait for cooling, then hold STOP/CLEAR 5 seconds | Unlock after cooldown |
| Oven still warm/hot | Keep door closed; allow more cooling time | Lock remains engaged |
| Lock never releases | Reset power at the breaker for 1 minute, then retry | Control reboots |
When it points to a part problem
If the control responds but the latch never moves, a failed lock component or a safety device can keep the door locked.
- Door lock motor not moving or stuck: check the wall oven door lock motor 318261226
- Oven overheated and opened a safety circuit: check the wall oven thermal fuse 5304506123
- Door switch not sensing closed position: inspect the door switch and latch alignment
Why it matters
Forcing a locked oven door can bend hinges, damage the latch, or crack the door glass. Using the correct STOP/CLEAR unlock procedure protects the door lock system and helps you avoid unnecessary parts replacement.
For control locations and model-specific operating notes, use the 79048183002 owner's manual.
Last updated: February 2026
Is Kenmore Elite high end?
Yes. Kenmore Elite is Kenmore’s premium line, and the Kenmore Elite wall oven model 79048183002 is built to deliver higher-end features and fit-and-finish compared with standard Kenmore models, with performance ultimately depending on the exact configuration and installation.
What “high end” means for Kenmore Elite
Kenmore Elite typically sits in the mid-to-high range of the market. In practical terms, that usually means:
- More cooking features (often convection options, more precise temperature control)
- More premium exterior styling and control layouts
- More complex electronics (control boards, sensors, door lock systems)
- Higher replacement-part costs compared with basic models
- Tighter installation requirements for cabinet cutout and electrical hookup
For model-specific installation requirements, use the 79048183002 installation guide.
Quick comparison: Kenmore vs Kenmore Elite
| Line | Typical positioning | What you usually get | Tradeoffs |
|---|---|---|---|
| Kenmore (standard) | Value to mid-range | Core bake/broil functions | Fewer advanced features |
| Kenmore Elite | Mid-to-high end | More features and premium design | More parts complexity and cost |
| Pro-style/luxury brands | High end to luxury | Pro aesthetics, specialty modes | Highest purchase and repair cost |
Why it matters when you’re buying parts or troubleshooting
“High end” often means the oven relies more on precision sensing and controls. If you’re diagnosing temperature or heating complaints on this model, these parts are common players:
- Range oven temperature sensor 5304504897 (helps regulate oven temperature)
- Bake and broil heating circuits (elements, wiring, terminals)
- Relay/control electronics (can affect heat cycling and error behavior)
- Door lock and door switch components (can affect self-clean and operation)
Practical tips for owners of model 79048183002
- Confirm your cabinet cutout measurements before any reinstall; the installation instructions call out specific cutout ranges.
- If baking seems off by 25 to 50 degrees, test temperature with an oven thermometer and consider the sensor and calibration steps in the manual.
- If the oven is dead or intermittently loses power, check the house breaker first, then inspect wiring connections and terminal condition.
Last updated: February 2026
Where is the model number on a Kenmore Elite stove?
On a Kenmore Elite built-in oven like model 79048183002, the model number is typically on the oven frame behind the door, along the door jamb, or on a rating label visible when the door is open. For some installations, it can also be on the side trim or rear area.
Most common places to check
- Open the oven door and look along the left or right door jamb (the frame the door closes against)
- Check the front frame just behind the door, near the bottom edge
- Look behind the lower access panel (if your wall oven has one)
- Check the side trim area (visible when the door is open)
- If the oven was removed for service, check the rear panel label
What the label looks like
Most Kenmore Elite wall ovens use a rating label that includes:
- Model number (for example, 79048183002)
- Serial number
- Electrical ratings (volts/amps)
- Sometimes the manufacturing code information
Quick checklist before you start
- Make sure the oven is cool and the door is fully supported
- Use a flashlight and take a photo once you find the tag
- Write down the model number exactly; this ensures the correct parts match
Why it matters
The model number is what we use to match the correct Kenmore Elite wall oven parts, installation cutout requirements, and wiring details. It also helps confirm whether your unit is a 27-inch or 30-inch configuration referenced in the installation guide.
| If you find the tag here | What to record |
|---|---|
| Door jamb / front frame | Model and serial number |
| Rear panel (service access) | Model, serial, electrical ratings |
| Side trim area | Model number (verify full digits) |
Last updated: February 2026
Why is my Kenmore Elite oven not working?
If your Kenmore Elite wall oven model 79048183002 is completely dead or will not heat, the most common causes are a power supply problem (breaker, junction box connection, terminal block) or a failed safety/control component such as a thermal fuse, temperature sensor, or relay control board. Use the wiring and safety steps in the 79048183002 installation guide to verify power is safely disconnected before testing.
Quick checks first (no parts needed)
- Confirm the oven is not in a timed cook/delay start mode; cancel and retry Bake.
- Check the home breaker; wall ovens often use a 2-pole breaker that can trip partially.
- If the display is off, reset power at the breaker for 1 minute, then restore power.
- If the display is on but it will not heat, test Bake and Broil separately.
- If the oven was recently installed or moved, recheck the junction box connections and strain relief.
Most likely causes and what to test
| Symptom | Most likely cause | What you can check |
|---|---|---|
| No display, no heat | Power supply issue, loose/burned connection | Breaker, junction box wiring, terminal block condition |
| Display works, no heat | Failed sensor or control, open safety device | Sensor resistance/continuity, thermal fuse continuity |
| Heats sometimes, temps off | Temperature sensor drifting | Test/replace sensor |
Parts that commonly fix “not working”
- Terminal block 5304409888: if wiring connections are loose, overheated, or damaged.
- Wall oven thermal fuse 5304506123: if the oven is dead after an overheat event.
- Range oven temperature sensor 5304504897: if the oven runs but will not regulate temperature.
- Wall oven relay control board 316443935: if outputs to heating circuits fail (advanced diagnosis).
Safe DIY testing tips
- Turn off power at the breaker and verify power is off before touching wiring.
- Use a multimeter to check continuity on fuses and to measure sensor resistance.
- Inspect for heat damage at wire connectors and the terminal block.
Why it matters
A wall oven that “does nothing” is usually a power delivery issue, while an oven that powers on but will not heat is usually a sensor, fuse, or control problem. Correct diagnosis prevents repeat failures and protects wiring connections.
Last updated: February 2026