Owner’s manual
 Error Codes





What is the average lifespan of a Maytag refrigerator?
A Maytag refrigerator like model MFI2269VEM10 typically lasts 13 years on average. Real-world lifespan depends most on compressor run time, condenser cleanliness, door seal condition, and how often the doors are opened.
Typical lifespan range (what we see most often)
- Average: 13 years
- Common range: 10 to 15 years
- Often shorter when: coils are clogged with dust, doors do not seal, or the unit runs in a hot garage
| Lifespan estimate | What it means | What usually drives it |
|---|---|---|
| 10 years | Early replacement | heavy use, poor airflow, dirty coils |
| 13 years | Typical average | normal household use and basic maintenance |
| 15+ years | Above average | clean coils, stable temps, good door seals |
What matters most for MFI2269VEM10 longevity
We use these maintenance and usage factors to help you get the most years out of your bottom-mount refrigerator:
- Keep airflow clear at the grille and around the cabinet (good ventilation reduces compressor strain).
- Clean spills and odors regularly so gaskets and liners stay in good shape.
- Replace the water filter on schedule if you use the dispenser/ice maker.
- Avoid overloading the doors and bins; extra weight can affect alignment and sealing.
- Watch for early warning signs: warmer temps, longer run times, unusual noises, or moisture around doors.
Where to find model-specific care steps
For cleaning guidance, temperature control basics, and routine care intervals specific to this Maytag model, use the MFI2269VEM10 refrigerator manual.
Why it matters
Knowing the expected lifespan helps you decide whether to maintain, repair, or plan for replacement. Small upkeep steps (especially keeping airflow and seals in good shape) can prevent expensive cooling-system wear.
Last updated: January 2026
How to lower wheels on Maytag refrigerator?
On Maytag model MFI2269VEM10, you lower the refrigerator by removing the base grille and turning the roller adjustment screws or leveling screws to the left (counterclockwise), depending on which leveling style your unit has. Recheck door closing after each small adjustment using the MFI2269VEM10 user manual.
Where the adjustments are and what tool to use
Start at the front base of the cabinet.
- Pull off the base grille (toe grille) to access the adjusters.
- If your unit has adjustable rollers, use a 3/8-in hex driver on the roller adjustment screw.
- If your unit uses leveling screws, use a 1/4-in hex driver on the leveling screw.
- Turn both sides the same amount to keep the cabinet square.
- If needed, adjust the rear roller screws (some units have them) with a 3/8-in hex driver.
Step-by-step: lowering the front (and setting the tilt)
- Remove the base grille.
- Have someone gently push back on the top of the refrigerator to take weight off the adjusters.
- Turn the adjuster left to lower that side.
- Aim for a slight tilt back so the doors close easily.
- If your model has a brake foot, turn it down until it is firmly against the floor to prevent rolling.
Quick reference: which direction lowers it?
| Leveling style on MFI2269VEM10 | What you turn | To lower the refrigerator |
|---|---|---|
| Adjustable rollers | Roller adjustment screw | Turn left |
| Leveling screws | Leveling screw | Turn counterclockwise |
If the grille is damaged or won’t snap back on
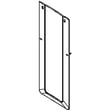
A bent or cracked grille can keep you from accessing the adjusters easily and may not fit tightly afterward. If you need a replacement, match it to your model using the refrigerator toe grille WPW10534162.
Why it matters
Proper leveling helps the French doors seal correctly, improves door closing, and reduces vibration and noise. It also helps keep the freezer drawer from pulling the cabinet forward.
Last updated: January 2026
What is the most common problem with a Maytag refrigerator?
The most common issue we see with the Maytag MFI2269VEM10 bottom-mount refrigerator is not cooling well (fresh food warm, freezer warming, or both). In many cases it comes down to airflow, temperature settings, or a cooling-system component such as the evaporator fan or defrost system; see the MFI2269VEM10 user manual for model-specific troubleshooting steps.
Quick checks we recommend first
- Confirm the controls are set to the recommended temperatures; wait 24 hours after any adjustment.
- Make sure air vents inside the refrigerator and freezer are not blocked by food packages.
- Verify both doors close fully and the gaskets are clean and sealing.
- If the unit was just installed or recently moved, allow 24 hours to cool completely.
- Listen for normal fan operation; a failed fan can cause warm temperatures.
Parts that commonly relate to “not cooling” symptoms
If basic checks do not help, these model-compatible parts are often involved in cooling complaints:
- Evaporator fan blade WP67006337 (moves cold air through the compartments)
- Evaporator motor W10850438 (drives the evaporator fan)
- Refrigerator defrost bi-metal thermostat WP67006387 (helps control defrost heating)
Symptom-to-likely-cause guide
| What you notice | Common direction to check | Why it matters |
|---|---|---|
| Freezer cold, refrigerator warm | Airflow issue (evaporator fan, blocked vents) | Cold air is made in the freezer and must be circulated to the fresh-food section |
| Frost/ice buildup, temps rising | Defrost system issue | Frost can block airflow across the evaporator |
| Both sections warm | Cooling system not running efficiently | Can point to fan, control, or sealed-system concerns |
Why it matters
When a refrigerator is not cooling, food safety and compressor run time are the big concerns. Catching airflow or defrost problems early can prevent heavier icing, warmer temperatures, and longer run cycles.
Helpful DIY resource
For a deeper walkthrough on cooling failures, use refrigerator wont cool troubleshooting video defrost system problems.
Last updated: January 2026
Can you lower the fridge height?
Yes. On the Maytag MFI2269VEM10 bottom-mount refrigerator, you can lower the cabinet by adjusting the front leveling system behind the base grille; turn the leveling/roller adjustment so the front drops, then reinstall the grille. See the MFI2269VEM10 user manual for the exact adjustment style on your unit.
How to lower the cabinet (leveling adjustment)
- Remove the base grille (toe grille) at the bottom front.
- Identify your leveling style:
- Style 1: roller adjustment screws (front and possibly rear)
- Style 2: leveling screws (one on each side)
- Lower the refrigerator:
- Style 1: turn the roller adjustment screw to the left.
- Style 2: turn the leveling screw counterclockwise.
- Adjust both sides the same amount so the doors stay aligned.
- Reinstall the base grille.
Quick checklist before you start
- Use a 1/4-inch hex driver (common for leveling screws) or a 3/8-inch hex driver (common for roller adjustment screws).
- Have someone gently push back on the top of the refrigerator to reduce weight on the adjusters.
- Keep the refrigerator slightly tilted back so the doors close easily.
- Recheck door swing and gasket contact after each small adjustment.
What “lowering” really changes
Lowering the front legs/rollers reduces the cabinet height slightly, but it also changes door closing and alignment.
| Adjustment goal | What to do | What you should notice |
|---|---|---|
| Lower overall front height | Turn adjusters to lower both sides evenly | Cabinet sits lower, doors may feel heavier |
| Improve door closing | Raise the front slightly (tilt back) | Doors close more easily |
| Fix uneven doors | Adjust one side slightly more than the other | Door tops line up better |
Why it matters
Correct leveling helps the French doors seal properly, prevents warm air leaks, and reduces moisture or frost issues caused by doors not closing squarely.
Last updated: January 2026