 Installation guide
 Owner’s manual


How to get rid of control lock on GE microwave?
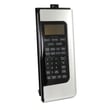
To turn off Control Lock on your GE JVM1850SM4SS microwave/hood combo, press and hold CLEAR/OFF for about 3 seconds until “CONTROL LOCKED” or “LOCKED” disappears from the display. This restores normal keypad operation.
Quick steps to unlock the controls
- Make sure the microwave is plugged in and the display is on.
- Press CLEAR/OFF.
- Keep holding CLEAR/OFF for about 3 seconds.
- Release the button when the lock message clears.
- Test a simple function (for example, set the clock or start a short timed cook).
If it still shows “LOCKED”
Sometimes the keypad does not register a long press on the first try. Use this checklist:
- Press the center of the CLEAR/OFF pad firmly (not the edge).
- Hold it a full 3 seconds (count slowly).
- If the display is unresponsive, unplug the microwave for 60 seconds, plug it back in, then try again.
- Confirm the door is fully closed and latched before testing any cooking cycle.
What “Control lock” does (and why it matters)
Control Lock is a safety feature that disables most keypad inputs to prevent accidental operation (common when cleaning the control panel or when kids are nearby). Unlocking it is the fastest way to restore normal start, time cook, and vent/light controls.
Control lock at a glance
| Display message | What it means | What to do |
|---|---|---|
| CONTROL LOCKED / LOCKED | Keypad is locked | Hold CLEAR/OFF ~3 seconds |
| Oven will not start (no lock message) | Power/door issue is more likely | Check outlet, breaker, and door closure |
For the exact wording and feature notes for this model, use the JVM1850SM4SS owner's manual.
Last updated: February 2026
Do all over the range microwaves have the same dimensions?
No. Over-the-range microwaves are built around common cabinet openings, but they are not all the same dimensions. For GE model JVM1850SM4SS, the installation requirements call for a 30-inch-wide cabinet space and specific clearances, so you should measure your opening and follow the installation guide before replacing an OTR unit.
What is “standard” for OTR microwaves?
Most OTR microwaves are designed to fit a 30-inch cabinet opening, but height and depth vary by model and venting design.
Common size patterns you will see:
- Width: typically 30 inches (some compact models are narrower)
- Height: varies by model (standard vs. low-profile designs)
- Depth: varies based on door style and handle projection
- Mounting: wall plate and top cabinet bolt locations can differ between brands and models
Model-specific fit rules for GE JVM1850SM4SS
From the installation requirements for this model:
- The space between cabinets must be 30 inches wide and free of obstructions.
- The bottom of the cabinet needs to be 30 inches or more above the cooking surface.
- The microwave is intended for installation over ranges up to 36 inches wide.
- The microwave must be installed level; cabinet trim or a recessed cabinet bottom can change how the mounting plate is positioned.
Quick fit checklist (measure before you buy)
- Cabinet opening width (target: 30 inches)
- Distance from cooktop to cabinet bottom (minimum: 30 inches)
- Floor to top of microwave location (often 66 inches or more, depending on your kitchen layout)
- Venting path (recirculating vs. outside venting) and whether cabinetry blocks the vent grille
Why it matters
Even when two OTR microwaves are both “30-inch models,” differences in mounting-hole patterns, venting orientation, and door depth can prevent a clean swap. Using the correct clearances helps the hood fan vent properly and keeps the unit level and secure.
| What must match | Why it matters | What to check |
|---|---|---|
| Cabinet opening width | Ensures the microwave fits between cabinets | Measure inside-to-inside width |
| Cooktop clearance | Prevents heat damage and meets install requirements | Measure cooktop to cabinet bottom |
| Mounting layout | Avoids drilling new holes or misalignment | Compare templates in the guide |
| Venting setup | Prevents restricted airflow | Confirm duct direction or recirculation |
Last updated: February 2026
What is the average lifespan of a GE microwave?
Most GE microwaves average 7 to 10 years of service life with normal household use. For an over-the-range model like GE JVM1850SM4SS, lifespan depends most on ventilation, keeping the cavity clean, and avoiding conditions that strain the door interlock and heating system; see the owner's manual for care and operating guidance.
Typical lifespan and what changes it
A microwave’s life is usually limited by wear on the door safety system, cooling and venting performance, and high-voltage heating components.
- Light use (reheating only): often closer to 10 years
- Heavy use (multiple cook cycles daily): often closer to 7 years
- Poor airflow or grease buildup: shortens life by overheating internal parts
- Door slamming or misalignment: accelerates interlock wear
- Running empty or frequent arcing events: can damage the cavity and components
What to do to help your JVM1850SM4SS last longer
We recommend these habits for GE over-the-range microwaves:
- Clean interior splatters regularly; avoid abrasive cleaners and never use oven cleaner
- Keep the grease filter clean so the vent system can move air properly
- Close the door gently so the latch and interlock switches stay aligned
- Use microwave-safe cookware only; keep metal out unless the manual specifically allows it
- Stop using the unit if you see arcing or burning; address the cause before continued cooking
Parts that commonly affect “end of life” symptoms
If the microwave stops running, runs only with the door held, or heats inconsistently, these parts are common suspects on this model:
| Symptom | Common area | Example part on this model |
|---|---|---|
| Won’t start, intermittent start | Door interlock system | Micro-switch WB24X830 |
| Door won’t latch or feels loose | Latch/lever hardware | Microwave latch body WB06X10676 |
| Runs but does not heat | High-voltage heating system | Microwave magnetron WB27X10880 |
Why it matters
Knowing the typical 7 to 10 year lifespan helps you decide whether to troubleshoot and replace a wear part (like an interlock switch) or plan for replacement when a major component (like the magnetron) fails.
Last updated: February 2026
What are common problems with GE JVM1850SM4SS microwaves?
Common problems with the GE JVM1850SM4SS microwave/hood combo include not heating, not starting due to a door-latch or interlock issue, loud or no turntable rotation, and hood-light or vent-fan problems. We use the symptoms below to narrow the likely part and the safest next step; see the owner's manual for model-specific use and care.
Most common symptoms and what they usually point to
- Runs but does not heat: high-voltage system issue (often the magnetron, capacitor, or transformer)
- Dead display or won’t power on: blown fuse, power supply issue, or door interlock not proving closed
- Starts then stops, or won’t start: door latch body or door interlock switch problem
- Turntable not rotating: failed turntable motor or obstruction under the tray
- Cooktop light out: burned-out bulb (this model uses a 120V, 40-watt incandescent bulb)
- Vent fan noisy or not working: vent fan motor or capacitor
Parts on this model that commonly fix these issues
If your symptom matches, these are frequently replaced parts for JVM1850SM4SS:
| Symptom | Common part to check/replace | Example part on this model |
|---|---|---|
| Won’t start, door error behavior | Door interlock switch | Micro-switch WB24X830 |
| Door won’t latch correctly | Latch mechanism | Microwave latch body WB06X10676 |
| No heat (unit runs) | Magnetron | Microwave magnetron WB27X10880 |
| Turntable not turning | Turntable motor | Microwave turntable motor WB26X10233 |
| Cooktop light out | Cooktop light bulb | Microwave light bulb WB36X10003 |
| Vent fan not working | Vent fan motor assembly | Microwave vent fan motor assembly WB26X10210 |
Quick checks we recommend before ordering parts
- Confirm the outlet has power; reset the breaker if needed.
- Make sure the door closes firmly and the latches engage (no slamming).
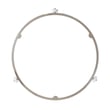
- Remove the glass tray and roller support; clean and reinstall so it sits flat.
- If the cooktop light is out, replace with the correct bulb type and wattage.
- Clean the grease filter regularly; restricted airflow can make the hood louder and less effective.
Why it matters
Microwave door interlock parts are a safety system; if the latch or switches are worn, the microwave may not run at all or may behave inconsistently. Heating problems can involve high-voltage components; those repairs require careful handling and are often best left to a qualified technician.
Last updated: February 2026


