Installation guide
 Owner’s manual
 Error Codes



How to clean the coils on a Kenmore side by side refrigerator?
For Kenmore side-by-side refrigerator model 10656652500, we clean the condenser coils by unplugging the refrigerator, gently brushing and vacuuming dust from the coil area, then restoring power. In most homes, routine coil cleaning is not needed unless the area is dusty, greasy, or you have pets (then cleaning helps cooling performance).
Before you start (safety and setup)
- Unplug the refrigerator or disconnect power at the breaker.
- Keep cleaning products nonflammable.
- Use a soft brush and a vacuum with a brush attachment.
- Avoid bending coil fins or pulling on wiring.
- If you need access instructions for your exact cabinet layout, use the owner's manual.
How we clean the condenser coils
- Pull the refrigerator straight out to protect flooring and avoid stressing the water line.
- Locate the condenser coil area (commonly behind the toe grille at the bottom front, or on the back).
- Remove the toe grille or rear access cover if needed.
- Brush loose dust and pet hair off the coils and surrounding area.
- Vacuum everything you loosened, including the floor under the unit.
- Reinstall the cover or grille, push the refrigerator back into place, then restore power.
When coil cleaning matters most
The manual notes there is no need for routine condenser cleaning in normal home environments, but cleaning is important when conditions are harsher.
- Heavy pet hair near the refrigerator
- Dusty basements or utility rooms
- Greasy kitchens (airborne cooking residue)
- Refrigerator running longer than usual
- Warm temperatures in the fresh food section
Quick guide: how often to clean
| Home condition | Typical coil cleaning interval |
|---|---|
| Normal, low dust | About once a year |
| Pets or dusty area | Every 3 to 6 months |
| Greasy environment | Every 3 to 6 months |
Why it matters
Clean condenser coils help the compressor shed heat efficiently. That can reduce run time, improve temperature stability, and help prevent overheating-related cooling problems.
Last updated: February 2026
Where is the model number on a Kenmore side by side refrigerator?
On Kenmore side-by-side refrigerator model 10656652500, the model number is printed on the model and serial number label located on the inside wall of the refrigerator (fresh food) compartment. Use the full model number from that label when ordering parts or checking specifications in the owner's manual.
How to find the label quickly
- Open the refrigerator (not the freezer) door
- Look along the inside side walls near the front edge
- Check near the crisper area and the upper interior wall sections
- Use a flashlight; the label can be small and easy to miss
- Write down both the model number and serial number exactly as shown
What you will see on the label
Most Kenmore refrigerators list both identifiers together:
| Item on label | What it’s used for | Example format |
|---|---|---|
| Model number | Matching parts and diagrams | 10656652500 |
| Serial number | Production details and service history | Letters plus numbers |
Why it matters
We use the model number to match the correct Kenmore parts for your exact configuration (ice maker, water system, shelves, and door components). Even small model differences can change which parts fit.
Tip for parts ordering
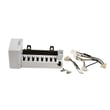
Once you have the model number, you can match common replacements from the parts list, such as the ice maker assembly - refrigerator ice maker by whirlpool 4317943 or the refrigerator inlet valve W10408179, when troubleshooting ice or water issues.
Last updated: February 2026
What are the most common problems with Kenmore refrigerators?
The most common problems we see on Kenmore refrigerators like model 10656652500 are no power or no cooling, temperatures running too warm or too cold, ice maker and water dispenser issues, and door sealing problems that cause moisture buildup. Many of these start with control settings, airflow, and basic power checks in the owner's manual.
Common issues and what they usually point to
- Not running at all: unplugged cord, tripped breaker, blown fuse, controls set to OFF, or the unit is in a normal defrost cycle
- Not cooling or warming up: blocked air vents, frequent door openings, large food load, or controls not set correctly
- Freezer warm or low ice production: heavy ice usage, doors opened often, or freezer control needs adjustment
- Water not cold at dispenser: new install or heavy recent dispensing (needs time to chill)
- Moisture inside or doors hard to open: dirty or sticky door gaskets, frequent openings, or high room humidity
Quick checks we recommend first (no tools)
- Confirm the refrigerator is plugged into a grounded 3-prong outlet and the breaker is not tripped.
- Verify the refrigerator and freezer controls are not set to OFF; adjust one setting at a time.
- Make sure air vents are not blocked by food packages.
- Limit door openings and allow several hours for temperatures to stabilize after changes.
- Clean door gaskets if they feel sticky or the doors are difficult to open.
Control adjustments at a glance
| Symptom | Typical adjustment | What to expect |
|---|---|---|
| Refrigerator too warm | Set refrigerator control one setting colder | Cooling improves after several hours |
| Refrigerator too cold | Set refrigerator control one setting warmer | Less freezing in fresh food section |
| Freezer too warm / too little ice | Set freezer control one setting colder | Better ice production after temps stabilize |
| Freezer too cold | Set freezer control one setting warmer | Reduces over-freezing |
Why it matters
Temperature and airflow problems can look like major failures, but they often come from blocked vents, frequent door openings, or control settings. Fixing those first protects food, improves ice production, and helps the compressor run more efficiently.
Last updated: February 2026