Installation guide
 Owner’s manual
 Error Codes


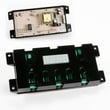



How do I tell what model Kenmore stove I have?
Your Kenmore stove’s model number is printed on the appliance ID label; for Kenmore ranges it’s commonly found on the oven door frame, inside the storage drawer opening, or on the back panel. For this parts page, the model number is 79073032310; confirm yours matches before ordering parts.
Where to look on a Kenmore gas range
Check these common label locations (start with the easiest):
- Oven door frame (open the door and look around the frame)
- Storage drawer opening (pull the bottom drawer out and look along the frame)
- Back of the range (rear panel area)
- Under the cooktop (some models allow the top to lift for service access)
- Broiler drawer area (if equipped)
What the model number looks like
Kenmore model numbers are typically a long string of numbers. Many Kenmore ranges use a 3-digit prefix that helps identify the manufacturer family; for example, 790 is a common Kenmore range prefix.
Use the model number exactly as shown on the label (including all digits) when searching parts and manuals.
| What to capture | Example for this range | Why it matters |
|---|---|---|
| Model number | 79073032310 | Ensures diagrams and parts match |
| Serial number | (varies) | Helps date the unit and confirm revisions |
| Color/finish note | (varies) | Helps match cosmetic parts like panels/handles |
Why it matters before ordering parts
Using the exact model number prevents wrong-part issues, especially for items that vary by revision, such as an igniter, control panel, or oven sensor.
Helpful next steps
- Compare your label to the 79073032310 owner’s manual
- If the label is worn, take a clear photo with the oven door open and the drawer removed
- Match the full model number first, then choose the part by name and diagram location
Last updated: February 2026
How long should a Kenmore gas stove last?
A Kenmore gas range like model 79073032310 typically lasts 15 years with normal household use. Keeping burners clean, ensuring steady ignition, and addressing heating problems early helps you avoid stress on the gas valve, igniter, and oven controls.
Typical lifespan and what affects it
Most ranges reach their full service life when heat and airflow stay consistent and parts are replaced before they fail completely.
- Heavy daily cooking shortens lifespan; light use extends it
- Frequent self-clean cycles can accelerate wear on door parts and electronics
- Poor flame quality (yellow flames, soot) increases heat stress
- Power surges can damage the control board and display
- Skipping cleaning can clog burner ports and cause delayed ignition
Quick maintenance checklist (high impact)
Use these habits to keep your 79073032310 running reliably.
- Clean surface burner caps and ports regularly; keep spillovers from baking on
- Keep the oven bottom and burner area free of grease and debris
- Replace a dim or failed oven light promptly using the correct bulb (heat-rated)
- If the oven struggles to ignite or takes longer to heat, test and replace the igniter early
- Verify the range is level so cookware heats evenly and the door seals properly
Common “wear” parts vs. “repair” parts
These parts often determine whether a range feels “worn out” or works like new.
| Symptom | Most likely area | Example part for this model |
|---|---|---|
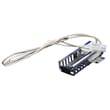
| Oven won’t heat or heats slowly | Ignition system | Range oven burner igniter 5304509706 |
| Oven temp swings or bakes unevenly | Temperature sensing/control | Range oven temperature sensor (model-specific) |
| Oven light out | Lighting | Appliance light bulb, 40-watt |
Why it matters
A gas range that is slow to ignite or running with unstable temperature forces longer burner on-time and higher heat exposure. Fixing ignition and temperature issues early helps the range reach the full 15-year lifespan instead of wearing out prematurely.
For model-specific care, cleaning, and operating guidance, follow the 79073032310 use and care manual.
Last updated: February 2026
How to remove the top of a Kenmore gas range?
On the Kenmore 79073032310 gas range, the cooktop is a lift-up top. We remove the burner grates first, then lift the cooktop from the front and support it with the built-in lift-up rods; lowering it requires releasing the rods and gently sliding the top back down (see the 79073032310 owner's manual).
Safety first (gas range cooktop access)
- Turn all surface burners OFF and let everything cool completely.
- If you smell gas: do not light anything or touch switches; contact your gas supplier.
- Use fingertips on the cooktop sides to avoid pinching.
- Do not drop or bend the cooktop; it can permanently damage the surface.
- Keep children away while the top is raised.
Steps to lift (remove) the top for access
- Remove the burner grates (once cool) and set them aside.
- Stand at the front of the range.
- Grasp the sides of the cooktop and lift up from the front edge.
- Raise it until the support (lift-up) rods snap into place and hold the cooktop up.
- Clean or inspect underneath as needed.
Steps to lower the cooktop
- Support the cooktop with your hands at the front corners.
- Push back on each support rod with the heel of your hand to release the notched support.
- Gently slide the cooktop back down until it sits level.
If you need the cooktop fully off (not just lifted)
Many Kenmore lift-up cooktops are designed for service access without complete removal. If you are removing surface burner tubes or working near gas valves, follow the detailed disassembly sequence in the 79073032310 installation guide and shut off the gas supply before servicing.
Quick reference table
| Task | What you do | What it’s for |
|---|---|---|
| Lift cooktop | Remove grates; lift from front; engage lift-up rods | Cleaning and inspection under top |
| Lower cooktop | Release rods; guide top down level | Prevents bending and pinched fingers |
| Deeper service | Shut off gas; follow install/service steps | Burner tube, valve, and regulator access |
Why it matters
Lifting the cooktop the correct way protects the cooktop surface, prevents pinched fingers, and gives safe access to components like surface burners and gas valves without creating a gas leak or damaging wiring.
Last updated: February 2026
What does F31 mean on a Kenmore gas stove?
On Kenmore gas range model 79073032310, the F31 error points to an oven temperature sensing problem (most often the oven temperature sensor circuit). First, press STOP/CLEAR to clear the code; if it returns, reset power for 5 minutes and retest using Bake or Broil as outlined in the 79073032310 owner's manual.
What to do first (safe, quick checks)
- Press STOP/CLEAR to clear the F31 code.
- Try Bake again; if the code returns, turn the range off at the breaker.
- Wait 5 minutes, restore power, and set the clock.
- Retest Bake or Broil.
- If F31 repeats, focus troubleshooting on the oven temperature sensor and its wiring.
Likely causes of an F31 code
F31 is typically triggered when the control detects an abnormal temperature sensor signal.
| What can be wrong | What you may notice | Common fix |
|---|---|---|
| Oven temperature sensor out of range | Oven won’t heat correctly; code beeps | Replace the sensor |
| Loose or damaged sensor wiring/connector | Intermittent code; heats sometimes | Reseat connector; repair wiring |
| Control issue (less common) | Code persists after sensor checks | Further diagnosis of control circuit |
A common replacement part for this model is the range oven temperature sensor 316233903.
How we recommend testing the sensor (overview)
- Disconnect power at the breaker.
- Access the sensor connection (usually inside the oven cavity or from the rear panel).
- Inspect for burned terminals, pinched wires, or a loose plug.
- Use a meter to check sensor resistance at room temperature (compare to the spec in the manual).
- Replace the sensor if readings are out of spec or the code returns after wiring checks.
For wiring checks and meter basics, use how to use a multimeter to test electrical parts video.
Why it matters
When the control cannot trust the temperature sensor signal, it may shut down heating to prevent overheating or unsafe operation. Fixing the sensor circuit restores accurate temperature control and reliable baking.
Last updated: February 2026
Why is my Kenmore oven not igniting?
If your Kenmore gas range model 79073032310 won’t ignite, the most common causes are a weak or cracked oven igniter, a gas supply issue, or a control/safety circuit problem that prevents the oven gas valve from opening. Start with safe, basic checks, then test the igniter circuit.
Quick checks (no tools)
- Confirm the range is getting gas (other surface burners light normally).
- Set Bake and watch through the oven bottom openings: the igniter should glow and then the burner should light.
- If you smell gas but no ignition, stop and ventilate; turn the oven off.
- Make sure the oven bottom and flame spreader are seated correctly after cleaning.
- Avoid blocking oven bottom openings or lining the bottom with foil; restricted airflow can create unsafe conditions.
Most likely fix: replace a weak igniter
A glowing igniter can still be bad; if it glows but the burner lights late (or not at all), the igniter often is not drawing enough current to open the gas valve.
- Recommended part for this model: range oven burner igniter 5304509706
- Use the wiring diagram and access steps in the 79073032310 owner’s manual
What to test (with a multimeter)
Turn off power to the range before testing.
- Igniter resistance/continuity: open circuit indicates a failed igniter.
- Voltage to igniter during Bake: if no voltage, suspect control or wiring.
- Oven temperature sensor: a failed sensor can cause control issues on some ranges.
| Symptom | Most common cause | What to do next |
|---|---|---|
| No glow from igniter | Failed igniter, wiring, or control | Check harness connections; test igniter continuity |
| Igniter glows, no flame | Weak igniter or gas valve issue | Replace igniter first; then evaluate gas valve |
| Slow ignition (30-90+ sec) | Weak igniter | Replace igniter |
Why it matters
A gas oven that does not ignite reliably can allow unburned gas to accumulate and can also lead to poor baking performance. Fixing ignition quickly improves safety and temperature stability.
Last updated: February 2026