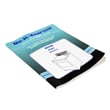
 Owner’s manual

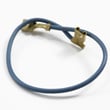
Can you get parts for a Kenmore dryer?
Yes. We carry replacement parts for Kenmore dryers, including the Kenmore 11062082101 electric dryer, so you can fix common problems like no heat, noisy operation, or a door that will not start the cycle. Use the 11062082101 owner's manual to confirm symptoms and safe service steps before ordering parts.
Common Kenmore dryer parts customers replace
These are frequent wear items and heat-related parts for model 11062082101:
- Drum support rollers (squealing, thumping): support kit WPW10314173
- Heating system parts (no heat, weak heat): dryer heating element WP3387747
- Safety cutoffs (runs but no heat, overheats): dryer thermal fuse WP3390719
- Belt drive support (squeal, drum not turning): dryer idler pulley 279640
- Door start interlock (will not start when door closes): dryer door switch WP3406107
Quick troubleshooting before you order
Many “bad part” symptoms are caused by airflow or setup issues. We recommend these checks first:
- Clean the lint screen before or after each load (restricted airflow causes long dry times).
- Inspect and clear the exhaust duct and outside vent hood for lint buildup or crushing.
- Avoid plastic venting; the manual notes it can affect performance and warranty coverage.
- Verify the dryer has proper electrical supply (electric dryers need full power for heat).
- If the dryer overheated, correct the vent restriction before replacing any fuse or cutoff.
Which part usually matches which symptom?
| Symptom | Most likely area | Common part to check |
|---|---|---|
| Dryer runs, no heat | Heating circuit | Dryer heating element, thermal fuse |
| Loud squeal or rumble | Drum support | Support rollers, idler pulley |
| Will not start | Door circuit | Door switch |
| Long dry times | Airflow/venting | Lint screen, air duct, exhaust path |
Why it matters
Choosing parts by model number 11062082101 prevents fit issues and repeat repairs. On electric dryers, correct venting and lint removal also protect heating components and safety devices from overheating.
Last updated: February 2026
How do I know what model my Kenmore dryer is?
Your Kenmore dryer’s model number is printed on the model and serial number label; for model 11062082101, the label is located at the top inside the dryer door well. Once you have the full model number, we can match the correct parts, diagrams, and specifications.
Where to find the model number label
Check these common Kenmore electric dryer locations (start with the door opening):
- Top inside the dryer door well (most common for this style, including model 11062082101)
- Inside the door opening on the cabinet frame
- On the back panel of the dryer
- Near the lint screen housing (varies by design)
For a picture-based reference and the exact wording used in the documentation, use the 11062082101 owner's manual.
How to read the number you find
Kenmore model numbers are usually a long string of digits. What matters most is copying it exactly.
- Write down the full model number and serial number
- Keep any letters, dashes, and all digits in the same order
- Use the model number to select parts like a heating element, door switch, or thermal fuse
Quick example
| What you see on the label | What it’s used for |
|---|---|
| Model number (example: 11062082101) | Finds the correct parts list and diagrams |
| Serial number | Helps identify production details for service |
| Purchase date (if recorded) | Useful for maintenance and service history |
Why it matters
Using the exact model number prevents ordering the wrong part. Even similar Kenmore dryers can use different components (for example, a different heater, thermistor, or drum support setup).
If you’re troubleshooting after identifying the model, common wear items for this dryer include the dryer heating element WP3387747 and the dryer thermal fuse WP3390719.
Last updated: February 2026
How to reset a Kenmore Elite Smart Heat Dryer?
For Kenmore model 11062082101, the practical “reset” is a power reset: turn the dryer off, unplug it (or switch the breaker off) for 1 minute, restore power, then start a new cycle. This clears many control glitches and restores normal operation.
Reset steps (safe, quick)
- Press STOP/CANCEL once to stop the dryer.
- Unplug the dryer (or turn both dryer breakers off if it is on a 240V circuit).
- Wait 60 seconds.
- Restore power.
- Close the door and select a cycle.
- Press START.
For the exact control behavior on your dryer (including how STOP/CANCEL and START work), follow the 11062082101 owner's manual.
If the dryer still will not start after a reset
A reset will not fix an open safety switch, a blown fuse, or a power supply problem. Check these common causes:
- Door not fully closed; a failed door switch can prevent starting (see dryer door switch WP3406107).
- House power issue; many electric dryers use two fuses or breakers, and one can trip without the other.
- Start sequence issue; if the cycle sits more than about 5 minutes without pressing START, the dryer can shut off and needs a new selection.
- Overheat protection opened; a blown thermal fuse stops the dryer (see dryer thermal fuse WP3390719).
What “reset” can and cannot do
| Situation | Reset helps? | What to do next |
|---|---|---|
| Control panel acting odd, cycle won’t respond | Yes | Power reset, then reselect cycle |
| Dryer won’t start at all | Sometimes | Check door switch, power, thermal fuse |
| Dryer runs but no heat | No | Check breakers, then heating circuit parts |
| Repeated shutdowns | Sometimes | Check venting for crushing/kinks and airflow |
Why it matters
Resetting is a fast first step, but repeated “glitches” often point to airflow restriction, a failing safety device, or an electrical supply issue. Fixing the root cause helps prevent overheating, long dry times, and repeat no-start problems.
Last updated: February 2026
What are the parts of a dryer called?
On our Kenmore electric dryer model 11062082101, the main parts are typically grouped into airflow/heat, drum support and drive, controls/safety, and door/lint handling. Knowing the correct part names helps you match symptoms (no heat, squealing, no start) to the right replacement.
Common dryer parts and what they do
- Heating system: creates heat for drying; often includes a heater and safety cutoffs.
- Airflow system: moves air through the drum and out the vent; restricted airflow causes long dry times.
- Drum and supports: the drum tumbles clothes; rollers and supports keep it stable.
- Drive system: motor, belt, and idler pulley turn the drum.
- Controls and sensors: timer/control board, thermistor, and moisture sensor regulate temperature and dryness.
- Door and safety switches: door switch and latch keep the dryer running only when the door is closed.
Parts you will see most often on this model
| System | Part name (common) | Example part for 11062082101 |
|---|---|---|
| Heat | Heating element | Dryer heating element WP3387747 |
| Safety | Thermal fuse | Dryer thermal fuse WP3390719 |
| Drive | Idler pulley | Dryer idler pulley 279640 |
| Drum support | Drum support roller kit | Support kit WPW10314173 |
| Airflow | Blower wheel | Dryer blower wheel WP697772 |
| Sensing | Thermistor | Dryer thermistor WP8577274 |
Why the names matter when troubleshooting
Using the right part name helps you avoid ordering the wrong item and speeds up diagnosis:
- No heat: often points to the heating element, thermal fuse, or cut-off components.
- Squealing or thumping: commonly relates to drum rollers/supports or the idler pulley.
- Won’t start: often involves the door switch or a failed drive motor.
- Long dry times: usually airflow related; check lint screen and venting first.
Where to confirm the exact part names for your dryer
We list the exact component names and diagrams for Kenmore 11062082101 in the 11062082101 owner’s manual.
Last updated: February 2026
What is the code F01 on a Kenmore dryer?
On Kenmore electric dryer model 11062082101, the F01 (sometimes shown as F1) code points to a control sensing problem, most often tied to the dryer’s temperature-sensing circuit (thermistor) or the electronic control. Start with a power reset, then check the sensor wiring and related parts.
Quick checks we recommend first
- Press STOP/CANCEL to clear the display, then try START again (the manual notes this approach for certain display messages). See the 11062082101 owner's manual.
- Unplug the dryer (or switch off the breaker) for 2 minutes, then restore power.
- Confirm the dryer is on a separate 30-amp circuit and the plug and outlet are secure.
- If the code returns immediately, stop running cycles and move to component checks.
Parts that commonly cause F01-type faults
On this Kenmore 110-series style dryer, these parts are frequent suspects when the control cannot read temperature correctly or detects an abnormal condition:
- Thermistor (temperature sensor): dryer thermistor WP8577274
- Heating circuit issues that overheat and trigger safety devices
- Loose or damaged wiring at the sensor, heater, or control
- Restricted airflow (lint screen or venting) causing overheating
What to inspect (in order)
| Check | What you’re looking for | Why it matters |
|---|---|---|
| Lint screen and venting | Lint blockage, weak airflow outside | Overheating can confuse temperature readings and trip safeties |
| Thermistor harness | Loose connector, broken wire, corrosion | Bad signal to the control can trigger an error |
| Heater area | Burn marks, damaged terminals | Heat damage often starts at connections |
| Safety devices | Open thermal fuse or cut-off | A safety trip can be the result of overheating |
Why it matters
F01 is often the dryer telling you it cannot reliably control heat. Continuing to run it with poor airflow or a failing sensor can lead to repeated shutdowns, no-heat symptoms, or additional part failures.
When to schedule service
Schedule service if the reset does not clear the code, or if the dryer beeps and shows the code as soon as you start a cycle. The manual also notes that certain service-type codes require professional service; use the 11062082101 owner's manual as your reference.
Last updated: February 2026
What size is a Kenmore Model 11062082101 dryer?
The Kenmore 11062082101 electric dryer is a full-size 27-inch class dryer. Most Kenmore dryers in this design measure about 27 inches wide, with overall height and depth varying slightly by leveling legs and venting; confirm the exact cabinet dimensions in the 11062082101 owner's manual.
Typical dimensions you can expect
For a 27-inch Kenmore electric dryer like model 11062082101, these are the common size ranges used for planning space and hookups:
- Width: ~27 in
- Height: ~38 to 44 in (varies with top style and leveling legs)
- Depth: ~27 to 30 in (depth increases if you include the exhaust elbow and cord)
- Door swing clearance: allow extra space so the door opens fully
How to measure your dryer (quick and accurate)
Use a tape measure and measure the cabinet, not the door handle.
- Measure width across the widest cabinet points
- Measure height from floor to the top of the cabinet (with leveling legs set)
- Measure depth from the back panel to the front edge (exclude the door), then add space for venting
- Add at least 4 to 6 inches behind the dryer for the vent connection in most installations
Space planning guide
| What you’re planning for | What to allow | Why |
|---|---|---|
| Dryer body | 27-inch class footprint | Fits standard alcoves and laundry rooms |
| Behind dryer | 4 to 6 in (typical) | Room for vent elbow and cord |
| Side clearance | A little extra on one side | Easier service access and airflow |
Why it matters
Correct sizing prevents crushed venting (poor drying), makes installation easier, and reduces strain on parts like the blower wheel and heating system. If drying performance drops after a move, check vent routing and airflow guidance in the 11062082101 owner's manual.
Last updated: February 2026












