Owner’s manual
 Error Codes



Do you remove cardboard from the bottom of a Whirlpool refrigerator?
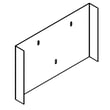
No. On Whirlpool model WRF560SMYB04, the cardboard-like panel at the bottom rear is a protective cover and airflow baffle for the compressor and condenser area, so it should stay in place during normal use. Use the owner's manual for model-specific handling and clearance guidance.
What that bottom “cardboard” piece does
That panel is there to help the refrigerator run safely and efficiently.
- Protects wiring and components near the compressor area
- Helps direct airflow across the condenser for proper cooling
- Reduces the chance of dust and debris getting pulled into the machine compartment
- Helps limit accidental contact with hot or moving parts
When you might remove it (and when you should not)
You typically only remove the rear lower access panel for service or cleaning, then reinstall it exactly as it was.
- OK to remove briefly: cleaning heavy dust buildup, inspecting for a leak, or replacing a component
- Do not leave it off: after cleaning or a repair, because airflow and protection are affected
- Do not cut or tear it: damaged panels can rattle and can disrupt airflow
Quick check: is it packaging or a permanent panel?
Use this checklist to tell the difference.
| What you see | Usually means | What to do |
|---|---|---|
| Fastened with screws or tabs at the lower rear | Permanent access/airflow panel | Leave installed (reinstall after service) |
| Loose sheets, tape, foam blocks, or corner protectors | Shipping materials | Remove those only |
| Panel has a vented or shaped opening | Airflow baffle | Keep installed |
Why it matters
That lower rear cover helps the condenser cool properly. If it is missing, the refrigerator can run longer, cool poorly, and collect more dust in the condenser area.
Last updated: February 2026
How do I remove the base grille on my Whirlpool refrigerator?
To remove the base grille on your Whirlpool WRF560SMYB04 bottom-mount refrigerator, pull the grille straight forward from the bottom front of the cabinet until it unsnaps from the retaining clips. If your grille has screws, remove them first, then pull forward.
Quick steps
- Unplug the refrigerator or switch off power at the breaker (recommended when working near wiring).
- Open both fresh food doors for better access.
- Look along the top edge of the base grille for any screws.
- If screws are present, remove them and set them aside.
- Grip the grille near both ends and pull straight toward you to release the clips.
- Lift the grille away and set it on a towel to avoid scratches.
Reinstalling the base grille
Align the ends of the grille with the leveling leg/leveling assembly areas, then press firmly until it snaps into place. If your model uses screws, reinstall them snugly (do not overtighten).
| What you see | What to do |
|---|---|
| No screws visible | Pull straight forward to unsnap the clips |
| Screws along the top edge | Remove screws first, then pull forward |
| Grille feels stuck on one side | Pull evenly from both ends; avoid twisting |
Why it matters
The base grille helps direct airflow and protects components near the bottom front of the refrigerator. Removing it correctly prevents broken tabs and makes it easier to access leveling legs and clean dust buildup.
Helpful tip for ongoing performance
If you are already working at the bottom front of the refrigerator, it is a good time to check your water filter replacement schedule; a restricted filter can reduce water flow to the dispenser and ice maker. Follow the steps in the owner's manual and use the correct replacement such as the refrigerator filter EDR1RXD1 when needed.
Last updated: February 2026
What is the bottom part of a refrigerator called?
The “bottom part” of a refrigerator is usually the machine compartment, which houses key cooling components like the compressor, condenser fan area, and electrical parts. On a Whirlpool WRF560SMYB04 bottom-mount refrigerator, this is typically the service area near the lower rear.
What you will typically find in the bottom section
In most bottom-mount refrigerators, the lower rear compartment is where the sealed-system and airflow parts live. Common components include:
- Compressor (the pump that circulates refrigerant)
- Condenser coils and condenser airflow path (heat is released here)
- Run capacitor and start components (help the compressor start and run)
- Drain pan (catches defrost water and lets it evaporate)
- Wiring and control components
If you are identifying parts or removing a cover, use the diagrams and access notes in the owner's manual.
Why the compressor is the most common answer
When people ask about “the bottom part,” they often mean the compressor because it is the largest, most noticeable component in the lower rear area and it is central to cooling.
Quick ID guide
| What you see | What it is usually called | What it does |
|---|---|---|
| Black, football-sized metal can | Compressor | Pumps refrigerant to create cooling |
| Small cylinder or oval electrical part near compressor | Run capacitor | Helps compressor start and run |
| Warm air blowing near the floor behind the fridge | Condenser fan area | Moves heat away from the coils |
Parts that relate to the bottom machine compartment (WRF560SMYB04)
If you are troubleshooting a “no cool,” “clicking,” or “warm fridge” symptom, these model-matched parts are commonly involved:
Why it matters
Knowing the correct name helps you match the right diagram and order the right replacement part, especially when diagnosing cooling problems versus door, ice maker, or dispenser issues.
Last updated: February 2026
Can I replace my fridge shelves?
Yes. You can replace shelves in your Whirlpool WRF560SMYB04 bottom-mount refrigerator; the key is ordering the shelf (and any supports) that matches the exact shelf position in your fresh food section or freezer so the mounting tabs and rails fit correctly.
Get the correct shelf for WRF560SMYB04
Use your model number and the shelf location to match the right replacement.
- Identify where it fits: upper, middle, lower, or crisper cover area
- Check how it mounts: rear hooks, side rails, or support tabs
- Look for missing support pieces if the shelf won’t sit level
- Match finish and trim style so it seals and slides correctly
- Use diagrams to confirm the exact part for your shelf position
A commonly needed shelf-related support part for this model is the refrigerator shelf assembly WPW10502933 (often used as a shelf support or mounting component, depending on location).
Typical replacement steps
Most Whirlpool shelves remove without tools.
- Remove food and bins from the shelf area
- Lift the front edge slightly to clear the stops
- Slide the shelf forward and out
- Set the rear hooks/tabs into the supports
- Slide the shelf fully back until it sits flat and stable
What you’re replacing (common shelf materials)
Shelf materials vary by section; confirm what you have before ordering.
| Location | Typical shelf material | What to match before ordering |
|---|---|---|
| Refrigerator (fresh food) | Glass with trim/frame | Width, trim style, and tab locations |
| Freezer (bottom) | Plastic or wire shelf/basket components | Mounting points and bin/rail fit |
| Crisper cover area | Glass cover with frame | Frame style and support points |
Why it matters
A shelf that doesn’t match the correct position can rock, crack under load, block airflow, or interfere with door closing. Correct fit keeps temperatures stable and prevents rattles.
For shelf diagrams and placement details specific to WRF560SMYB04, use the owner's manual.
Last updated: February 2026