Get free shipping on your order, with any water filter subscription. Find my filter

Open Hamburger Menu
Sears Parts Direct
Tips to find your model number

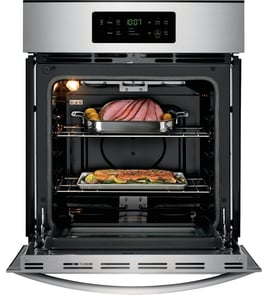
KitchenAid KEBS177SSS04 27" electric wall oven Parts

Here are the diagrams and repair parts for KitchenAid KEBS177SSS04 27" electric wall oven, as well as links to manuals and error code tables, if available.

KitchenAid KEBS177SSS04 27" electric wall oven
By Schematic
By Part
SELECT DIAGRAM
?

This is the number corresponding to the part on the diagram / schematic

Browse Parts for KEBS177SSS04 Wall Ovens

  • Range Ground Screw for KitchenAid KEBS177SSS04 - Part 4450800

    Optional parts (not included) diagram

  • Range Oven Light Lens for KitchenAid KEBS177SSS04 - Part W10169756

    Oven parts diagram

    Range Oven Light Lens

    In Stock
    $41.24
    13% OFF Phone Price : $47.24Info Icon
    Minus Item
    Qty
    Plus Item
  • Range Oven Door Bumper for KitchenAid KEBS177SSS04 - Part W10105790

    Oven parts diagram

    Range Oven Door Bumper

    In Stock
    $9.48
    10% OFF Phone Price : $10.48Info Icon
    Minus Item
    Qty
    Plus Item
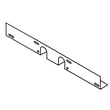
  • Wall Oven Bake Element End Cover for KitchenAid KEBS177SSS04 - Part 4450039

    Internal oven parts diagram

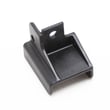
  • Oven Support Bracket for KitchenAid KEBS177SSS04 - Part 8304378

    Oven door parts diagram

  • Wall Oven Door Hinge Receiver, Left for KitchenAid KEBS177SSS04 - Part WP4455605

    Oven parts diagram

    Hinge Receiver

    Part #4455605

    Replaced by #WP4455605

    Info Icon
    Manufacturer substitution
    This part replaces 4455605. Substitute parts can look different from the original.
    In Stock
    $70.08
    8% OFF Phone Price : $76.08Info Icon
    Minus Item
    Qty
    Plus Item
  • Nut for KitchenAid KEBS177SSS04 - Part WPW10116349

    Internal oven parts diagram

    Nut

    Part #W10116349

    Replaced by #WPW10116349

    Info Icon
    Manufacturer substitution
    This part replaces W10116349. Substitute parts can look different from the original.
    In Stock
    $32.51
    Minus Item
    Qty
    Plus Item
  • Whirlpool Range Broil Element for KitchenAid KEBS177SSS04 - Part WP9760774

    Internal oven parts diagram

    Range Broil Element

    Part #9760774

    Replaced by #WP9760774

    Info Icon
    Manufacturer substitution
    This part replaces 9760774. Substitute parts can look different from the original.
    In Stock
    $156.85
    7% OFF Phone Price : $168.85Info Icon
    Minus Item
    Qty
    Plus Item
  • Appliance Touch-up Paint, 0.6-oz (citrine White) for KitchenAid KEBS177SSS04 - Part WP261869

    Optional parts (not included) diagram

    Wall Oven Touch-up Paint

    Part #261869

    Replaced by #WP261869

    Info Icon
    Manufacturer substitution
    This part replaces 261869. Substitute parts can look different from the original.
    This item is not returnable
    In Stock
    $17.29
    10% OFF Phone Price : $19.29Info Icon
    Minus Item
    Qty
    Plus Item
  • Wall Oven Door Lock Assembly for KitchenAid KEBS177SSS04 - Part W11029221

    Oven parts diagram

    Door Latch

    Part #W10195935

    Replaced by #W11029221

    Info Icon
    Manufacturer substitution
    This part replaces W10195935. Substitute parts can look different from the original.
    In Stock
    $116.44
    23% OFF Was : $151.31Info Icon
    Minus Item
    Qty
    Plus Item

KitchenAid 27" Electric Wall Oven KEBS177SSS04 FAQs

To reset your KitchenAid KEBS177SSS04 wall oven, turn the oven off and restore power by cycling the circuit breaker off, then back on. If the control is stuck in Sabbath Mode, exit it by touching OFF to return to normal operation (non-Sabbath Mode). See the owner's manual for the exact key sequences and mode behavior.

Quick reset options (try in this order)
  • Touch OFF (or UPPER OVEN OFF / LOWER OVEN OFF on double ovens) to stop any active cycle.
  • If the display is unresponsive, turn the breaker OFF for 1 minute, then turn it back ON.
  • If you see Sabbath indicators or the oven will not respond normally, exit Sabbath Mode (steps below).
  • After power is restored, set the clock if prompted, then test BAKE for a few minutes.
If the oven is in Sabbath Mode

Sabbath Mode changes how the control responds, so it can look like the oven needs a reset.

  • To stop active cooking while staying in Sabbath Mode: the oven can remain in Sabbath Mode but stop actively cooking; the “ON” indicator goes out.
  • To return to normal operation: touch OFF.
Enable or disable the ability to use Sabbath Mode (control setup)

Use this if Sabbath Mode was enabled or disabled and you need to change that setting:

  • Open the oven door.
  • Touch OFF (or UPPER OVEN OFF / LOWER OVEN OFF).
  • Press 7, 8, 9, 6 in order.
  • Touch START.
What a “reset” fixes (and what it does not)
Symptom Reset helps? What to check next
Blank or frozen display Yes Breaker, wiring connections, control power
Oven will not heat after reset Sometimes Heating circuit, sensor, thermal fuse
Temperature is inaccurate No Sensor calibration, temperature sensor
Why it matters

A proper reset clears a locked-up control and restores normal keypad response. If the oven still will not heat after a reset, the issue is usually in a heating or safety circuit such as the wall oven thermal fuse WP8304452 or the wall oven temperature sensor WPW10131825.

Last updated: February 2026

On the KitchenAid KEBS177SSS04 electric wall oven, the main parts include the electronic oven control, oven vent, broil element, hidden bake element, convection element and fan (on convection models), door lock latch, gasket, and oven lights. You can confirm locations and features in the owner's manual.

Common electric oven parts (what they do)
  • Electronic oven control: Sets bake, broil, convection, and self-clean functions.
  • Bake element: Provides primary heat for baking; this model uses a hidden-style bake element.
  • Broil element: Provides high, top-down heat for broiling.
  • Convection element and fan: Circulates hot air for more even cooking (when equipped).
  • Oven vent: Routes heat and moisture out of the oven cavity.
  • Door lock latch: Locks the door during self-clean.
  • Gasket: Seals the door to keep heat inside.
  • Oven lights: Illuminate the oven interior.
Parts you can replace on this model

If you are troubleshooting heating, temperature accuracy, or lighting issues, these are common service parts for KEBS177SSS04:

Symptom Likely part to check Example part on this model
Oven will not bake or bakes unevenly Bake element Bake element WPW10207398
Oven temperature seems off Temperature sensor Wall oven temperature sensor WPW10131825
No broil heat Broil element Range broil element WP9760774
Oven light not working Light bulb or light assembly Wall oven light bulb WPW10169757
Why it matters

Knowing the major oven components helps you narrow down problems faster. For example, a weak bake element can cause long preheat times, while a failing temperature sensor can cause overbaking or underbaking even when the display looks normal.

Last updated: February 2026

On the KitchenAid KEBS177SSS04 wall oven, the model number is on the appliance identification label, typically found around the oven door opening (often along the frame/trim area you can see when the door is open). Use the model number exactly as shown when looking up parts and manuals.

Where to look first

Check these common label locations on built-in KitchenAid wall ovens:

  • Along the oven frame just inside the door opening (left or right side)
  • On the front trim area visible with the door open
  • Near the lower edge of the oven frame (around the door gasket line)
  • If it is a double oven, check the upper and lower door openings
What you should write down (and why)

Record the full ID information from the label so we can match the correct parts list for your exact unit.

  • Model number (example: KEBS177SSS04)
  • Serial number (helps identify production run)
  • Any revision or additional codes printed near the model/serial
Quick ID checklist
Label item What it’s used for Example
Model number Matching diagrams and part compatibility KEBS177SSS04
Serial number Narrowing down version changes (varies)
Electrical rating Confirming supply requirements (varies)
Why it matters

KitchenAid wall ovens can have small design changes across production runs. Using the exact model number from the label helps ensure you get the right replacement parts (for example, a heating element, temperature sensor, or door latch) the first time.

For additional identification and documentation details, use the KEBS177SSS04 owner's manual.

Last updated: February 2026
Most common symptoms to help you fix your wall oven

Choose a symptom to see related wall oven repairs.

Main causes: bad oven door lock assembly, faulty electronic control board, wiring failure…

Main causes: faulty oven temperature sensor, control system problem, weak burner igniter, damaged oven element…

Main causes: lack of gas supply, broken igniter, tripped circuit breaker, broken oven element, tripped thermal fuse, con…

Main causes: lack of electrical power, bad electronic control board, faulty oven control thermostat…

Main causes: broken broil element, faulty broil burner igniter, control system failure…

Main causes: broken bake element, bad bake burner igniter, tripped thermal switch, control system failure…

Most common repair guides to help fix your wall oven

These step-by-step repair guides will help you safely fix what’s broken on your wall oven.

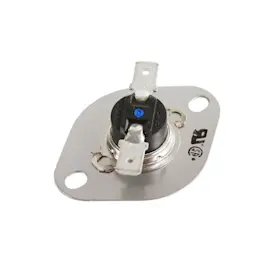
How to replace the thermal switch in a wall oven

How to replace the thermal switch in a wall oven

If the oven won't heat after resetting the thermal switch, replace the thermal switch.…

Repair time and Difficulty

 60 minutes or less
How to replace a wall oven thermal fuse

How to replace a wall oven thermal fuse

The thermal fuse trips to prevent the over from excessively overheating. The oven won't heat again until you replace the…

Repair time and Difficulty

 60 minutes or less
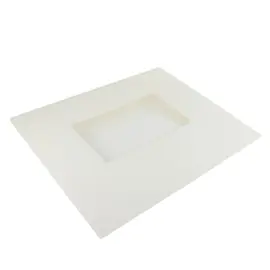
How to replace a wall oven door outer glass panel

How to replace a wall oven door outer glass panel

Learn how to replace a damaged outer window panel on your wall oven door with these step-by-step instructions. …

Repair time and Difficulty

 45 minutes or less

Effective articles & videos to help repair your wall oven

Use the advice and tips in these articles and videos to get the most out of your wall oven.

How to remove grease from your oven

How to remove grease from your oven

Oven looking grimy? Discover how to clean a greasy oven using safe, effective methods like baking soda and more.…

How to read a wiring schematic video

How to read a wiring schematic video

Learn how to decipher symbols so you can buy the right part for your problem.…

How to correct an oven's temperature setting

How to correct an oven's temperature setting

If your oven consistently undercooks or overcooks, it might need recalibration. You can reset it yourself.…

Parts & More

Air Compressor
Bottom-Mount Refrigerator
Dishwasher
Dryer
Electric Range
Front-Engine Lawn Tractor
Gas Range
Gas Walk-Behind Mower
Lawn & Garden Engine
Parts
Refrigerator
Room Air Conditioner
Side-By-Side Refrigerator
Vacuum Cleaner
Washer