Installation guide
 Owner’s manual
 Error Codes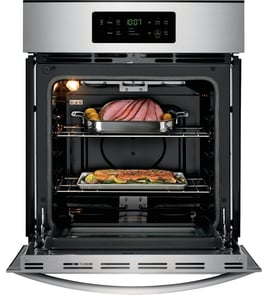


How to reset KitchenAid wall oven?
To reset your KitchenAid KEBS177SSS04 wall oven, turn the oven off and restore power by cycling the circuit breaker off, then back on. If the control is stuck in Sabbath Mode, exit it by touching OFF to return to normal operation (non-Sabbath Mode). See the owner's manual for the exact key sequences and mode behavior.
Quick reset options (try in this order)
- Touch OFF (or UPPER OVEN OFF / LOWER OVEN OFF on double ovens) to stop any active cycle.
- If the display is unresponsive, turn the breaker OFF for 1 minute, then turn it back ON.
- If you see Sabbath indicators or the oven will not respond normally, exit Sabbath Mode (steps below).
- After power is restored, set the clock if prompted, then test BAKE for a few minutes.
If the oven is in Sabbath Mode
Sabbath Mode changes how the control responds, so it can look like the oven needs a reset.
- To stop active cooking while staying in Sabbath Mode: the oven can remain in Sabbath Mode but stop actively cooking; the “ON” indicator goes out.
- To return to normal operation: touch OFF.
Enable or disable the ability to use Sabbath Mode (control setup)
Use this if Sabbath Mode was enabled or disabled and you need to change that setting:
- Open the oven door.
- Touch OFF (or UPPER OVEN OFF / LOWER OVEN OFF).
- Press 7, 8, 9, 6 in order.
- Touch START.
What a “reset” fixes (and what it does not)
| Symptom | Reset helps? | What to check next |
|---|---|---|
| Blank or frozen display | Yes | Breaker, wiring connections, control power |
| Oven will not heat after reset | Sometimes | Heating circuit, sensor, thermal fuse |
| Temperature is inaccurate | No | Sensor calibration, temperature sensor |
Why it matters
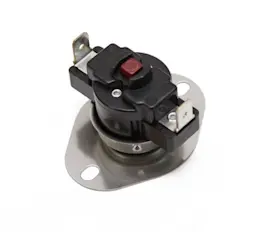
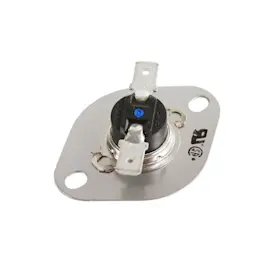
A proper reset clears a locked-up control and restores normal keypad response. If the oven still will not heat after a reset, the issue is usually in a heating or safety circuit such as the wall oven thermal fuse WP8304452 or the wall oven temperature sensor WPW10131825.
Last updated: February 2026
What are the parts of an electric oven?
On the KitchenAid KEBS177SSS04 electric wall oven, the main parts include the electronic oven control, oven vent, broil element, hidden bake element, convection element and fan (on convection models), door lock latch, gasket, and oven lights. You can confirm locations and features in the owner's manual.
Common electric oven parts (what they do)
- Electronic oven control: Sets bake, broil, convection, and self-clean functions.
- Bake element: Provides primary heat for baking; this model uses a hidden-style bake element.
- Broil element: Provides high, top-down heat for broiling.
- Convection element and fan: Circulates hot air for more even cooking (when equipped).
- Oven vent: Routes heat and moisture out of the oven cavity.
- Door lock latch: Locks the door during self-clean.
- Gasket: Seals the door to keep heat inside.
- Oven lights: Illuminate the oven interior.
Parts you can replace on this model
If you are troubleshooting heating, temperature accuracy, or lighting issues, these are common service parts for KEBS177SSS04:
| Symptom | Likely part to check | Example part on this model |
|---|---|---|
| Oven will not bake or bakes unevenly | Bake element | Bake element WPW10207398 |
| Oven temperature seems off | Temperature sensor | Wall oven temperature sensor WPW10131825 |
| No broil heat | Broil element | Range broil element WP9760774 |
| Oven light not working | Light bulb or light assembly | Wall oven light bulb WPW10169757 |
Why it matters
Knowing the major oven components helps you narrow down problems faster. For example, a weak bake element can cause long preheat times, while a failing temperature sensor can cause overbaking or underbaking even when the display looks normal.
Last updated: February 2026
Where is the model number on a KitchenAid KEBS177SSS04 oven?
On the KitchenAid KEBS177SSS04 wall oven, the model number is on the appliance identification label, typically found around the oven door opening (often along the frame/trim area you can see when the door is open). Use the model number exactly as shown when looking up parts and manuals.
Where to look first
Check these common label locations on built-in KitchenAid wall ovens:
- Along the oven frame just inside the door opening (left or right side)
- On the front trim area visible with the door open
- Near the lower edge of the oven frame (around the door gasket line)
- If it is a double oven, check the upper and lower door openings
What you should write down (and why)
Record the full ID information from the label so we can match the correct parts list for your exact unit.
- Model number (example: KEBS177SSS04)
- Serial number (helps identify production run)
- Any revision or additional codes printed near the model/serial
Quick ID checklist
| Label item | What it’s used for | Example |
|---|---|---|
| Model number | Matching diagrams and part compatibility | KEBS177SSS04 |
| Serial number | Narrowing down version changes | (varies) |
| Electrical rating | Confirming supply requirements | (varies) |
Why it matters
KitchenAid wall ovens can have small design changes across production runs. Using the exact model number from the label helps ensure you get the right replacement parts (for example, a heating element, temperature sensor, or door latch) the first time.
For additional identification and documentation details, use the KEBS177SSS04 owner's manual.
Last updated: February 2026