Owner’s manual
 Error Codes
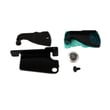
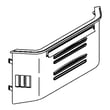

How to remove bottom grille on GE refrigerator?
On the GE GBSC0HCXCRWW bottom-mount refrigerator, we remove the bottom (base) grille by taking out the two Phillips-head screws, then pulling the grille off. Reinstall by positioning the grille and tightening the same two screws; see the GBSC0HCXCRWW owner's manual.
- Unplug the refrigerator or switch off power at the breaker (safer when working near wiring and fans).
- Locate the base grille at the very bottom front of the cabinet.
- Remove the two Phillips-head screws securing the grille.
- Pull the grille forward and off the refrigerator.
- Set the grille and screws aside so they do not get lost.
Reinstalling is the reverse of removal: align the grille, seat it fully, then reinstall the two Phillips-head screws.
You typically remove the grille to:
- Access and adjust the leveling legs.
- Clean dust from the lower front area for better airflow.
- Make room for moving the refrigerator through a tight opening.
| Task | What you need | What to look for |
|---|---|---|
| Remove base grille | Phillips screwdriver | Two screws at the grille |
| Level refrigerator | Phillips screwdriver (to remove grille) | Leveling legs behind grille |
| Reinstall base grille | Phillips screwdriver | Grille seated flush, screws snug |
A properly installed base grille helps protect lower components and supports correct airflow. Removing it the right way also prevents stripped screw heads and cracked grille tabs.
Last updated: February 2026
What is the most common problem with GE GBSC0HCXCRWW refrigerators?
The most common issues we see with the GE GBSC0HCXCRWW bottom-mount refrigerator involve the ice maker and water system (no ice, slow fill, leaks) and basic cooling performance (warm fridge or freezer). These problems often trace back to water supply setup, airflow, or a failing fan or control component; use the GBSC0HCXCRWW owner's manual for model-specific checks.
- Ice maker not making ice or slow ice production: water supply restriction, air in the line, or a valve issue
- Water leaking at the back or under the unit: loose water line connection, damaged tubing, or a valve that is not sealing
- Warm refrigerator section but freezer seems closer to normal: evaporator airflow problem
- Noisy operation: fan blade rubbing ice, worn fan motor, or condenser fan issues
- Intermittent cooling or odd behavior: electronic control problems
- Confirm the freezer door closes fully and nothing is holding it open (ice production and temps drop fast when a door is ajar).
- Verify the cold water supply is on and the water line is properly connected (ice maker models need a cold water supply).
- Check for kinks in the water line behind the refrigerator and look for slow drips at fittings.
- Listen for the evaporator fan when the freezer door is closed; no fan airflow usually means a cooling problem is coming.
- If you have a reverse osmosis system, use the refrigerator filter bypass plug when required; using both filters can cause hollow cubes.
| Problem area | Common fix | Example part for GBSC0HCXCRWW |
|---|---|---|
| No ice, slow fill, leaking | Replace the inlet valve | Refrigerator water inlet valve assembly WR57X10086 |
| Warm temps, poor airflow | Service evaporator fan system | Refrigerator evaporator fan motor WR60X10282 and refrigerator evaporator fan blade WR60X30922 |
| Intermittent operation | Replace main control | Refrigerator electronic control board WR55X10837 |
Ice maker and cooling complaints often share the same root cause: restricted water flow, poor airflow, or a component that is starting to fail. Catching it early helps prevent food spoilage, recurring leaks, and compressor strain.
- How to diagnose a faulty refrigerator water inlet valve
- How to fix your evaporator cooling fan
- GE refrigerator error codes
Last updated: February 2026
What is the average lifespan of a GE GBSC0HCXCRWW refrigerator?
A GE bottom-mount refrigerator like model GBSC0HCXCRWW typically lasts 13 years. With consistent maintenance (clean condenser coils, good door sealing, and stable temperatures), many units reach 15 years before major repairs become more likely; sealed-system failures tend to be the costliest.
Most refrigerators in this class follow a predictable pattern:
- 0 to 5 years: Mostly minor issues (lights, door alignment, occasional ice or water quirks)
- 6 to 10 years: Wear items show up (fans, control issues, gaskets)
- 11 to 15 years: Higher chance of cooling-system or defrost-related repairs
- 15+ years: Replacement becomes more common if the compressor or sealed system has trouble
These steps have the biggest impact on longevity and energy use:
- Vacuum and brush condenser coils regularly (dust buildup drives compressor run time)
- Keep door gaskets clean and sealing tightly; fix gaps quickly
- Maintain steady settings (freezer near 0°F, fresh food near 37°F)
- Avoid overpacking so the evaporator fan can move air
- Replace failed interior lighting promptly to reduce heat and improve visibility
For model-specific care and cleaning guidance, use the owner's manual.
| Age of refrigerator | Common symptoms | Often-related parts |
|---|---|---|
| 5 to 10 years | Warm temps, noisy operation | Evaporator fan motor, condenser fan motor |
| 8 to 12 years | Intermittent cooling, odd behavior | Electronic control board, run capacitor |
| 10 to 15 years | Poor cooling, long run times | Compressor or sealed system components |
If you are troubleshooting cooling or noise, the GE refrigerator error codes guide can help narrow down the failure.
Knowing the typical lifespan helps us decide whether to repair or replace. A fan motor, gasket, or control board repair can be a smart investment in the 6 to 12 year range; compressor-level repairs near or past the average lifespan often change the value equation.
Last updated: February 2026