

What is the average life of a Kenmore dryer?
Most Kenmore dryers, including the Kenmore 11087983110 gas dryer, typically last 10 to 13 years with normal household use. Regular vent cleaning, avoiding overloads, and replacing wear items early (rollers, idler pulley, thermal fuse) can push real-world life closer to the high end.
Typical lifespan and what changes it
A dryer’s life is mostly determined by heat stress, airflow restriction, and drum support wear.
- Best-case use: light loads, good venting, routine cleaning
- Shortened life: long or clogged venting, frequent heavy loads, high-heat cycles
- Common “wear-out” items: drum rollers, idler pulley, blower wheel, door hardware
- Common “overheat” failures: thermal fuse trips from restricted airflow
What usually fails first on this model family
These are common service parts for Kenmore 110-series style dryers; replacing them early often prevents bigger damage.
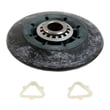
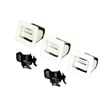
- Drum support rollers: support WPW10314173
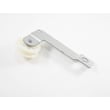
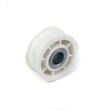
- Belt tension system: dryer idler pulley 279640
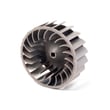
- Air movement: dryer blower wheel WP697772
- Overheat protection: thermal fuse WP3390719
Quick “life extension” checklist
- Clean the lint screen every load; wash it monthly to remove residue.
- Inspect and clean the vent duct at least yearly (more often with long runs).
- Keep the load size moderate so the drum, rollers, and motor are not overworked.
- If drying times increase, fix airflow first before replacing heat parts.
Symptoms and the most likely cause
| Symptom | Most common cause | What we check first |
|---|---|---|
| Takes too long to dry | Restricted venting | Lint screen, duct, outside hood |
| Loud thumping/squeal | Worn drum support parts | Rollers and idler pulley |
| Runs but stops heating | Burner ignition components or airflow | Venting, then ignition system |
Why it matters
A dryer that is forced to run hot and long (because of poor airflow) wears out the motor, drum supports, and safety devices faster. Keeping airflow strong is the simplest way to protect the burner system and extend the service life.
Last updated: February 2026
What size is a Kenmore Model 11087983110 dryer?
Kenmore gas dryer model 11087983110 is a full-size 27-inch class dryer in most installations. For planning clearances, we use typical exterior dimensions of about 27 inches wide, 27 to 29 inches deep, and 38 to 43 inches tall (height varies most with the control console and leveling legs).
Typical dimensions and what changes them
Even within the same Kenmore 110-series family, the exact cabinet depth and overall height can vary. These factors usually make the difference:
- Control panel style (rear console vs. top console)
- Door and handle (adds a little depth when opened)
- Leveling legs (can raise overall height)
- Vent hookup (rear elbow can add depth behind the cabinet)
- Pedestal or platform (if used)
Clearance checklist (what we recommend)
Use these practical spacing targets when measuring your laundry area:
- Sides: at least 1 inch each side for airflow and vibration
- Rear: 4 to 6 inches if using a rear vent elbow
- Front: enough room for the door to open fully and load/unload
- Top: a few inches if shelving is above the dryer
- Vent path: keep it short and smooth to reduce dry times
Quick planning table
| Measurement | Typical for 11087983110 class dryers | What to measure at home |
|---|---|---|
| Width | ~27 in. | Left to right at the widest point |
| Depth | ~27 to 29 in. | Back of cabinet to front edge (not the open door) |
| Height | ~38 to 43 in. | Floor to top of cabinet/console |
Why it matters
Correct sizing helps prevent installation headaches (tight fits, crushed venting, door interference) and supports better drying performance by keeping airflow and exhaust routing in good shape.
Related parts that affect fit and airflow
If you are reworking venting or chasing long dry times while you measure, these model-matched parts are commonly involved:
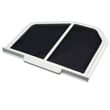
- Screen W10120998 (lint screen that must seat correctly for good airflow)
- Dryer blower wheel WP697772 (moves air through the drum and vent)
- Thermal fuse WP3390719 (opens if the dryer overheats, often tied to restricted venting)
Last updated: February 2026
What are common problems with Kenmore dryers?
Common problems on a Kenmore gas dryer like model 11087983110 include no heat, long dry times, the drum not turning, and loud squealing or thumping. Most of these issues trace back to restricted airflow (lint or venting) or normal wear on drive and burner components.
Most common symptoms and what usually causes them
- Dryer runs but won’t heat: failed gas ignition parts (igniter, radiant sensor, gas valve coils) or a blown thermal fuse
- Long drying times: clogged lint screen, blocked vent duct, crushed flex vent, or a weak blower wheel
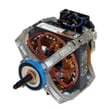
- Drum won’t turn: worn idler pulley, seized drum rollers, or a failed drive motor
- Loud noise (squeal, rumble, thump): worn drum support rollers, idler pulley, or blower wheel damage
- Stops mid-cycle: overheating from poor airflow that can open the thermal fuse
Parts that commonly fix these problems (for model 11087983110)
| Symptom | Common suspect part | Example from available parts |
|---|---|---|
| No heat | Gas valve coils | Dryer valve coil kit 279834 |
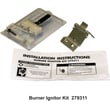
| No heat | Ignition source | Dryer igniter 279311 |
| No heat or stops | Overheat protection | Thermal fuse WP3390719 |
| Squealing/rumbling | Drum support | Support WPW10314173 |
| Drum not turning | Belt tension system | Dryer idler pulley 279640 |
Quick checks we recommend before replacing parts
- Clean the lint screen and confirm strong airflow at the outside vent hood
- Inspect the vent run for kinks, crushed sections, or heavy lint buildup
- Listen for the burner: ignition click, glow from igniter, then flame (no flame often points to coils or sensor)
- If the drum is hard to turn by hand (power off), suspect rollers or idler issues
- If the dryer overheats or shuts off, address venting first, then check the thermal fuse
Why it matters
Airflow problems make a gas dryer run hotter and longer, which increases wear on the blower wheel, drum support system, and safety devices like the thermal fuse. Fixing venting and worn drive parts restores drying performance and helps prevent repeat failures.
Related help: Kenmore 110 series electronic control model dryer error codes
Last updated: February 2026
How do I tell what model Kenmore dryer I have?
Your Kenmore dryer’s model number is printed on the appliance ID tag; once you find it, you can match parts and diagrams to the exact unit. For this page, the model is Kenmore 11087983110 (a gas dryer), so the ID tag should show 11087983110.
Where to find the model number tag
Check these common locations on Kenmore dryers:
- Inside the door opening on the front panel (most common)
- On the door itself (edge or inner surface)
- On the back panel of the cabinet
- Near the lint screen housing (lift the lint screen and look around the opening)
- On the lower front frame area (sometimes visible when the door is open)
What the model number looks like (and why it matters)
Kenmore model numbers are usually 10 to 12 digits. Many Kenmore dryers start with 110, which helps identify the design family used to match parts like the drive system, burner components, and door hardware.
Quick examples
| What you see on the tag | What it tells you | What to do next |
|---|---|---|
| 11087983110 | Exact model match for this page | Use it to select exact parts |
| 110.XXXXXXXX | Same family, different exact model | Use the full number after 110 |
| 796.XXXXXXXX | Different Kenmore design family | Use the full number after 796 |
Tips to avoid ordering the wrong part
When you write down the model number, also capture the full serial number from the same tag. Then:
- Copy the model number exactly (no spaces, no missing digits)
- Use the full model, not just the first three digits
- Match parts by function and location (for example, drum support vs. door latch)
- If you are fixing a noise issue, common wear parts include the support WPW10314173 and dryer idler pulley 279640
Why it matters
Kenmore dryers can look identical across multiple model numbers, but internal parts (like the drum support system, gas ignition components, or door hardware) can differ. Using the exact model number prevents fit issues and repeat repairs.
Last updated: February 2026
How do I know if my Kenmore dryer thermal fuse is blown?
On Kenmore gas dryer model 11087983110, a blown thermal fuse commonly shows up as a dryer that won’t start or runs with no heat. The sure way to confirm is a continuity test with a multimeter on the thermal fuse after disconnecting power; a blown fuse reads open (no continuity). See the correct replacement as thermal fuse WP3390719.
Quick symptoms to look for
- Dryer will not start even though the outlet has power
- Motor hums but the drum does not tumble (varies by setup)
- Dryer tumbles but there is no heat (some configurations)
- Cycle stops early because airflow is restricted and the dryer overheats
- Burning smell or very hot cabinet (stop using the dryer and check venting)
How we test the thermal fuse (simple continuity check)
- Unplug the dryer (and shut off the gas supply as a safety step).
- Access the fuse (typically on the blower housing or exhaust duct area).
- Pull the wire connectors off the fuse terminals.
- Set your multimeter to continuity or lowest ohms.
- Touch a probe to each terminal.
Expected result
| Meter result | What it means | What to do next |
|---|---|---|
| Beep or near 0 Ω | Fuse is good | Check airflow, igniter, coils, and sensors |
| No beep / OL / infinite Ω | Fuse is blown | Replace the fuse and fix the overheating cause |
Why the fuse blows (and what to fix so it doesn’t happen again)
A thermal fuse is a one-time safety device; it opens when the dryer overheats. On gas dryers, overheating is usually caused by restricted airflow.
- Clean the lint screen and confirm it seats correctly (lint screen issues can reduce airflow)
- Inspect and clean the vent duct to the outside; remove lint buildup and kinks
- Make sure the outside vent hood opens freely
- Check the blower wheel for damage or slipping; consider dryer blower wheel WP697772 if it is cracked or stripped
- Avoid long, crushed, or excessively flexible vent runs
Related no-heat checks for this gas dryer
If the fuse tests good but you still have no heat, common gas-heat suspects include:
Why it matters
Replacing the thermal fuse without correcting the airflow problem often leads to repeat failures, longer dry times, and higher operating temperatures that can damage other parts.
Last updated: February 2026
How to replace a belt on an old Kenmore dryer?
To replace the belt on a Kenmore dryer model 11087983110, we unplug the dryer, open the cabinet, remove the front panel, slip the old belt off the motor and idler, then route the new belt around the drum and through the idler pulley so it tensions correctly.
Safety first (gas dryer)
- Unplug the dryer from the wall outlet.
- Shut off the gas supply valve before opening the cabinet.
- Work in a well-ventilated area.
- Wear cut-resistant gloves; cabinet edges are sharp.
- If you smell gas at any point, stop and have the gas connection checked by a qualified technician.
Belt replacement steps (typical Kenmore 110-style design)
- Remove the lint screen, then remove the screws that secure the top (locations vary by version).
- Lift the top and support it.
- Remove the front panel (and door switch connector if present).
- Reach under the drum and release belt tension by moving the idler pulley.
- Slip the belt off the motor pulley and idler pulley, then pull the belt off the drum.
- Install the new belt around the drum with the ribbed side against the drum.
- Route the belt through the idler so the idler pulley applies tension, then loop it around the motor pulley.
- Rotate the drum by hand 1 to 2 turns to confirm the belt tracks straight and the idler moves freely.
- Reinstall the front panel, lower the top, restore gas, then test a timed dry cycle.
Parts that commonly matter during a belt job
If the belt broke due to drag or noise, we typically inspect these wear items while the cabinet is open:
- Dryer idler pulley 279640 (keeps belt tension)
- Support WPW10314173 (drum support roller; worn rollers can shred belts)
- Drum glides and felt seals (not listed here, but commonly inspected)
- Motor pulley condition and alignment
Quick symptom-to-part check
| What you notice | Most likely issue | What to check next |
|---|---|---|
| Drum will not turn, motor runs | Broken/slipped belt | Idler movement and belt routing |
| Loud thump or rumble | Worn drum rollers | Support WPW10314173 |
| Squeal when starting | Seized idler | Dryer idler pulley 279640 |
| Belt keeps walking off | Misrouting or bent bracket | Idler bracket alignment and drum tracking |
Why it matters
Correct belt routing and proper idler tension prevent repeat belt failures, reduce noise, and protect the drive motor from overload. On a gas dryer like the 11087983110, safe shutdown and reassembly also helps avoid airflow and heating problems after the repair.
Last updated: February 2026
What is the capacity of the Kenmore dryer model 11087983110?
The Kenmore gas dryer model 11087983110 has a 7.0 cu. ft. drum capacity, which is a full-size capacity designed for everyday family loads like towels and bedding. If drying performance seems “small,” airflow and heat issues are usually the cause, not capacity.
What 7.0 cu. ft. means for real loads
A 7.0 cu. ft. Kenmore dryer typically handles these loads well when venting is clear and the lint screen is clean:
- A full basket of mixed clothing
- Several bath towels in one load
- Queen sheets and light bedding
- Medium blankets (dry one bulky item at a time)
- Larger loads when you avoid packing the drum tight
Quick capacity and loading guide
| Capacity | Dryer size | Best practice |
|---|---|---|
| 7.0 cu. ft. | Full-size | Fill loosely to about 3/4 full so items tumble freely |
If it feels like the dryer “can’t handle” a full load
Capacity is fixed, but dry time changes fast with airflow, heat, and drum tumbling. Check these common causes first:
- Clean the lint screen every load; replace a damaged or warped screen W10120998
- Confirm strong airflow at the outside vent hood
- Clean lint buildup from the vent duct and inside the cabinet
- If the dryer overheats or stops mid-cycle, test the thermal fuse WP3390719
- If airflow is weak or noisy, inspect the dryer blower wheel WP697772
Why it matters
Knowing the correct 7.0 cu. ft. capacity helps you load the drum properly; overloading reduces tumbling and airflow, which increases dry time and can overheat components like the thermal fuse and blower system.
Last updated: February 2026
How do I get my dryer out of lock mode?
On the Kenmore 11087983110 gas dryer, “lock mode” is the control lock feature; it turns off by pressing and holding the lock key (or the key with a lock icon) for several seconds until the lock indicator clears. If the console stays locked, a power reset restores normal keypad operation.
Unlock it safely (most common steps)
- Press and hold Control lock or Child lock (if your console has that label) for about 3 to 5 seconds.
- If there is no dedicated lock button, press and hold the key that has a lock icon printed above it.
- On some Kenmore 110-series electronic controls, the lock is a button combination; press and hold the two keys indicated by the lock icon.
- If the dryer beeps but stays locked, unplug the dryer (or turn off the breaker) for 1 minute, then restore power.
- Confirm the door is fully closed; some models limit keypad response when the door is not latched.
If the lock keeps coming back
A stuck key or residue on the console can make the control think a button is being held.
- Wipe the control panel with a lightly damp cloth and dry it.
- Press each button once; none should feel jammed.
- Avoid leaning on the console or resting laundry baskets on it.
When a part is likely involved
If the dryer will not start and the control acts like the door is open, the door switch circuit is a common cause on many Kenmore dryers. A related part used on this model is the switch W10820036.
| What you see | What it usually means | What to do |
|---|---|---|
| Lock icon on; buttons still work | Lock feature is enabled | Hold lock key or lock combo |
| Lock icon on; buttons do not respond | Keypad needs reset or key is stuck | Power reset; clean panel |
| Won’t start; door seems “open” | Door switch circuit issue | Check door closure; test switch |
Why it matters
Control lock prevents accidental cycle changes and unwanted starts. Unlocking it first helps you avoid unnecessary troubleshooting when the dryer is otherwise operating normally.
Last updated: February 2026