 Installation guide
 Owner’s manual



How do I reset a Hotpoint dishwasher?
To reset your Hotpoint dishwasher model HDA2100H35WW, press START/RESET to cancel the cycle; press it a second time to pump out and turn the dishwasher off. After it drains and stops, select your cycle and press START/RESET once to restart (see the HDA2100H35WW owner's manual).
- Close and latch the door fully.
- Touch START/RESET once to cancel.
- Touch START/RESET a second time to drain and shut off.
- Wait until draining stops and the controls go idle.
- Re-select your cycle and options.
- Touch START/RESET once to start.
If you hear beeping or see the CLEAN light flashing, use this reset sequence:
- Press START/RESET to stop the beeper and trigger a reset attempt.
- Turn power off at the circuit breaker for 30 seconds.
- Restore power, then start a new cycle.
| Control style | What “reset” usually means | What to press |
|---|---|---|
| Electronic pad controls | Cancel cycle, drain, power off | START/RESET (press twice) |
| Cycle dial (timer) models | Cancel options or reposition cycle | RESET (if present) or turn dial to a new cycle |
A proper reset clears a paused cycle, forces a drain, and gets the control back to a known starting point. This helps when the dishwasher will not start, will not advance, or you need to restart after opening the door mid-cycle.
Last updated: February 2026
Why is my Hotpoint dishwasher not drying?
If your Hotpoint HDA2100H35WW dishwasher is not drying, the most common cause is the drying heat option being turned off. For best results, select HEATED DRY ON (and optionally HI TEMP RINSE) so the heater runs during the final rinse and drying portion of the cycle; see the HDA2100H35WW owner's manual.
- Confirm HEATED DRY ON is selected (HEATED DRY OFF saves energy but leaves dishes to air dry).
- Avoid using RINSE ONLY with heated drying.
- Let the cycle finish; warm, moist air venting during drying is normal.
- Open the door after the cycle ends to speed air drying.
- Run hot water at the sink before starting so the dishwasher begins with hotter water.
If settings are correct and drying is still poor, these issues are common on this style of Hotpoint dishwasher:
- Heater not heating (often shows up as consistently wet dishes and cooler-than-normal interior)
- Poor wash water temperature (reduces final rinse heat and drying performance)
- Venting or airflow restrictions (moisture stays trapped)
| Symptom you notice | Likely area to check | What we typically do next |
|---|---|---|
| Dishes always wet, no noticeable heat | Heating circuit or controls | Verify options, then test heater circuit per manual |
| Cycle completes but performance varies | Incoming water temp | Target about 120°F at the sink before starting |
| Water remains in tub, musty odor | Drain system | Check drain path and hose routing |
Drying depends on heat plus airflow. If HEATED DRY is off or the incoming water is too cool, the final rinse and drying period cannot evaporate water effectively, so plastics and concave items stay wet.
For step-by-step cycle and option details (including HEATED DRY and HI TEMP settings), follow the HDA2100H35WW owner's manual. If you also have draining issues that affect drying, inspect the dishwasher drain hose WD24X10014 for kinks, clogs, or improper routing.
Last updated: February 2026
How much water does a Hotpoint dishwasher use?
For the Hotpoint HDA2100H35WW dishwasher, water use depends on the cycle you select; typical wash cycles range from about 3.5 to 7.0 gallons per cycle on timer models, while options like Rinse Only can use as little as 2.2 gallons. See the cycle chart in the HDA2100H35WW owner's manual.
| Cycle (timer models) | Water usage (gallons) |
|---|---|
| Normal Wash | 3.5 to 5.0 |
| Heavy Wash | 4.9 to 7.0 |
| Pots & Pans | 6.0 to 7.0 |
| Light Wash/Water Saver | 3.9 to 5.5 |
| Rinse Only | 2.2 |
| Plate warmer/Drying | 0.0 |
- Cycle selection (Normal vs. Heavy vs. Pots & Pans)
- Options such as Hot Start/Hot Prewash (adds water when selected)
- How dirty the load is (heavier soil usually means a heavier cycle)
- Incoming water temperature (best results with 120°F to 150°F water)
- Water pressure (dishwasher supply should be 20 to 120 PSI)
- Use Normal Wash for everyday loads; it is designed to conserve water and energy.
- Run the hot water at the sink until it is hot before starting a cycle; this helps cleaning performance.
- Avoid pre-rinsing under the faucet; scrape food instead.
- Load so items do not block the detergent dispenser or spray action.
- If cleaning is poor, address the cause (water temperature, detergent, loading) before moving to a heavier cycle.
Choosing the right cycle on the HDA2100H35WW controls both water consumption and cleaning performance. Using a heavier cycle than you need can add several gallons per load, while the right cycle and proper water temperature deliver clean dishes with less water.
Last updated: February 2026
How to use Hotpoint one button dishwasher?
On the Hotpoint HDA2100H35WW dishwasher, you start a wash by selecting the cycle (or leaving it on the default cycle, depending on your control style) and pressing START/RESET once. After you press Start, there can be a short delay before you hear washing because the dishwasher may take a few minutes to begin filling.
- Load dishes so spray arms can spin freely.
- Add detergent and close the dispenser.
- Select your wash cycle and any options (such as heated dry, if your model has it).
- Close and latch the door.
- Press START/RESET one time to begin the cycle (electronic models).
For full control-panel specifics and cycle names for your exact version, follow the steps in the HDA2100H35WW owner's manual.
Some HDA2100H35WW versions use a dial. For dial models, we recommend:
- Make sure the door is unlatched.
- Slowly turn the dial to START/ON or to the cycle you want.
- Do not turn past the start or cycle position (you can accidentally skip a prewash).
- Latch the door to start.
Pressing START/RESET twice is used to end a cycle:
- 1 press: starts the cycle
- 2 presses: pumps out, then turns the dishwasher off
| Button action | What happens | When to use it |
|---|---|---|
| Press once | Starts the selected cycle | Normal starting |
| Press twice | Drains, then shuts off | Canceling a cycle |
Using the correct start method prevents accidental cycle cancellation and helps you avoid “it has power but won’t run” situations that are really just a fill delay or an unlatched door.
Last updated: February 2026
Where is the dishwasher filter on a Hotpoint dishwasher?
On the Hotpoint HDA2100H35WW dishwasher, the filter area is in the bottom of the tub under the lower dishrack. We access it by sliding out and removing the lower rack, then lifting or twisting out the filter pieces (depending on the filter style used in this design).
- Turn the dishwasher off; let the unit cool if it just ran.
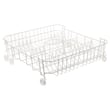
- Pull the lower rack straight out and lift it off the rails.
- Look at the sump area in the center of the tub floor (around the lower spray arm base).
- Remove the filter components:
- Twist the cylindrical screen or cap counterclockwise (if present)
- Lift out the flat screen or coarse filter plate (if present)
- Rinse debris off under warm running water
- A coarse screen that catches larger food particles
- A finer screen or cylinder that traps smaller debris
- The sump opening where water is pulled into the circulation pump
- The lower spray arm hub above the filter area
- Rinse filters with warm water; use a soft brush for grease or film
- Clear glass, labels, and bone fragments from the screen
- Do not run the dishwasher with filter pieces left out
- Do not use harsh abrasives that can tear mesh screens
| Symptom | Common filter-related cause | What to do first |
|---|---|---|
| Grit on dishes | Filter/screen clogged | Clean filter and sump area |
| Poor wash pressure | Debris restricting water flow | Clean filter; check spray arm holes |
| Drain issues | Debris in sump area | Clean filter area; then check drain path |
A clean filter keeps water moving through the wash system correctly, which improves cleaning performance and helps protect the pump and motor assembly from debris.
For diagrams and model-specific component locations, use the HDA2100H35WW owner's manual.
Last updated: February 2026
What does F03 mean on a Hotpoint dishwasher?
F03 on a Hotpoint dishwasher indicates a drain failure or drain timeout; the dishwasher is not getting rid of water fast enough during the cycle. On model HDA2100H35WW, we focus on the drain path (air gap/high loop, hose, and drain components) to restore normal draining.
- Cancel the cycle and let the dishwasher drain and reset before restarting (many models drain for a short period after a reset).
- Check the sink air gap (if you have one) and clean it; a clogged air gap is a common cause of poor draining.
- Inspect the drain hose for kinks, crushing, or a blockage; confirm the hose routing has a proper high loop.
- If the dishwasher drains into a disposer, make sure the disposer inlet is clear.
- Verify the door is fully closed and latched before starting a new cycle.
If the drain path is clear but the unit still times out, these model-matched parts are the most common suspects:
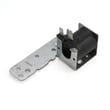
- Drain solenoid assembly: controls the drain mechanism on many Hotpoint/GE designs.
- Drain hose: can clog internally or split and leak.
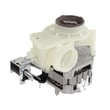
- Pump and motor assembly: if the pump is weak or jammed, draining slows or stops.
| Symptom | Most likely cause | What we do next |
|---|---|---|
| Water remains in tub after cycle | Clogged air gap, disposer, or hose | Clean air gap, clear disposer, inspect hose routing |
| Hums but drains slowly | Partial blockage or weak pump | Check hose for restriction; consider pump/motor diagnosis |
| Intermittent draining | Drain solenoid sticking | Inspect drain solenoid operation and linkage |
A drain timeout leaves dirty water in the sump, reduces cleaning performance, and can trigger repeat error codes. Fixing the drain restriction early also helps prevent leaks at the drain line during the drain portion of the cycle.
- Use the HDA2100H35WW installation guide to confirm drain hose routing and post-install drain checks.
- If you suspect a failed component, start with the g.e. dishwasher drain solenoid assembly WD21X10268 because it directly affects draining on many Hotpoint/GE-style designs.
Last updated: February 2026
Can I replace dishwasher parts myself?
Yes, for the Hotpoint HDA2100H35WW dishwasher, we can replace many common parts ourselves if we shut off power and water first and follow the step-by-step procedures in the HDA2100H35WW owner’s manual. For electrical wiring, grounding, or hard-wiring work, we use a qualified technician.
These repairs are typically straightforward with basic hand tools:
- Spray arms and rack components (cleaning issues, poor spray)
- Door sealing parts (minor leaks around the door)
- Drain hose routing or replacement (slow drain, water left in tub)
- Some mechanical drain components (when the unit hums but will not drain)
- Timer and door switch replacement if you are comfortable with appliance disassembly
If you are troubleshooting poor wash performance, the dishwasher not cleaning dishes video is a good walkthrough for common causes like blocked spray holes and loading issues.
The manual emphasizes disconnecting power before maintenance and using proper grounding practices. Use this checklist every time:
- Turn off the dishwasher circuit breaker (and wall switch, if your setup has one)
- Shut off the water supply valve under the sink
- Pull the dishwasher out only as far as needed to avoid kinking hoses
- Keep screws and panels organized so the enclosure goes back on correctly
- Do not touch the heating element during or right after a cycle
| Symptom | What we check first | Part that often fixes it |
|---|---|---|
| Dishes not getting clean | Clogged spray holes, loading, water temp | Dishwasher spray arm, lower WD12X10244 |
| Dishwasher will not start | Door not latching, switch not closing | Dishwasher door switch WD21X10261 |
| Water not draining | Clogged drain path, hose/air gap | Dishwasher drain hose WD24X10014 |
DIY replacement can restore cleaning and draining performance quickly, but doing the shutdown steps correctly prevents electric shock, leaks, and damaged wiring. Using the correct procedure also helps ensure panels and fasteners go back in place safely.
Last updated: February 2026





