Owner’s manual
 Error Codes



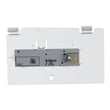
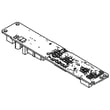
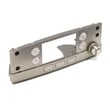
How to remove bottom grille on GE refrigerator?
On the GE CFE28TSHPSS bottom-mount refrigerator, the bottom grille (base grille) typically comes off by releasing its retaining tabs or removing a couple of screws (model variations exist). Once released, pull the grille straight out from the bottom front of the cabinet; use the CFE28TSHPSS owner's manual for the exact access points.
Quick removal steps (safe and simple)
- Unplug the refrigerator or switch it off at the control before working near wiring.
- Open both fresh food doors for better access to the lower front edge.
- Look along the top edge of the grille for retaining clips or tabs.
- If you see screws, remove them with a Phillips screwdriver.
- Pull the grille straight toward you; do not twist it.
- Set the grille aside where it will not get stepped on or warped.
Reinstalling the grille
Most base grilles reinstall by aligning the tabs and pushing the grille straight in until it seats, then reinstalling any screws.
- Line up the left and right ends first.
- Press evenly across the front so the clips snap in.
- Reinstall screws (if used) and snug them; do not overtighten.
What to check if it will not come off
| What you notice | Most likely cause | What we recommend |
|---|---|---|
| Grille moves but will not release | A hidden screw or locked tab | Recheck both corners and the top edge for fasteners |
| Grille feels stuck to the floor | Leveling legs are low or floor contact | Raise the front slightly by adjusting leveling legs, then pull straight out |
| Plastic flexing or cracking sounds | Pulling at an angle | Stop and pull evenly from the center and both corners |
Why it matters
Removing the bottom grille is a common first step for cleaning dust from the front air intake area and for accessing components during troubleshooting. Keeping airflow clear helps the refrigerator cool efficiently and can reduce temperature swings.
Related part that is often checked during cooling issues
If you are removing the grille as part of a cooling or temperature problem, a failed sensor can contribute to inconsistent temperatures. One model-matched option is the refrigerator temperature sensor WR55X10025.
Last updated: February 2026
What is the most common problem with a GE refrigerator?
The most common problem we see with GE refrigerators like model CFE28TSHPSS is inadequate cooling (fresh food too warm, freezer not holding temperature). In many cases, the root cause is restricted airflow or a failed cooling component such as the evaporator fan motor, a temperature sensor, or a defrost-system part.
Quick checks we recommend first
- Make sure air vents inside both compartments are not blocked by food packages.
- Confirm the doors close fully and the gaskets seal all the way around.
- Listen for the evaporator fan; it should run when the compressor is running (door closed).
- Check for heavy frost on the freezer back wall (often points to a defrost problem).
- Verify the temperature settings and allow 24 hours after any adjustment.
For model-specific operating details and control settings, use the CFE28TSHPSS owner's manual.
Common causes and the parts that usually fix them
If basic airflow and settings look good, these are the most frequent repair paths:
| Symptom | Most likely area | Example part for CFE28TSHPSS |
|---|---|---|
| Fridge warm, freezer OK | Air not moving from freezer to fridge | GE refrigerator evaporator fan motor WR60X26866 |
| Temps swing up and down | Temperature feedback issue | Refrigerator temperature sensor WR55X10025 |
| Heavy frost, weak airflow | Defrost system not clearing ice | Refrigerator defrost heater WR51X10132 or refrigerator defrost bi-metal thermostat WR50X10108 |
| Runs a lot, inconsistent cooling | Control not managing loads correctly | Refrigerator main control board WR55X46805 |
Why it matters
When cooling is weak, the compressor and fans run longer to compensate. That increases energy use and can shorten the life of key components. Fixing airflow restrictions early also helps prevent frost buildup and food spoilage.
Ordering the right replacement part
We match parts by model number. Order CFE28TSHPSS replacement parts from the parts list for this model, or search by model on Sears PartsDirect if you are comparing diagrams or looking for additional assemblies.
Last updated: February 2026
Why is my refrigerator water dispenser leaking from the bottom?
On GE model CFE28TSHPSS, a leak from the bottom of the dispenser area is most often caused by trapped air in the water line system (common after installation or a filter change) that makes water drip after dispensing. Purging air and reseating the filter usually stops it; follow the CFE28TSHPSS owner's manual.
Quick fixes we recommend first
- Dispense water continuously for at least 5 minutes to purge trapped air; discard the first 6 glasses.
- Remove and reinstall the water filter so it fully locks in place.
- Pull out, empty, and clean the dispenser tray; reinstall it firmly so it sits flat.
- Wipe the dispenser recess and confirm the “leak” is not tray overflow.
- If it drips right after releasing the paddle, remove your glass slowly; a few drops can occur.
If it still leaks: parts and areas to inspect
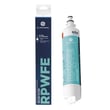
- Water filter: Replace a clogged or damaged filter; use the GE refrigerator water filter RPWFE.
- Water inlet valve: A valve that does not close cleanly can seep and cause dripping; check the refrigerator water inlet valve WR57X27487.
- Water tank (reservoir): A cracked tank can leak inside the fresh food section and track down; inspect the refrigerator tank WR17X26291.
- Tubing and quick-connects: Look for a loose fitting or pinched line behind the dispenser.
Symptom guide
| What you notice | Most likely cause | Best first step |
|---|---|---|
| Drips briefly after dispensing | Air in lines | Purge for 5 minutes |
| Started after filter change | Filter not seated, air in new filter | Reinstall filter, then purge |
| Leaks when not dispensing | Inlet valve seepage, cracked tank | Inspect valve and tank |
Why it matters
Even a small dispenser leak can lead to repeated puddles and moisture inside trim and insulation. Fixing it early helps prevent odors, ice buildup, and floor damage.
Last updated: February 2026