 Installation guide
 Owner’s manual
 Error Codes


Can I replace a dryer heating element myself?
Yes, many homeowners can replace the heating element in a Kenmore 11067741600 dryer if they’re comfortable working with electrical appliances and can follow step-by-step instructions. The key is disconnecting power first and reassembling the heater wiring and airflow parts correctly; use the 11067741600 owner's manual for model-specific guidance.
Before you start (safety and prep)
Replacing a heating element involves exposure to 240V wiring on electric dryers, plus sharp metal panels. We recommend these basics before opening the cabinet:
- Unplug the dryer (or switch off the breaker) before removing any panels
- Confirm the dryer is fully cool
- Take photos of wire locations before disconnecting anything
- Clean lint from the cabinet and vent area while it’s open (restricted airflow can overheat the heater)
- Use rigid or manufacturer-approved venting; crushed or flexible venting can trap lint and restrict airflow
What you’ll typically replace (and why)
On the 11067741600, “no heat” is often tied to the heater circuit, but airflow and safety cutoffs matter too.
| Symptom | Common DIY check | Parts often involved |
|---|---|---|
| Drum tumbles, no heat | Verify both breakers/fuses are on (electric dryers use two) | Heating element, thermal cut-off, thermostat |
| Burning smell or overheating | Check vent for blockage/crushing, clean lint | Cut-off kit, operating thermostat |
| Long dry times | Inspect lint screen and vent run for restrictions | Blower wheel, ducting, seals |
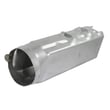
If you’re replacing the heater itself, the correct part for this model is the dryer heating element WP3387747.
DIY steps (high-level)
Exact access varies by design, so follow the model instructions, but the workflow is usually:
- Disconnect power
- Remove the access panel(s) to reach the heater housing
- Label and disconnect heater wires
- Remove the heater assembly and swap in the new element
- Reinstall all covers and reconnect wiring exactly as found
- Restore power and test a timed heat cycle
Why it matters
A correctly installed heating element restores proper drying performance, but proper airflow is just as important. A blocked or crushed vent can cause repeated heater failures and overheating, so cleaning and vent inspection should be part of the same repair.
Last updated: February 2026
How do I know if my Kenmore dryer thermal fuse is blown?
On Kenmore dryer model 11067741600, a blown thermal fuse most often shows up as a dryer that will not run at all, or a dryer that tumbles but has no heat (especially if one side of the 240V supply is lost). The sure way to confirm is a continuity test with a multimeter after disconnecting power; see the 11067741600 owner's manual for safety and access guidance.
Common symptoms that point to a blown thermal fuse
- Dryer will not start even with the door closed and Start pressed firmly
- Drum turns but there is no heat (clothes stay damp)
- Dryer stops mid-cycle and will not restart until it cools
- You recently had restricted airflow (lint buildup, crushed vent)
- You find repeated heating problems after a venting issue
Quick checks before you test the fuse
The manual notes that electric dryers can run the drum but lose heat if a household fuse or breaker is tripped because many electric dryers use two fuses or two breakers.
- Confirm the cycle is actually selected (not set to an off position)
- Press Start firmly and make sure the door is fully closed
- Check both house fuses or both breakers for the dryer
- Verify the dryer has the correct power supply (electric dryers typically require 240V)
What each symptom usually means
| What you see | Most common cause | What to do next |
|---|---|---|
| Won’t run at all | Blown thermal fuse, door switch issue, no power | Check power and door switch, then test fuse |
| Tumbles, no heat | Tripped breaker/fuse on one leg, heating circuit fault | Reset/check both breakers, then test heating circuit |
| “AF” style airflow warning (if equipped) | Vent crushed or blocked | Clear venting and lint path |
How to test the thermal fuse (basic method)
- Unplug the dryer or disconnect power at the breaker.
- Access the fuse (location varies by design; follow the 11067741600 installation guide for safe access and reassembly basics).
- Pull the wires off the fuse terminals.
- Measure continuity across the fuse with a multimeter.
- Good fuse: continuity (beep or near 0 ohms)
- Blown fuse: no continuity (no beep, open circuit)
Why it matters
A thermal fuse is a one-time safety device. If it is blown, we treat it as a sign of overheating, and the most common root cause is restricted airflow. Fixing the venting and lint path helps prevent the new fuse from blowing again.
Last updated: February 2026
How do I tell what model my Kenmore dryer is?
Your Kenmore dryer’s model number is printed on the model and serial number label; on model 11067741600, that label is located at the top inside the dryer door well. Once you have the full model number and serial number, you can match the correct parts and specifications.
Where to look on Kenmore model 11067741600
Check these common label locations in this order:
- Top inside the dryer door well (most common for this model)
- Inside the door opening on the cabinet frame
- On the back panel
- Near the lint screen housing (some designs)
What the model number looks like (and why it matters)
Kenmore model numbers are usually a long string of digits. For many Kenmore dryers, the first three digits (such as 110) identify the manufacturing source family, which helps ensure you get the right heating, drum, and control parts.
Quick example
| What you find | What to do with it |
|---|---|
| Model number (example: 11067741600) | Use it to select exact-fit parts and diagrams |
| Serial number | Helps confirm production series for some components |
| Purchase date | Useful for maintenance planning and service history |
Tips to avoid ordering the wrong part
- Write the model number exactly as shown (all digits, no spaces).
- Record the serial number from the same label.
- If the label is hard to read, take a clear photo before cleaning it.
- Use the model number when choosing common wear items like a drum support roller or idler pulley.
Why it matters
Kenmore dryers can look similar across series, but parts like the heating element, door switch, and timer can vary by model. Using the exact model number keeps troubleshooting accurate and prevents returns.
For label location and how to record the information, follow the 11067741600 owner's manual.
Last updated: February 2026
How much does it cost to replace a heating element in a Kenmore dryer?
For Kenmore dryer model 11067741600, the total cost to replace the heating element is the price of the element plus labor if you hire service. Most homeowners spend about $150 to $400 total, depending on local labor rates and whether heat-safety parts also need replacement.
Typical cost breakdown (parts and labor)
- Heating element: commonly $40 to $150 for the part itself.
- Professional labor: commonly $100 to $250 (often 1 to 2 hours).
- Possible add-ons: thermal cut-off, thermostat, or wiring repair if overheating damaged other components.
- DIY option: you typically pay for parts only, plus basic tools.
| Scenario | What you pay for | Typical total |
|---|---|---|
| DIY replacement | Heating element (and any related parts) | $40 to $200 |
| Pro replacement | Parts + labor | $150 to $400 |
Parts that commonly get replaced with the element
On this Kenmore model, the heating element is sold as Dryer heating element WP3387747. If the dryer overheated, technicians often replace heat-safety parts at the same time.
- Thermal cut-off or fuse kit
- Operating thermostat
- Heating element wire/terminal repair
- Vent cleaning supplies (if airflow is restricted)
What changes the price the most
- Airflow problems: a crushed, long, or lint-packed vent can overheat the heater and trip safety devices.
- Electrical supply issues: electric dryers need the correct 240V supply; a half-tripped breaker can cause “no heat.”
- More than one failed part: thermostats and thermal cut-offs can mimic a bad element.
- Access and installation: stacked units, tight closets, or long vent runs increase labor time.
Why it matters
Replacing the element without fixing the root cause (usually restricted venting or an electrical supply problem) leads to repeat failures and longer dry times. Use the safety and access steps in the 11067741600 owner’s manual before starting any DIY repair.
Last updated: February 2026
Is it worth replacing the heating element in a dryer?
Yes, it’s usually worth replacing the heating element when your Kenmore dryer model 11067741600 tumbles but has no heat, especially if the dryer is otherwise in good condition and the venting and power supply check out. A heating element replacement typically restores normal drying for far less than the cost of a new dryer.
When replacing the heating element makes sense
We recommend replacing the element when these checks point to a true heat failure (not an airflow or power issue):
- The drum turns, but clothes stay cold and damp
- You have proper 240V power to the dryer (electric dryers need 240V)
- Both household fuses or breakers are good (electric dryers often use 2)
- The lint screen and vent path are clear (restricted airflow can cause heat problems)
- You’ve ruled out simple control issues (cycle selected, Start pressed, door fully closed)
If you’re replacing the element, use the correct part for this model: dryer heating element WP3387747.
Quick cost vs. benefit comparison
| Option | Typical cost | Typical outcome |
|---|---|---|
| Replace heating element | Lower | Restores heat; extends dryer life |
| Replace multiple heat circuit parts | Medium | Best when a thermal cut-off or thermostat also failed |
| Replace dryer | Highest | New warranty and features, higher upfront cost |
What to check first (prevents wasted parts)
Before ordering parts, we follow this order because it catches the most common “no heat” causes:
- Power supply: confirm 240V and that both breakers or fuses are good
- Airflow: crushed or blocked venting can trigger airflow-related problems
- Heat circuit safeties: a blown thermal cut-off can stop heat
- Heating element: open element coil or damaged terminals
Helpful references for your exact model are in the 11067741600 owner’s manual and the 11067741600 installation guide.
Why it matters
A dryer that tumbles with no heat is often repairable, but poor airflow or incorrect power can mimic a bad element. Verifying venting and 240V power first helps ensure the repair fixes the real problem and helps prevent repeat failures.
Last updated: February 2026
What is the average life of a Kenmore dryer?
A Kenmore dryer typically lasts 13 years on average. For Kenmore model 11067741600, regular vent cleaning, correct installation, and replacing wear items like rollers and idler pulleys on time are the biggest factors in reaching (or beating) that lifespan; see the 11067741600 owner's manual for care guidance.
Typical lifespan and what changes it
Most dryers fail early due to airflow restrictions, overheating, or normal wear in the drum support and drive system.
- Good airflow (short, smooth venting) helps the heater and motor run cooler.
- Long or restrictive vent runs can reduce performance and shorten dryer life.
- Overloading strains the drive motor, belt, and drum supports.
- Ignoring squeals or thumps often leads to bigger repairs later.
- Routine lint removal reduces heat stress on thermostats and thermal cutoffs.
Quick maintenance checklist (best ROI)
Use this as a simple schedule to extend the life of your 11067741600 dryer.
- Clean the lint screen every load (replace if damaged).
- Check and clean the vent path and exterior hood regularly.
- Keep the dryer level to reduce drum and roller wear.
- Stop using the dryer if you smell burning; inspect lint buildup and airflow.
- Address noise early by inspecting drum supports and the idler.
Common wear parts that affect longevity
If your dryer is noisy, slow to dry, or intermittently stops, these parts are frequent culprits.
| Symptom | Common cause | Example part for this model |
|---|---|---|
| Thumping, rumbling | Worn drum support rollers | Support WPW10314173 |
| Squealing, belt slack | Worn idler pulley | Dryer idler pulley 279640 |
| Long dry times, overheating | Restricted venting or heat system issues | Dryer heating element WP3387747 |
Why it matters
A dryer that is drying slowly usually runs hotter and longer, which increases stress on the heating circuit (heater, thermostat, thermal cutoff) and the drive system. The installation instructions for venting specifically note that overly long exhaust systems reduce performance and can shorten dryer life; the 11067741600 installation guide is the best reference for vent length and elbow limits.
Last updated: February 2026











