
Are air compressor parts interchangeable?
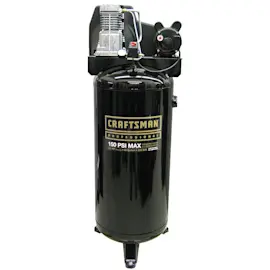
Most parts on a Craftsman 106175781 twin-cylinder tank compressor are not interchangeable with other models because internal components are built around specific pump design, mounting, airflow, and pressure requirements. Some external connection items (like certain fittings) can interchange if the thread type and size match exactly.
What’s usually model-specific (not interchangeable)
These parts must match the exact compressor design to avoid poor performance, leaks, or damage:
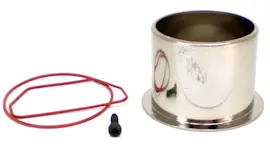
- Pump components (cylinders, pistons, rings, connecting rods)
- Valve plate and reed valves
- Head gasket and cylinder gaskets
- Crankcase parts (bearings, seals, oil sight glass on oil-lube units)
- Motor-to-pump mounting hardware and pulley/flywheel alignment parts
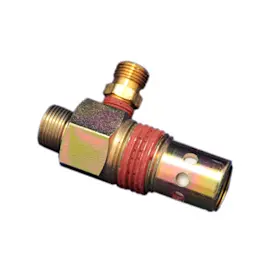
- Tank check valve style and port orientation (varies by tank and manifold layout)
What’s sometimes interchangeable (only if specs match)
Some items can swap between brands and models, but only when you match the connection and ratings:
- Quick-connect couplers and plugs (industrial, automotive, ARO styles)
- NPT threaded fittings (common sizes include 1/4-in and 3/8-in NPT)
- Air hose ends and adapters
- Pressure gauge (must match pressure range and thread)
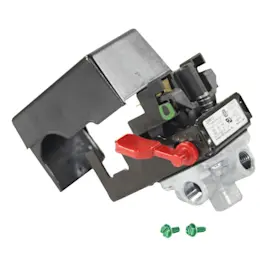
- Pressure switch (must match cut-in/cut-out range, voltage, and port type)
Quick compatibility checklist (before you buy)
Use this checklist to prevent cross-threading and air leaks:
- Confirm thread type (most shop compressors use NPT)
- Confirm thread size (measure or compare to the old fitting)
- Match pressure rating (PSI) to your compressor’s maximum pressure
- Match flow needs (CFM) for tools that are air-hungry
- Verify port orientation and clearance so lines and covers still fit
Common examples
| Part type | Often interchangeable? | What must match |
|---|---|---|
| Pump internals | No | Model-specific design and tolerances |
| Couplers/plugs | Sometimes | Style + NPT size + seal method |
| Pressure switch | Sometimes | Voltage + PSI range + port configuration |
| Gauge | Sometimes | PSI range + thread size |
Why it matters
Interchanging the wrong part can create slow recovery, constant running, nuisance tripping, or persistent leaks. Matching the correct specs keeps your Craftsman compressor safe, efficient, and able to hit its designed pressure and airflow.
For help identifying the correct replacement by model number and diagrams, use how to find your appliance model number (and what it means for parts).
Last updated: February 2026
How do I find my compressor model number?
Your Craftsman twin-cylinder tank compressor model number is usually printed on a data plate or sticker on the tank or frame. For Craftsman model 106175781, check the tank (front or side) first, then the base rail or pump area for a label that lists the model and serial.
Where to look on a Craftsman air compressor
Check these common label locations (in order):
- Tank front or tank side near the drain valve area
- Tank shoulder near the handle or wheel bracket
- Base rail or frame near the power cord entry
- Pump shroud or motor mount plate (near the compressor head)
- Underside of the tank (tip only when empty and stable)
What the model number label looks like
Most compressor ID labels include several fields. Use the model number (not the tank size or PSI rating) when searching parts.
| Label field | What it means | Use it for parts? |
|---|---|---|
| Model number | Identifies the exact unit version | Yes |
| Serial number | Unique ID for your specific unit | Sometimes |
| Voltage/amps | Electrical rating | No |
| Max PSI | Pressure rating | No |
| Tank size | Capacity (gallons) | No |
Tips to read a worn or dirty data plate
A dirty tank label is the most common reason the model number is hard to find.
- Wipe the label with a damp cloth and mild soap; avoid soaking it
- Use a flashlight at a low angle to make faint printing stand out
- Take a close-up photo and zoom in to read small characters
- Write it down exactly as shown (letters, numbers, and dashes)
Why it matters
The model number ensures we match the correct Craftsman parts and diagrams for your compressor’s pump, pressure switch, regulator, and safety valve. Even small model changes can use different fittings or electrical components.
For more help identifying the correct number format, use how to find your appliance model number (and what it means for parts).
Last updated: February 2026
Is a 150 PSI air compressor good for car detailing?
Yes. A 150 PSI air compressor is a solid choice for car detailing because it gives you plenty of maximum pressure headroom; what matters more in real use is whether your Craftsman model 106175781 can deliver enough CFM at your working pressure (often 60 to 90 PSI) and has enough tank capacity to avoid constant cycling.
What to look at besides PSI
For detailing tools, PSI is usually regulated down; airflow and storage are what keep the tool working continuously.
- CFM at 90 PSI: higher CFM keeps Tornador-style tools and blow guns from sputtering
- Tank size (gallons): larger tanks reduce pressure drop during long bursts
- Duty cycle: higher duty cycle handles longer sessions without overheating
- Moisture control: add a water separator and drain the tank often to prevent water spray
- Noise and portability: important for mobile detailing or garage use
Quick sizing guide for common detailing tasks
Use this as a practical target when comparing compressors.
| Detailing task | Typical regulator setting | What matters most | Practical compressor target |
|---|---|---|---|
| Blow gun for drying/crevices | 60 to 90 PSI | CFM consistency | 3 to 5+ CFM @ 90 PSI |
| Tornador-style cleaning tool | ~90 PSI | High CFM, steady pressure | 4 to 6+ CFM @ 90 PSI |
| Light air tools (small ratchet, inflator) | 70 to 100 PSI | Tank recovery | Medium tank, decent CFM |
Setup tips that make a 150 PSI compressor work better for detailing
- Set the regulator at the tool (or close to it) so pressure stays stable
- Use a 3/8-inch hose for higher-flow tools to reduce pressure drop
- Add an inline filter/water separator; compressed air carries moisture
- Drain the tank after each session; water in the tank leads to wet air output
- If the compressor runs nonstop, reduce tool demand or plan short bursts to let it recover
Why it matters
Detailing is usually limited by airflow (CFM) and moisture, not maximum PSI. A 150 PSI compressor can be excellent for detailing when it can maintain the CFM your tools need at 60 to 90 PSI and you manage water in the air line.
For general DIY safety and planning before repairs or upgrades, we recommend reviewing are diy appliance repairs safe.
Last updated: February 2026
What is the most common cause of air compressor failure?
On the Craftsman 106175781 twin-cylinder tank compressor, the most common cause of failure is poor maintenance that makes the unit run hot and run too long; restricted intake airflow and unresolved air leaks are the two biggest drivers of overheating and rapid pump and motor wear.
Most common failure triggers to check first
- Restricted intake filter or dirty intake path that starves the pump for air
- Air leaks at quick-connects, hose, regulator, fittings, tank drain, or check valve that force long run times
- Blocked cooling airflow (compressor pushed against a wall, clogged shroud/fins, hot garage corner)
- Moisture left in the tank (not draining) that leads to internal corrosion and debris
- Electrical stress (undersized extension cord, weak outlet, loose wiring) that overheats the motor
- Pressure switch or unloader issues that cause hard starts and repeated cycling
Quick symptom-to-cause guide
| What you notice | Most likely cause | What to do next |
|---|---|---|
| Runs constantly, won’t reach cut-out pressure | Air leak or worn pump valves/rings | Soap-test for leaks; then evaluate pump output |
| Trips breaker on start | Power supply issue, hard-start/unloader problem, failing start components | Eliminate extension cords; verify start/unloader operation |
| Gets very hot, smells “hot” | Restricted intake or poor ventilation | Clean intake area; improve airflow around the unit |
| Water spits from air tools | Tank not drained, no moisture control | Drain tank after use; add a water separator if needed |
Why it matters
Excessive run time is what kills compressors. When the 106175781 runs longer than normal to build pressure, heat rises quickly and that accelerates wear on the pump, seals, valves, and motor components.
Helpful DIY guidance
For safe electrical checks that often uncover the root cause, use: how to use a multimeter to test electrical parts video and how to tell if a fuse is blown.
Last updated: February 2026