- Kenmore refrigerator water filters
- Whirlpool refrigerator water filters
- Samsung refrigerator water filters
- GE refrigerator water filters
- LG refrigerator water filters
- Frigidaire refrigerator water filters
- KitchenAid refrigerator water filters
- Maytag refrigerator water filters
- Kenmore Elite refrigerator water filters
- Estate refrigerator water filters
- GE Profile refrigerator water filters
- Amana refrigerator water filters
- Bosch refrigerator water filters
- Dacor refrigerator water filters
- Electrolux refrigerator water filters
Top DIY repair help
View All Repair Categories
Appliances
Lawn & Garden
Power Tools
Home Improvement
Sports & Leisure
Heating & Cooling
Quick Links
How to replace an air compressor pressure switch
less than a minute readMar 05Lyle Weischwill
Repair time and Difficulty
45 minutes or less
Tools Required
- Work gloves
- Wrench set
- Nut driver set
- Thread-sealing tape
This DIY repair guide explains how to replace the pressure switch on an air compressor. The pressure switch starts the pump motor as the tank empties and pressure drops to the cut-in pressure; the switch stops the motor when tank reaches the cut-out pressure.
Over time, the pressure switch wears out. If the pressure switch won’t start the pump when tank pressure drops below the cut-in pressure or won’t stop the pump when the tank reaches the cut-out pressure, replace the pressure switch with the manufacturer-approved air compressor part.
This procedure works on common Craftsman, Devilbiss, Dewalt, Campbell Hausfeld and Porter Cable air compressors.
Instructions
- 1. Shut off the electricity and drain the air tank
Unplug the air compressor’s power cord from the wall outlet.
Pull the ring on the safety valve to drain all air pressure from the tank. Wear work gloves to protect your hands.
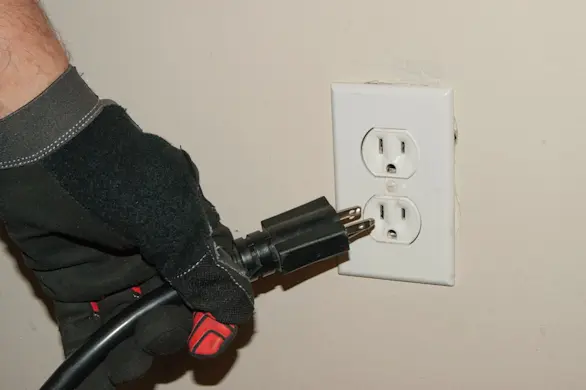
PHOTO: Unplug the power cord. 
PHOTO: Drain the air tank.
- 2. Remove the tank pressure gauge
Unscrew the tank pressure gauge and remove it from the pressure switch.

PHOTO: Remove the tank pressure gauge.
- 3. Remove the pressure switch tube
Unscrew the pressure switch tube fittings from the check valve and pressure switch.
Remove the pressure switch tube.

PHOTO: Disconnect the pressure switch tube. 
PHOTO: Unscrew the pressure switch tube fitting.
- 4. Remove the pressure regulator assembly
Unscrew the pressure regulator assembly and remove it from the pressure switch.

PHOTO: Unscrew the pressure regulator assembly.
- 5. Remove the pressure switch
Remove the pressure switch cover.
Take a digital photo of the wires connected to the pressure switch for use later when reconnecting wires.
Disconnect the 2 black wires from the pressure switch.
Disconnect the 2 green wires from the pressure switch.
Pull the 2 power cord strain reliefs off the pressure switch.
Unscrew the safety valve and remove it from the pressure switch.
Unscrew the pressure switch assembly from the pipe connected to the tank.

PHOTO: Remove the pressure switch cover. 
PHOTO: Disconnect the black wires. 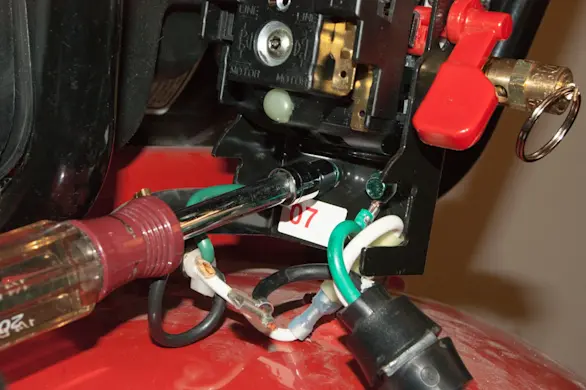
PHOTO: Disconnect the green wires. 
PHOTO: Unscrew the safety valve. 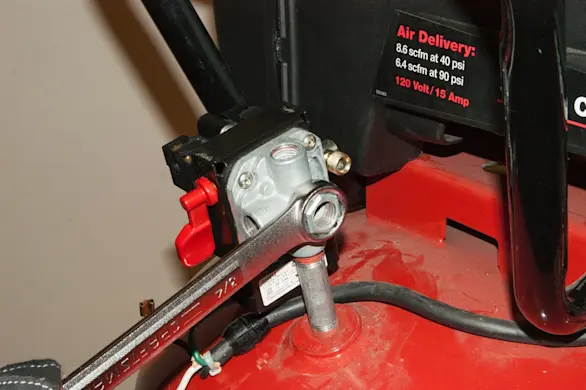
PHOTO: Unscrew the pressure switch.
- 6. Install the new pressure switch
Apply thread-sealing tape to the tank pipe.
Screw the new pressure switch onto the tank pipe.
Tighten the pressure switch and align the check valve tube fitting.
Apply thread-sealing tape to the threads of the safety valve.
Screw the safety valve into the new pressure switch and tighten firmly.
Remove the new pressure switch cover.
Using your digital photo as a reference, connect the wires to the new pressure switch.
Insert the power cord strain relief into the strain relief bracket.
Reinstall the pressure switch cover.

PHOTO: Screw on the new pressure switch. 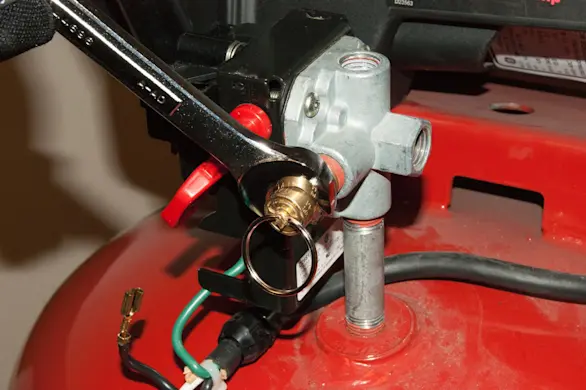
PHOTO: Screw the safety valve on. 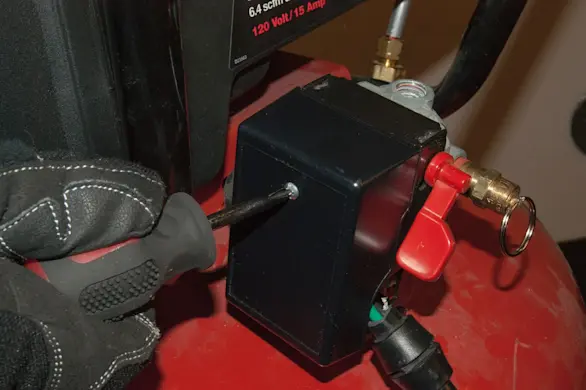
PHOTO: Remove the new pressure switch cover. 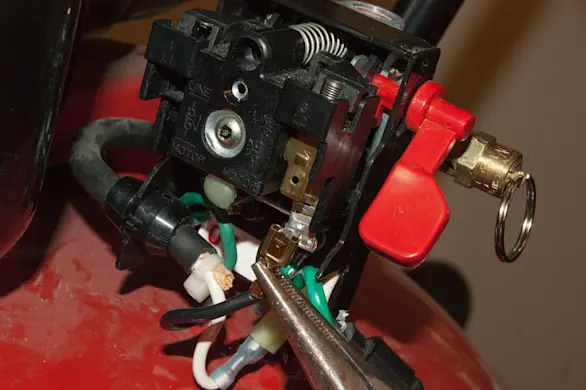
PHOTO: Reconnect the wires. 
PHOTO: Reinstall the pressure switch cover.
- 7. Reinstall the pressure regulator
Apply thread-sealing tape to the pressure regulator connecting pipe threads.
Screw the pressure regulator and pipe into the new pressure switch and tighten firmly with the tank gauge fitting facing up.
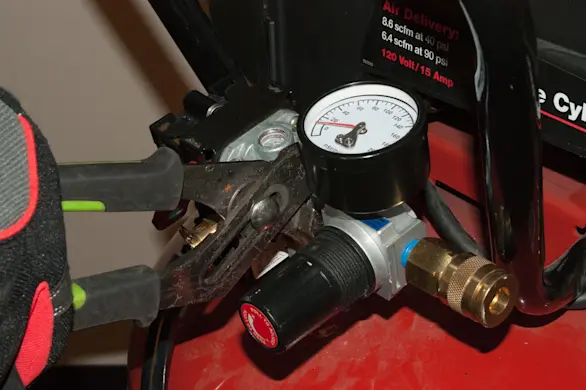
PHOTO: Reinstall the pressure regulator.
- 8. Reinstall the pressure switch tube
Reconnect the pressure switch tube to the check valve and the pressure switch.
Tighten the fittings firmly.
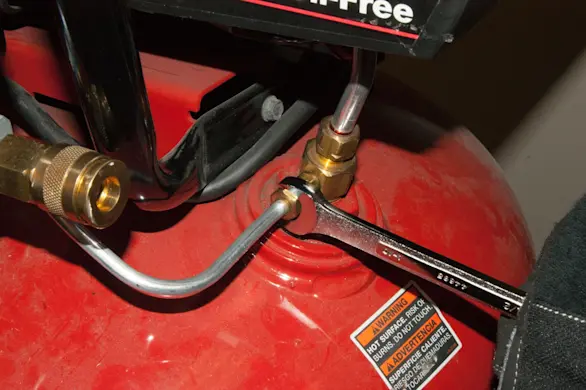
PHOTO: Reconnect the pressure switch tube. 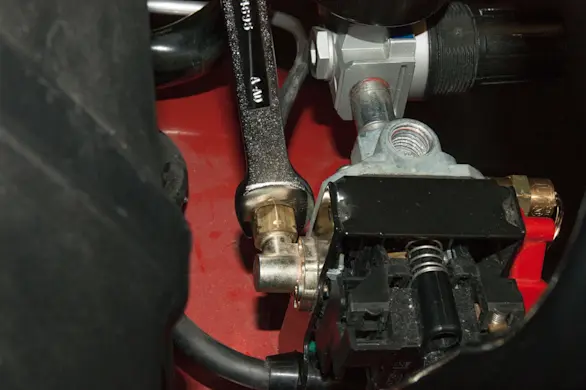
PHOTO: Tighten the fittings firmly.
- 9. Reinstall the tank pressure gauge
Screw the pressure gauge onto the new pressure switch and tighten the gauge firmly.
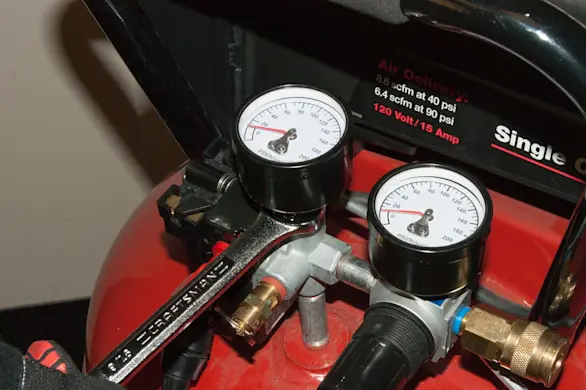
PHOTO: Screw on the pressure gauge.
- 10. Restore power
Plug the air compressor into the electrical outlet.

PHOTO: Plug the compressor in.