 Installation guide
 Owner’s manual


Where to find part number on GE dryer?
On your GE DJXR433EC2WW dryer, we find the model and serial information label on the front of the dryer behind the door (open the door and look on the front panel/door opening area). Once you have that label, you can match the correct replacement part number for your exact dryer.
- Open the dryer door fully
- Look on the front panel behind the door (door opening area)
- Check the door frame and the inside edge of the opening
- Wipe lint and dust off the label so the numbers are readable
- Write down the model number and serial number exactly as shown
Most GE dryer ID labels include:
- Model number (for this page: DJXR433EC2WW)
- Serial number
- Electrical ratings (voltage/amps)
- Sometimes a manufacturing date code
We use the model number to ensure the part fits your exact drum, motor, and control configuration.
| What you have | What it’s used for | Example for this dryer |
|---|---|---|
| Model number | Confirms the correct parts list | DJXR433EC2WW |
| Serial number | Helps confirm production run details | Varies by unit |
| Part number | Identifies the replacement component | WE12M22 (example) |
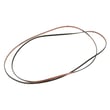
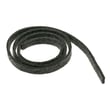
If your dryer squeals or the drum will not tumble, one common wear item is the belt. After confirming the model number on the label, you can match it to the correct belt for this dryer: drive belt WE03X29897.
Using the exact label information prevents ordering the wrong GE dryer parts (like a drive belt, idler pulley, or door switch) that look similar but fit different drum sizes or mounting styles.
For diagrams and model identification details, use the DJXR433EC2WW owner’s manual.
Last updated: February 2026
How do you reset the heating on a GE dryer?
On the GE DJXR433EC2WW electric dryer, there is no dedicated “heat reset” button; most heating problems are corrected by resetting power at the breaker and fixing the cause (often a tripped breaker leg, airflow restriction, or a failed thermostat or heater). Use the DJXR433EC2WW owner's manual for the exact control settings and troubleshooting chart.
- Turn the dryer OFF.
- At your home electrical panel, reset both dryer breakers (most electric dryers use 2 breaker legs).
- Wait 1 minute, then try a timed heat cycle.
- Confirm the cycle is set to a heated option (not “fluff/no heat”).
- If the drum tumbles but there is still no heat, move to airflow checks below.
- One breaker leg is tripped: the dryer can run but not heat.
- Restricted venting: lint buildup or crushed ducting overheats the system and stops heat.
- Failed heating circuit part: heating element, operating thermostat, high-limit thermostat, or safety thermostat.
- Incorrect cycle selection: a no-heat or low-heat setting for the load.
| Check | What you’re looking for | Typical fix |
|---|---|---|
| Breaker/fuses | One side tripped or blown | Reset/replace both legs |
| Lint screen and vent | Poor airflow, long dry times | Clean screen, clear venting |
| Heat components | No heat with good airflow | Test and replace failed part |
If airflow and power are good, these parts are common suspects:
- GE dryer heating element assembly WE11M23 (no heat at all)
- Dryer operating thermostat WE4M216 (cycling heat issues)
- Dryer high-limit thermostat WE4M137 (overheat protection)
- Dryer safety thermostat WE4M160 (opens if overheating occurs)
An electric dryer needs full 240V power and strong airflow to heat correctly. A partially tripped breaker or blocked vent can make the dryer tumble with little or no heat, increase dry time, and overheat safety controls.
Last updated: February 2026
Where is my thermal fuse located on my GE dryer?
On the GE DJXR433EC2WW electric dryer, the thermal fuse is typically mounted on the blower housing or exhaust duct area inside the cabinet, usually toward the rear where airflow exits the drum. We use the wiring diagram and component layout in the DJXR433EC2WW owner's manual to pinpoint the exact spot for your configuration.
Unplug the dryer and access the inside of the cabinet; then look for a small, flat plastic or metal fuse with two wires attached.
- On the blower housing near the blower wheel
- On the exhaust duct/air duct just after the lint screen housing
- Near the rear panel where the vent outlet connects
- Close to the heater housing on some GE designs (less common than blower area)
Because you are working around 240V wiring, we follow the same safety approach used for electrical service steps in the DJXR433EC2WW installation guide.
- Turn off the 30-amp dryer breaker (many electric dryers use a 2-pole breaker)
- Unplug the power cord before removing any panels
- Remove the rear panel or front panel (whichever your manual shows for component access)
- Take a photo of wire positions before disconnecting anything
- If you test the fuse, use a multimeter for continuity (a good fuse reads closed/near 0 ohms)
A blown thermal fuse often happens after restricted airflow (lint buildup or a crushed vent).
| Symptom | What you usually see | What to check next |
|---|---|---|
| Dryer will not start | No motor run | Door switch, thermal fuse, timer |
| Runs but shuts off quickly | Stops mid-cycle | Venting, blower, thermostats |
| No heat (some models) | Tumbles, no heat | Breaker/fuses, heater circuit, thermostats |
The thermal fuse is a one-time safety device; if it opens, the dryer is protecting itself from overheating. Replacing the fuse without fixing the airflow problem can cause the new fuse to fail again.
If you are also seeing long dry times, we recommend following the cleaning and vent checks in dryer takes a long time to dry.
Last updated: February 2026





