Get free shipping on your order, with any water filter subscription. Find my filter

Open Hamburger Menu
Sears Parts Direct
Tips to find your model number

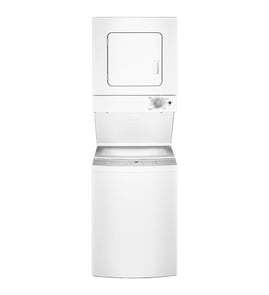
Kenmore 2661532210 stacked laundry center Parts

Here are the diagrams and repair parts for Kenmore 2661532210 stacked laundry center, as well as links to manuals and error code tables, if available.

Kenmore 2661532210 stacked laundry center
By Schematic
By Part
SELECT DIAGRAM
?

This is the number corresponding to the part on the diagram / schematic

Browse Parts for 2661532210 Laundry Center

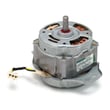
  • Laundry Center Washer Drive Motor And Shield Kit for Kenmore 2661532210 - Part WH49X20495

    Motor & drive assembly diagram

    Laundry Center Drive Motor

    Part #WH20X10081

    Replaced by #WH49X20495

    Info Icon
    Manufacturer substitution
    This part replaces WH20X10081. Substitute parts can look different from the original.
    In Stock
    $263.90
    $12.00 OFF Phone Price : $275.90Info Icon
    Minus Item
    Qty
    Plus Item
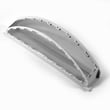
  • Dryer Lint Screen for Kenmore 2661532210 - Part WE18X25102

    Front panel diagram

    Dryer Lint Filter

    Part #WE18M52

    Replaced by #WE18X25102

    Info Icon
    Manufacturer substitution
    This part replaces WE18M52. Substitute parts can look different from the original.
    In Stock
    $49.03
    11% OFF Phone Price : $55.03Info Icon
    Minus Item
    Qty
    Plus Item
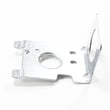
  • Dryer Power Cord Access Bracket for Kenmore 2661532210 - Part WE01X20423

    Controls diagram

    Strain Relief

    Part #WE1M457

    Replaced by #WE01X20423

    Info Icon
    Manufacturer substitution
    This part replaces WE1M457. Substitute parts can look different from the original.
    In Stock
    $9.01
    10% OFF Phone Price : $10.01Info Icon
    Minus Item
    Qty
    Plus Item
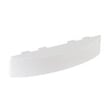
  • Clip Front P for Kenmore 2661532210 - Part WE02X36438

    Cabinet (1) diagram

    Clip Front P

    Part #WE2M301

    Replaced by #WE02X36438

    Info Icon
    Manufacturer substitution
    This part replaces WE2M301. Substitute parts can look different from the original.
    In Stock
    $31.81
    Minus Item
    Qty
    Plus Item
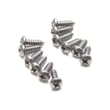
  • Washer Screw for Kenmore 2661532210 - Part WZ4X241D

    Controls diagram

    Screw

    Part #WH2M270

    Replaced by #WZ4X241D

    Info Icon
    Manufacturer substitution
    This part replaces WH2M270. Substitute parts can look different from the original.
    In Stock
    $24.52
    20% OFF Phone Price : $30.52Info Icon
    Minus Item
    Qty
    Plus Item
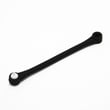
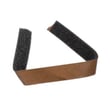
  • Washer Suspension Strap for Kenmore 2661532210 - Part WH01X20442

    Washer Suspension Strap

    Part #WH01X10633

    Replaced by #WH01X20442

    Info Icon
    Manufacturer substitution
    This part replaces WH01X10633. Substitute parts can look different from the original.
    In Stock
    $14.85
    12% OFF Phone Price : $16.85Info Icon
    Minus Item
    Qty
    Plus Item
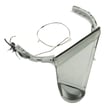
  • Dryer Lint Chute Assembly for Kenmore 2661532210 - Part WE02X25500

    Front panel diagram

    Duct Trap Assembly

    Part #WE14M192

    Replaced by #WE02X25500

    Info Icon
    Manufacturer substitution
    This part replaces WE14M192. Substitute parts can look different from the original.
    In Stock
    $128.91
    9% OFF Phone Price : $140.91Info Icon
    Minus Item
    Qty
    Plus Item
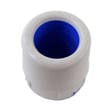
  • Laundry Center Washer Fabric Softener Dispenser Cup for Kenmore 2661532210 - Part WH44X10287

    Cover

    Part #WH44X20435

    Replaced by #WH44X10287

    Info Icon
    Manufacturer substitution
    This part replaces WH44X20435. Substitute parts can look different from the original.
    In Stock
    $42.69
    12% OFF Phone Price : $48.69Info Icon
    Minus Item
    Qty
    Plus Item
  • Laundry Center Dryer Door Handle for Kenmore 2661532210 - Part WE01X30378

    Door assembly diagram

    Laundry Center Dryer Door Handle

    Part #WE1M1068

    Replaced by #WE01X30378

    Info Icon
    Manufacturer substitution
    This part replaces WE1M1068. Substitute parts can look different from the original.
    In Stock
    $67.33
    8% OFF Phone Price : $73.33Info Icon
    Minus Item
    Qty
    Plus Item
  • Blower Gasket (exhaust) for Kenmore 2661532210 - Part WE09X27636

    Blower & motor assembly diagram

    Dryer Blower Gasket

    Part #WE1M966

    Replaced by #WE09X27636

    Info Icon
    Manufacturer substitution
    This part replaces WE1M966. Substitute parts can look different from the original.
    In Stock
    $58.69
    Minus Item
    Qty
    Plus Item

Kenmore Laundry Center 2661532210 FAQs

On the Kenmore 2661532210 stacked laundry center, the washer front access area is typically released after the top is opened and any retaining screws or spring clips are removed. We recommend following the exact sequence in the 2661532210 owner's manual to avoid bending panels or damaging wiring.

Before you start (safety and prep)
  • Unplug the laundry center from the wall outlet.
  • Turn off both water supply valves.
  • Protect the floor with a towel or cardboard.
  • Keep a small container for screws.
  • Take a quick photo of each step so reassembly is easy.
Common removal steps (most Kenmore laundry centers)
  1. Remove the control console fasteners (rear screws or end-cap screws, depending on design).
  2. Release the top panel: lift the top after removing screws or popping the spring clips.
  3. Remove the lower/front access panel screws (often along the bottom edge or inside the front lip).
  4. Tilt and lift the panel off the locating tabs.
  5. If a harness or switch is attached, disconnect the wire connector by the locking tab (do not pull on wires).
What you might be removing (and why)
Panel/area What it exposes Why you remove it
Lower front access panel Drain pump, hoses, wiring Clearing clogs, pump replacement
Full front panel (if equipped) Tub, motor, belt area Deeper service work
Top panel Lid switch/lock area, mounting points Accessing clips and fasteners
Why it matters

Front panels can be easy to warp if they are pulled before all screws and clips are released. Following the model-specific order also helps prevent broken tabs and pinched harnesses.

Related help

If the washer is locked up or showing a fault, use the Kenmore 417 laundry center -washer error codes guide to narrow the problem before disassembly.

Last updated: February 2026

On Kenmore stacked laundry center model 2661532210, the model number is printed on a rating label attached to the washer section. Most commonly, you’ll find it under the washer lid on the top frame, or on the cabinet near the lower side edge.

Most common label locations to check
  • Under the washer lid: lift the lid and look along the top rim of the opening (front or side of the frame)
  • Inside the washer cabinet: check the left or right side panel near the bottom edge
  • Behind the front access panel (if your unit has one): the label can be on the inner frame
  • Back of the unit: sometimes the rating label is on the rear panel near the power cord
What the label looks like (and what to write down)

The rating label usually includes several identifiers. We recommend recording these exactly:

Label item Why it matters Example format
Model number Ensures parts fit your exact laundry center 2661532210
Serial number Helps date the unit and confirm production run Letters and numbers
Electrical info Useful for troubleshooting and safe service Volts/amps
Tips to avoid mix-ups when ordering parts
  • Match the full model number exactly, including any extra digits.
  • If the label is worn, use a flashlight and take a close-up photo to zoom in.
  • Use the model number when checking diagrams and ordering common wear items like a dryer drum belt WE03X29897.
Why it matters

Kenmore laundry centers often have similar-looking cabinets across multiple series. Using the exact model number (like 2661532210) prevents ordering the wrong lid lock, drive belt, control board, or dryer parts.

For model-specific label illustrations and additional identification details, check the 2661532210 owner's manual.

Last updated: February 2026

A Kenmore stacked laundry center like model 2661532210 typically lasts 13 years with normal household use and routine maintenance. Keeping airflow clear for the dryer and avoiding washer overloads are the biggest factors in reaching that lifespan.

Typical lifespan and what affects it

Most laundry centers fail early due to heat stress in the dryer section or mechanical wear in the washer section.

  • Clean the lint screen every load and keep the exhaust vent clear
  • Do not overload the washer; heavy loads strain the drive belt and motor
  • Level the unit to reduce vibration and tub wear
  • Use the right water level and detergent amount to reduce residue buildup
  • Address new noises quickly (squeal, thump, grinding)
Common wear items that can shorten lifespan

If these parts wear out, the unit may still be worth repairing because they are normal service items.

Symptom Likely area Example part for 2661532210
Dryer drum not turning, burning rubber smell Belt drive Dryer drum belt WE03X29897
Dryer squeals or thumps Drum support/glides Dryer drum bearing kit WE25M40
Washer will not spin or agitate correctly Washer drive system Washer drive belt WH01X20436
Why it matters

Knowing the average lifespan helps you decide whether to repair or replace. On a 2661532210 laundry center, replacing a belt, bearing, lid lock, or switch often restores reliable operation and extends service life for years.

Where to confirm care and maintenance steps

For model-specific cleaning, loading, and operating guidance, follow the maintenance section in the 2661532210 owner's manual.

Last updated: March 2026
Most common symptoms to help you fix your laundry centers

Choose a symptom to see related laundry center repairs.

Main causes: broken dryer drive belt, weak drive motor, binding drum seals…

Main causes: door not fully shut, bad door switch, faulty push-to-start switch, wiring failure, bad drive motor, blown f…

Main causes: blocked exhaust vent, clogged lint screen, bad timer, moisture sensing problems, weak gas valve coils, bad …

Main causes: broken lid switch or lid lock, faulty drive motor, drain system problem, broken drive system components…

Main causes: bad lid switch or lid lock, drive motor failure, broken motor coupler, bad timer, faulty electronic control…

Main causes: clogged drain system, blocked drain hose, bad drain pump…

Main causes: control system failure, broken heating element, bad gas valve coils, gas supply failure, voltage supply pro…

Main causes: unbalanced load, broken suspension springs or shocks, worn snubber ring…

Main causes: lack of water supply, failed lid switch or lid lock, bad water level pressure switch, control system failur…

Most common repair guides to help fix your laundry centers

These step-by-step repair guides will help you safely fix what’s broken on your laundry center.

How to replace a laundry center washer lid lock switch

How to replace a laundry center washer lid lock switch

If the washer fills but won’t start the agitation cycle, the lid lock switch could be defective. …

Repair time and Difficulty

 15 minutes or less
How to replace a laundry center washer timer

How to replace a laundry center washer timer

If the washer doesn't fill, spin or drain, the timer could be the problem. …

Repair time and Difficulty

 15 minutes or less
How to replace a laundry center washer snubber ring

How to replace a laundry center washer snubber ring

If the washer tub bangs the cabinet during the spin cycle even though the load is balanced, you might need to replace th…

Repair time and Difficulty

 15 minutes or less

Effective articles & videos to help repair your laundry centers

Use the advice and tips in these articles and videos to get the most out of your laundry center.

How to get cleaner clothes: 7 laundry tips for whiter whites and better results

How to get cleaner clothes: 7 laundry tips for whiter whites and better results

Tired of dull laundry? These 7 expert tips help you get cleaner clothes, brighten whites, and fix common washer mistakes…

Are DIY appliance repairs safe?

Are DIY appliance repairs safe?

Find out how to stay safe when repairing your appliances.…

Cleaning your appliances after a drinking water advisory

Cleaning your appliances after a drinking water advisory

Find out how to clean and flush household appliances once a boil water advisory is lifted.…

Parts & More

Bottom-Mount Refrigerator
Coffee Maker
Dishwasher
Dryer
Front-Engine Lawn Tractor
Gas Range
Gas Walk-Behind Mower
Lawn Edger
Parts
Side-By-Side Refrigerator
Washer