 Installation guide
 Owner’s manual
 Error Codes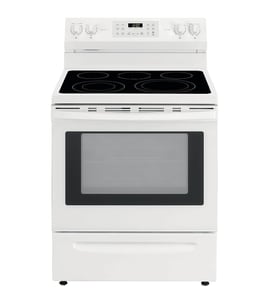


How long should a JennAir stove last?
A Jenn-Air range like model JDS9860AAP typically lasts 15 to 20 years with normal household use. Regular cleaning, proper installation and grounding, and fixing small problems early help you reach the high end of that lifespan; see the JDS9860AAP owner's manual for care and safety basics.
Typical lifespan and what affects it
Most ranges reach their full service life when heat, airflow, and door sealing stay in good shape.
- Cooking frequency (daily use shortens life compared to occasional use)
- Heat stress from frequent self-cleaning or high-heat broiling
- Ventilation and grease control, especially on downdraft models
- Electrical connection quality (loose connections can cause intermittent power issues)
- Maintenance habits (keeping burners, igniters, and the oven cavity clean)
What “end of life” usually looks like
A range is often still usable, but repairs become more frequent or more expensive.
| Symptom | Common cause | Typical fix |
|---|---|---|
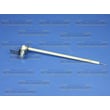
| Oven won’t heat or heats unevenly | Failed bake element | Replace the bake element WP74010750 |
| Burner won’t ignite reliably | Worn igniter or switch issue | Inspect igniter circuit and related harnesses |
| Door won’t seal, longer preheat times | Worn door gasket | Replace the door gasket WPW10162384 |
| Power cuts out or unit is dead | Loose/burned terminal connection | Inspect wiring and replace the terminal block WPW10245259 if damaged |
Why it matters
A 15 to 20 year lifespan is realistic only when the range operates safely and efficiently. A weak door seal, failing igniter, or poor electrical connection can increase cooking times, reduce temperature control, and raise the risk of repeat breakdowns.
Best practices to help it last 15 to 20 years
- Clean spills promptly to prevent baked-on residue and corrosion
- Keep the vent and filters clean if your model uses downdraft ventilation
- Avoid slamming the oven door; it protects hinges and the door seal
- Address ignition delays, uneven baking, or flickering power early
- Follow installation and grounding requirements in the JDS9860AAP installation guide
Last updated: February 2026
How to reset JennAir oven?
To reset your Jenn-Air range model JDS9860AAP, clear the control and then power-cycle the range. Press Cancel/Stop-Clear to stop beeping or a fault code; if the issue returns, turn power off at the breaker for a few minutes, then restore power and re-set the clock using the steps in the JDS9860AAP owner's manual.
Quick reset steps (most common)
- Press Cancel/Stop-Clear once to clear the display and stop an active cycle.
- If a fault code returns or the oven keeps beeping, switch the range OFF at the circuit breaker.
- Wait 2 to 5 minutes.
- Turn the breaker ON.
- Set the clock and test Bake for a few minutes.
If you see an “F” code or “CALL AN AUTHORIZED SERVICER” message
The manual treats this as a fault condition. Start with a control reset, then a power reset.
- Press Cancel/Stop-Clear.
- If the code and beeping continue, disconnect power for a few minutes and restore power.
- If the code returns after power is restored, schedule service (the control or a sensor circuit may be involved).
What “reset” means on this model
| What you do | What it resets | What it does not reset |
|---|---|---|
| Press Cancel/Stop-Clear | Current cooking function, active beeps | Underlying hardware problems |
| Breaker power-cycle | Control board state after a glitch | Failed heating element, stuck relay, wiring issues |
Why it matters
A simple Cancel/Stop-Clear reset fixes most “stuck” cycles and nuisance beeping. A breaker reset clears control glitches after a power surge, overheating event, or repeated fault-code beeps.
When a part is likely involved
If the oven will not heat after a successful reset, a heating circuit part is often the cause.
- No bake heat but broil works: check the bake element WP74010750
- No heat at all: check power supply connections and the terminal block
- Repeated overheating shutdowns: check airflow and cooling fan operation
Last updated: February 2026
Is JennAir considered high end?
Yes. Jenn-Air is considered a high-end (luxury) appliance brand; its ranges, including model JDS9860AAP, are positioned as premium products with design-forward styling and feature-focused cooking performance compared with mainstream lines.
What “high end” means in practical terms
High-end ranges typically emphasize premium materials, stronger feature sets, and a more built-in, pro-style look.
- More specialized cooking features (for example, convection options, precise temperature control)
- Premium fit and finish (heavier knobs, sturdier door feel, upgraded trim)
- Higher parts and service costs compared with value brands
- More installation requirements (leveling, clearances, anti-tip safety)
Model-specific note for JDS9860AAP
Your JDS9860AAP is a Jenn-Air range, and the documentation focuses on safe installation and proper operation, including anti-tip bracket engagement and leveling for best performance. For the exact operating features and care guidance for this model, use the JDS9860AAP owner's manual.
Installation expectations (common on premium ranges)
| Item | What to expect | Why it matters |
|---|---|---|
| Anti-tip bracket | Must be installed and engaged | Prevents tip-over risk |
| Leveling | Range should be leveled before use | Helps baking results and door alignment |
| Clearances | Minimum clearances must be maintained | Prevents rubbing, vibration, and heat issues |
Why it matters
Knowing Jenn-Air is high end helps set expectations for ownership: parts like controls, igniters, and venting components can cost more, and correct installation details (like anti-tip and leveling) directly affect safety and cooking performance.
Last updated: February 2026
What model is my Jenn air oven?
Your Jenn-Air oven’s model number is printed on the appliance’s rating label; once you find it, match it exactly (letters and numbers) to order the correct parts and use the right instructions. If your range is JDS9860AAP, use the JDS9860AAP owner's manual for model-specific operation details.
Where to find the model number label
On Jenn-Air ranges like model JDS9860AAP, the model and serial label is typically in one of these spots:
- Along the oven door frame (open the oven door and check the frame edges)
- On the storage drawer frame (pull the drawer out and look around the opening)
- Behind the lower access panel or toe panel (if your unit has one)
- On the back panel of the range (visible if you can safely pull the range forward)
- Inside the broiler area (on some configurations)
How to read the label correctly
Use these tips so you do not confuse the model number with other codes:
- Copy the model number exactly as shown (for example, JDS9860AAP)
- Record the serial number too; it helps confirm production series for some parts
- Ignore patent numbers, UL/CSA listing numbers, and gas type notes; those are not the model
- If the label is greasy or faded, wipe gently with a damp cloth and re-check under bright light
Why it matters (parts and installation)
The model number controls which parts diagrams, wiring, and installation clearances apply. For example, the installation instructions for this downdraft range include anti-tip bracket requirements and leveling checks; those steps are model-specific. Use the JDS9860AAP installation guide when verifying installation details.
Quick reference: model vs. serial
| What you see on the label | What it’s used for | Example |
|---|---|---|
| Model number | Picking the correct manual and parts | JDS9860AAP |
| Serial number | Identifying production run details | Varies |
Last updated: February 2026




